

- Overview
- Transcript
5.4 Incorporating Authentication on the Client Side
We've protected our API, which is arguably the most important thing we need to secure. But this has caused some oddities in the front-end UI. We'll iron those out in this lesson.
1.Introduction
1.1Introduction01:31
2.First Steps
2.1Setting Up the Project05:29
2.2Designing and Migrating the Database10:06
2.3Setting Up the Models10:48
3.Building and Querying a GraphQL API
3.1Understanding GraphQL09:42
3.2Creating and Querying Our API08:17
4.Building the Client Application
4.1Assembling the UI07:17
4.2Querying the API With JavaScript11:26
4.3Adding Arguments to Your Queries11:28
4.4Organizing Our Client-Side Queries07:53
4.5Defining Other GraphQL Types08:53
4.6Displaying Our New Data09:44
5.Incorporating Authentication
5.1Building the Login View09:42
5.2The Login Mutation11:37
5.3Authenticating the API09:17
5.4Incorporating Authentication on the Client Side09:04
5.5Displaying Auth-Appropriate Menus07:59
5.6User Registration09:33
6.Working With Complex Data
6.1Building the Project Creation UI08:31
6.2Getting a List of Users03:54
6.3Defining Input Types12:33
6.4Saving the Project09:52
7.Conclusion
7.1Conclusion01:00
5.4 Incorporating Authentication on the Client Side
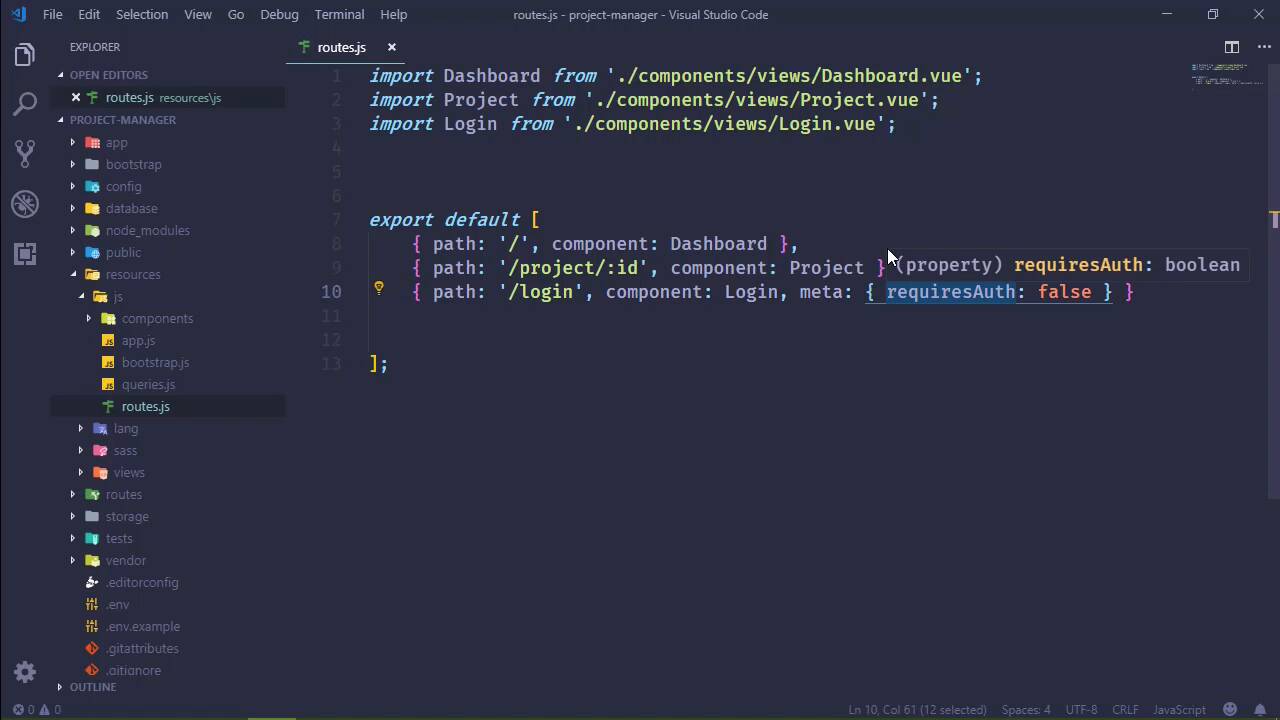
At the end of the previous lesson, we saw some behavior that we need to modify. When a users is not logged in, they of course, don't get access to the data. And that is the most important thing. But they can still see some of the UI, and that is of course to be expected. Because we've done all of our authentication checking on the server and we haven't done anything on the client. So in this lesson, we are going to enhance the user experience, so that if an unauthenticated user tries to access something that they don't have access to, well, then we will prompt them to log in. And there are going to be two parts to this. We, of course, need something on the server in order to check to see if the user is authenticated. But we also need something in the JavaScript in order to determine if what we are navigating to, as far as our routing is concerned, is protected or not. And if so, then determine if the user is authenticated, and redirect them to login, if necessary. So let's start with our JavaScript. Actually no, let's start with our server side because that is actually the more simple thing. So let's go to app>GraphQL. This is going to be a query. What we're going to do is write a simple query that is not really going to return anything. We're just going to use that to determine if the user is authenticated. So let's call this CheckAuthQuery.php. And let's start by just copying what we have in projects and using that as a basis because I don't want to have to type all of this. And there's a lot of stuff that we don't need. Now let's first of all change the class name, because that will come back to bite me if I don't. And as far as the attributes are concerned the name, let's say that this is the UserAuthQuery. As far as the description, it Checks the user auth. Okay, now as far as arguments are concerned, we don't really need any. There's nothing that we need to send with the query, we just need to make a request to ensure that we are logged in. So the type, then, really doesn't matter either, but we do need to return something. So let's just return a string. And as far as the resolve method is concerned, I mean, since is going to do all of the checking to see if we are authenticated or not, let's just return an empty string. I mean, because from the JavaScript perspective, if we get a 401, we of course aren't authenticated. But if we get anything other than that, then we are. So it doesn't really matter what we send, we are just relying upon really the status code of the request. Okay so with the query done, we do need to register it in our configuration. So let's go to our GraphQL config and let's add that new query. Let's just call that check and then we will say CheckAuthQuery. And that gets the server portion done. So now we can focus on the JavaScript, which really is going to be simple. But there's a couple of moving pieces just because of how we have everything set up. So let's start with our routes because we need to determine what is going to require authentication and what isn't. Well, from a server perspective, we've kind of taken the approach of everything is protected by default and then we have a few exceptions. So we can take that same approach here inside of our client. And so we can leave everything the same except for our login route. And we can do something to specify that this does not require authentication. So we can add a meta object here and this can have a property. Let's call it requiresAuth, and we will set it to false. And so of course if it is set to false then it doesn't require authentication. But if any route has requires auth and it is set to true then obviously it does. But if it doesn't, if it's undefined, then, we can say that the default is going to be true as well. So with that in place, we just need to hook into the routers guard and write some code whenever we tried to navigate between independent components. So that's inside of app because that is where we create our router. So we have a global guard called beforeEach. This is the method that's going to execute any time that we try to navigate to another component. And it accepts a call back function that gives us three things. The first is the route that we are going to, the route that we are coming from. And then the next thing in the pipeline. So we would use next in order to actually navigate to what it is that we are trying to get to. Okay, so as far as this code is concerned, we want to check what we are going to. We don't really care where we are coming from. We want to make sure that whatever we are trying to navigate to we have access to. So we're going to say two.matched, we're going to use matched here because you may or may not know but routes can have sub routes. If we wanted to, we could add children to a route and then we could specify some subroutes there. And so in order to match or to ensure that any of those subroutes were matched, then we need to use matched. Now in our case, we aren't using subroutes but this is a good habit to get into if you need to use the beforeEach guard for checking for authentication. So we're going to see if any of these matched routes has that requiresAuth from our meta object. And we're going to do an identity check. We're going to see if the value is exactly false, because of it's not, that route would then be protected. So if it doesn't require authentication, then we will say next so that we can navigate to whatever it is that we wanted to navigate to. And then, we will simply return. However, if we are trying to go to a route that is protected, then we want to make a request to our check query. So we are going to use our query method, we'll pass in check, we don't have any data to send. All we care about is the response. So if we get a response back, then, yeah, we can go to it. Otherwise, we have a 401, or some other kind of error. So this isn't going to be fool proof. We would have to spend a little more time making sure that we can get the type of response back that we want in order to determine whether or not we are authenticated. But for our purposes, this is going to be fine. So if we are authenticated, then we go to whatever it is that we are navigating to. If not then we go to the login form. And there we go. The only other thing we need to do is write that check query. So we're going to add that to our queries. We called it check and we are going to query CheckUserAuth. Since we started to use the more formal syntax then we'll just keep doing that. It's not really necessary in this particular case, but it's going to be fine. And that should work. So if we go back to the browser and we refresh this page, it should take us to the login form. And it does. So now let's try to log in. This is admin@local and password. And then that should log us in, and we get to see the dashboard. That's great. Well, the next thing I wanna do is also related to the user interface and the user experience. And that is change our menu based upon whether or not we are logged in. Of course, when a user is logged in, we want to see the dashboard link. And it would be nice to have a logout link. And if a user isn't authenticated, then there could be the login or the registration link. So we will implement that in the next lesson.


