

- Overview
- Transcript
4.6 Displaying Our New Data
Now that we can query our other types, it's time to actually query them and display them in the app.
1.Introduction
1.1Introduction01:31
2.First Steps
2.1Setting Up the Project05:29
2.2Designing and Migrating the Database10:06
2.3Setting Up the Models10:48
3.Building and Querying a GraphQL API
3.1Understanding GraphQL09:42
3.2Creating and Querying Our API08:17
4.Building the Client Application
4.1Assembling the UI07:17
4.2Querying the API With JavaScript11:26
4.3Adding Arguments to Your Queries11:28
4.4Organizing Our Client-Side Queries07:53
4.5Defining Other GraphQL Types08:53
4.6Displaying Our New Data09:44
5.Incorporating Authentication
5.1Building the Login View09:42
5.2The Login Mutation11:37
5.3Authenticating the API09:17
5.4Incorporating Authentication on the Client Side09:04
5.5Displaying Auth-Appropriate Menus07:59
5.6User Registration09:33
6.Working With Complex Data
6.1Building the Project Creation UI08:31
6.2Getting a List of Users03:54
6.3Defining Input Types12:33
6.4Saving the Project09:52
7.Conclusion
7.1Conclusion01:00
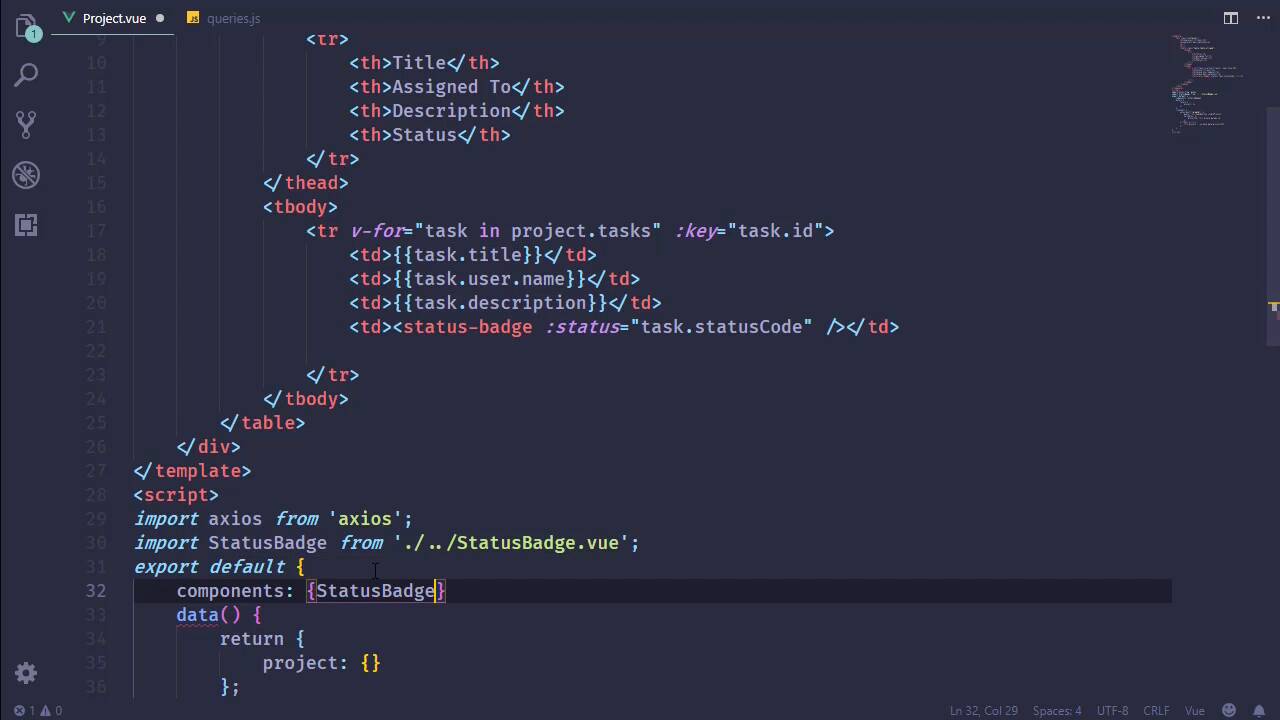
4.6 Displaying Our New Data
In the previous lesson, we finished implementing our GraphQL types. We have our Project, our Task, and our User types. And that gives us the ability to basically get all of the information that we need to display In our project page. So let's just jump right in and get started. Let's go to components, views, and this is the project view. Let's also open up our queries, because we will need to modify our query here. So let's start by saying that we want to pull in the tasks, because we do. And we need several things. We need the id, let's get the description, let's also get the statusCode. Let's also get the user that it is assigned to. And let's, at least for right now, just get the name. Later on we might want the id for editing purposes, and we will definitely want the id for editing purposes for the task. But for right now, let's just start with that, and that should give us all of the information that we need. So I'm gonna add some white space here. Of course, we should be doing this with CSS but I'm just gonna do it with HTML. And we want to have a table to display this. We could use cards or things like that, but let's go with a table. And this is going to be table-striped, and then we will have the head of our table. So this is of course where we are going to put our headings. So as far as our headings are concerned let's say that we want the title, we want the user, the description, and then the status. And that should be fine. So Title, Assigned To, that's what we will use there. Then Description, and then finally the Status. All right, so now we will need our table body, and we will have a tr element. We'll go ahead and use our for loop here, and we want all of the tasks in project.tasks. Let's go ahead and set the key, so that Visual Studio Code doesn't gripe at us. We'll say task.id there, and then we just basically want to provide that information. So let's get all this stuff we need to just rapidly do this. We want task.title, in the case of the user it's going to be task.user.name. Then we will have the description, followed by the statusCode. All right, so with this, let's go to the browser. Let's refresh the page, and we should see more information, and we do. We are missing the title for some reason, so maybe I typed something wrong, task.title. And [LAUGH] wow, I got everything but the title as far as the query is concerned. So now that we are retrieving the title, there we go. Now the table is not striped, and it is supposed to be striped. So our class is table and then table-striped, there we go. And something else I would like to do is, maybe not necessarily stripe the rows, but have something related to the status. And we just might leave the stripes there and have a button or something that are colored based upon the status, but we definitely want something a little more readable. Now, of course, OPEN is obviously readable, but COMP? I mean, we can say that, okay, yeah, that's obviously complete, but let's do something a little more friendly there. Instead of just using the status_code, let's say that we will have another component, something that we can call for the lack of a better term status-badge. So it would be a badge, and then we would simply supply the status to it. So we would say task.statusCode, and that would work I think, I mean, that's pretty simple and I like simple. All right, so let's go ahead and finish what we would do here. So we would import StatusBadge from, and this needs to be one directory above, and we just StatusBadge.vue, and we would then incorporate that in our components. So we will add that. This way, I don't have to forget to do that after we create it. So all right, let's go ahead and create that. This needs to be inside of components, so we will New File and StatusBadge.vue. As far as the template is concerned, it should be pretty easy. We're gonna have the span, we're gonna give it a class of badge. But we are also going to need to display the color dynamically. So let's start with badge there. Then, we're gonna bind this to an object, I'm just gonna call it classObj. And then we're going to display the text, but we need something to come up with a friendly text, so we're just gonna write a method called getStatusText. And that should be fine. Let's put this on multiple lines there, to make it a little bit easier to read. And then we will have our JavaScript. All right, so we are going to have a prop called status, and we're going to be working with that status inside of our data. So we are going to return an object that has a property called classObj. And let's see, if it is complete, we of course want that to be green. Of course, we would probably want to be a little more mindful of those that are colorblind that can't see red or green, but we're just gonna go with green. And so we are going to use this success badge, if the status === "COMP". Makes sense. Now, if it is OPEN, then let's use the secondary. So once again, we will check to see what status is, and if it is OPEN, then that will be status. Then we could use danger, for if it was on HOLD. So let's go ahead and add that. We don't have anything that's on HOLD, but at least that would be there in case if we ever did need that. All right, so we have our data, then we just need the method that is going to get a friendlier text. So getText or getStatusText, isn't it? And we should have done this for the class object, but we need to make sure that we have our status in uppercase so that when we do our comparisons we are comparing apples to apples. So if status is all uppercase COMPLETE, or COMP, then we of course want to return Complete. And if it is OPEN, then it is, of course, going to be Open. And we can also go ahead and do HOLD. I mean, since we went ahead and referenced HOLD above, then we can do that here as well. But let's say that for right now, if it's Complete or Open, then great, but if it's not either of those, then we will simply just return Hold. All right, so with that in place, we should be able to go back to the browser, let's refresh the page, and we should see our little tiny, tiny badges. However, we do have an issue. We aren't returning Open if the status is OPEN. That's because our check there was incorrect. So with another refresh, we should have the correct text for our status. I want to align that to the right, though. So let's go back to our project, and once again, we should be doing this a little bit better but I'm just going to add style. And we will say, text-align: right. So that should display that to the right, and okay, I'm fine with that. Now, of course, if we were logged in then this would look a little bit different. If we were logged in as an admin, we might have the ability to change anything that we want to change. If we were logged in as Jeremy, then we would have the ability to toggle the status of our task. But that is something that we will get to later on. Because the first thing we need to do is implement some kind of authentication, and we'll get started with that in the next lesson.


