

- Overview
- Transcript
6.1 Building the Project Creation UI
Before we can send data to our API, we need a UI for creating a project. We'll put that together in this lesson.
1.Introduction
1.1Introduction01:31
2.First Steps
2.1Setting Up the Project05:29
2.2Designing and Migrating the Database10:06
2.3Setting Up the Models10:48
3.Building and Querying a GraphQL API
3.1Understanding GraphQL09:42
3.2Creating and Querying Our API08:17
4.Building the Client Application
4.1Assembling the UI07:17
4.2Querying the API With JavaScript11:26
4.3Adding Arguments to Your Queries11:28
4.4Organizing Our Client-Side Queries07:53
4.5Defining Other GraphQL Types08:53
4.6Displaying Our New Data09:44
5.Incorporating Authentication
5.1Building the Login View09:42
5.2The Login Mutation11:37
5.3Authenticating the API09:17
5.4Incorporating Authentication on the Client Side09:04
5.5Displaying Auth-Appropriate Menus07:59
5.6User Registration09:33
6.Working With Complex Data
6.1Building the Project Creation UI08:31
6.2Getting a List of Users03:54
6.3Defining Input Types12:33
6.4Saving the Project09:52
7.Conclusion
7.1Conclusion01:00
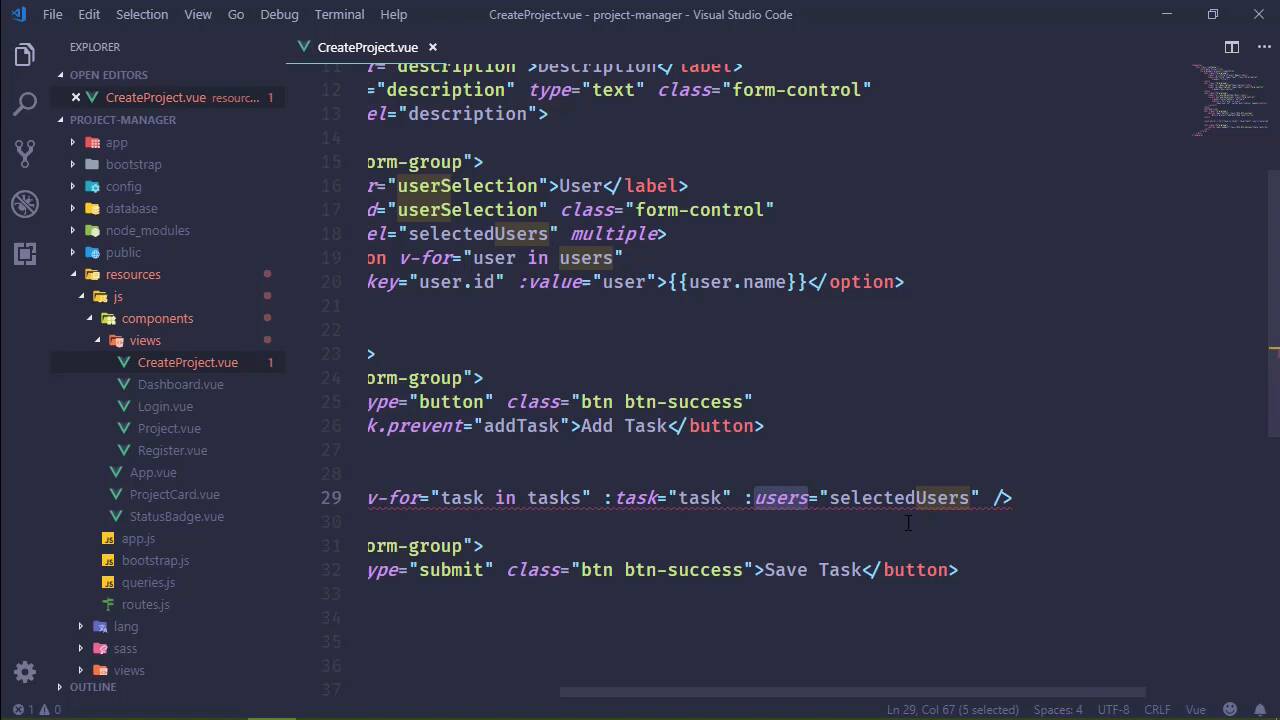
6.1 Building the Project Creation UI
Unlike logging in or registering a new user, creating a project is going to be a little bit more involved, primarily because we are dealing with more complex data. Logging in, registering, we're just working with very simple data, just three fields that are strings. But with a project, well, it's more complex. Yes, we have title and description, but we also have a task that is made up of smaller parts, as is the user information, as well. So we're going to have to divide this into multiple parts. We'll start with the user interface, and then we will move onto the server. Because the server is really going to depend upon the data that we send to it, as if that wasn't obvious. So the first thing we're going to do is add a link to our page for creating a project. So let's go to the app component and lets add that link. So let's put it in between the dashboard and the log out. So let's say that the path is going to be create, and then we will have the text of Create Project. So with that, let's also go to the routes so that we can set that up. And we'll just copy and paste. We'll call this CreateProject. And then we will just make the necessary changes. Now this is something that does require authentication. So we are not going to set the requiresAuth. And then we will say that the create route is going to go to CreateProject. All right, so with that done, we can create our CreateProject. So inside of views, let's create a new file. We'll call it createProject.vue, and I'm gonna cheat. I'm gonna paste in this markup, because it's a lot. You don't want to see me type all of this. But we will go over it. So first, we, of course, have a heading that says, Create Project. Then we have a form that is going to use the submitForm method to submit the form. Then we have our Project Name as the title being used. And that's also the v-model. We have the description, that's the v-model, as well. And I'm using an input element instead of a text area, just to keep things simple. Now, the users is a little bit different. Because, well, it's something that's going to rely upon the server. We need the list of our users. So we're going to have to make a query to retrieve our users so that we can populate our select. And this is a multiple select, so this isn't a drop-down. We will be able to choose multiple users from this. And if you'll notice, we are iterating over those users. So we will, of course, make the request. We will set our instance property called users to the data that came back. But then the v-model for our select is selected users. So this way we can keep track of the users that were selected and keep them separate from the user list that we got from the server. And we are binding the entire user object to the option so that we can have all of that information inside of our selected users. Then comes the Tasks. So we're gonna have a button that we can click on to create a new task. So we can have one task, we can have ten, we can have 100, if we wanted to create 100. But the idea is that we can have as many tasks as we want. And so we're going to be able to click a button. And we have this task-editor. You can see that it iterates over something called tasks. That's going to be an array. And it is bound to the task inside of that array. And also notice this, we're going to pass our selected users to the task, as well. Because we want to be able to choose the user that that task is assigned to. And then, of course, we have the Save Task button. Or, not Save Task, that is going to be, Save Project. So let's have that there. All right, so let's add in some scripts here. Let's start with our data properties. So we will have title, we will have description, and then we will have our users that we will retrieve from the server. Then we will have the selectedUsers, so that we can keep track of them. And then finally, we will have our tasks. Now our tasks, in this case, are just going to be normal objects. There's nothing really special about them. So let's go ahead and define that addTask. Is it called addTask? Yes, it is addTask. So this method is going to be actually pretty simple. All we are going to be doing is adding a new object to our tasks array. So we're just going to push in a new object. We're going to set the title to an empty string. Everything is basically going to be empty except for the statusCode. We can default that as OPEN. And we're also going to just keep track of the userId, as opposed to the entire user. And we're going to initialize that as 0. But that's going to be just fine. Let's go ahead and start the submitForm method, just so that we have that there. But that's all that we're going to do as far as this form is concerned right now. So let's go to our components folder. And let's add a new file, because we need our TaskEditor. So we will create that. And, once again, I'm just gonna paste this whole thing in, actually. The markup really isn't spectacular. We have a form-row so that everything is inline. We have a field for the title. Now notice though, that I'm binding the properties on the task that's bound to this editor. So all of the changes are going to flow up so that whenever we actually submit all of our data, everything's gonna be up-to-date as far as our tasks are concerned. So the title is bound to the task.title. The description is bound to the task.description. The Assigned To is gonna be a drop-down, in this case, but it is going to be bound to the userId. So all we are getting is the userId. We don't need anything else in order to send that data to the server. Then we have the statusCode that is bound to, of course, the task.statusCode. Then we have two props, task and users. So there's really nothing spectacular about this. We just need to import this to our CreateProject. So this will be called TaskEditor from, and we need to go back one, and then TaskEditor.vue. And then, of course, we want to add that to our components, so let's do that. And then we will see this in the browser. So we did add the menu items, so we should be able to just go straight to Create Project. And if we click on Add Task, we can see that a task was added, and we can keep adding tasks for, well, however long we want. And let's change the color of the Save Project. Let's not use success there, let's use primary. And that should be it. And that's at least going to setup the basic part of our API. Well, in the next lesson, we need to populate our User selection. So we will create a query for querying our database and returning the users so that we can work with them in our form.


