
 Lessons: 67Length: 8.9 hours
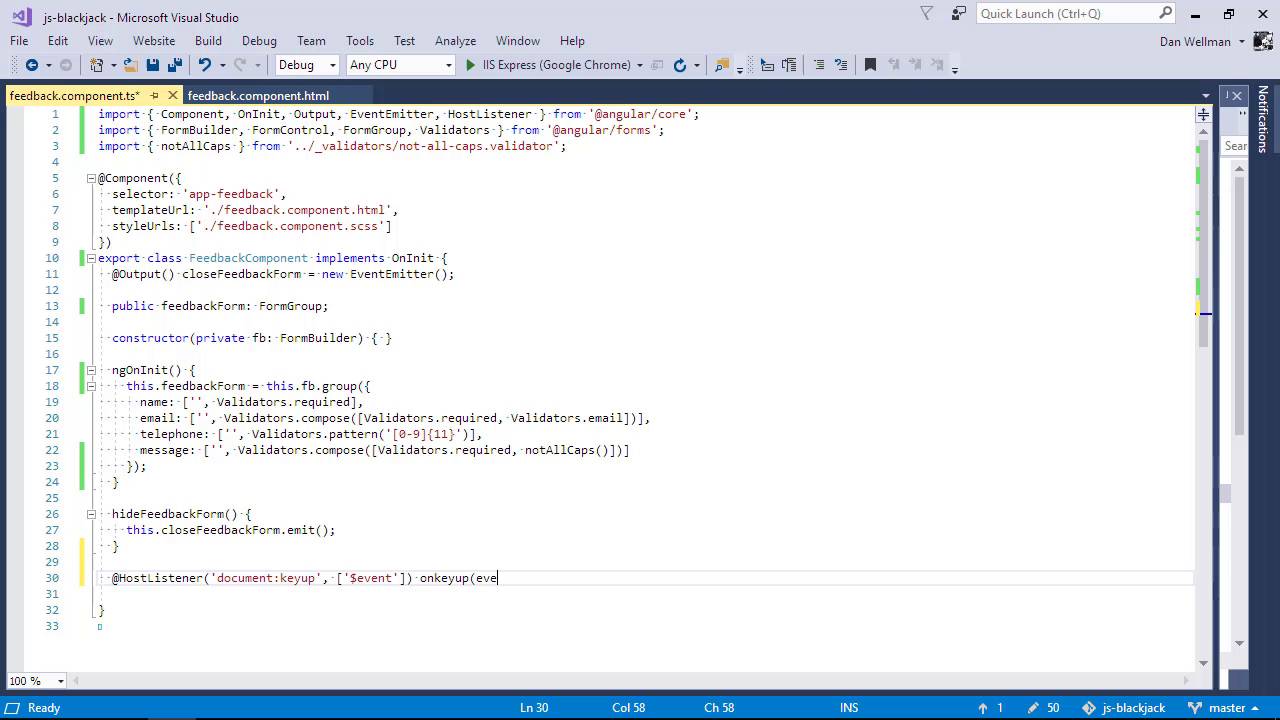

- Overview
- Transcript
5.10 Working With the `@HostListener` Decorator
Let's wrap up this chapter with a look at the @HostListener directive. This allows us to add an event listener that targets something outside of the component itself—for example, the document.
1.Introduction
1.1Introduction00:48
1.2Get Started With Angular-CLI11:09
1.3Developing With Angular-CLI13:17
1.4TypeScript vs. JavaScript06:54
1.5Angular Modules From the CLI04:31
1.6CLI Options05:21
2.Get Started With Angular
2.1Bootstrapping the Application04:30
2.2The Application Module04:15
2.3The Application Component08:06
2.4Component Styling03:06
2.5Global Styling05:11
2.6Creating a Component With the CLI09:34
2.7Creating a Service With the CLI07:56
3.Core Concepts
3.1Component Trees06:20
3.2Dependency Injection06:52
3.3Content Projection05:38
3.4Component and Directive Lifecycle Methods06:31
3.5Component-Only Lifecycle Methods05:28
3.6Decorators07:36
3.7Models16:55
4.Template Deep Dive
4.1Basic Data Binding With Interpolation05:35
4.2Property Bindings07:07
4.3Attribute Bindings03:29
4.4Event Bindings08:16
4.5Class and Style Bindings05:44
4.6The `NgClass` and `NgStyle` Directives05:04
4.7The `*ngIf` Directive04:41
4.8The `*ngFor` Directive09:29
4.9Inputs05:33
4.10Using Pipes in a Template07:31
4.11Using Pipes in a Class08:27
5.Forms
5.1Handling User Input With Template Reference Variables07:06
5.2Template-Driven Forms11:10
5.3Template-Driven Forms: Validation and Submission14:00
5.4Reactive Forms11:26
5.5Using a `FormBuilder`08:01
5.6Reactive Validation With Built-in Validators14:53
5.7Creating Custom Validators for Template-Driven Forms12:18
5.8Creating Custom Validators for Reactive Forms08:26
5.9Observing Form State Changes12:40
5.10Working With the `@HostListener` Decorator05:41
6.Routing
6.1Defining and Configuring Routes07:53
6.2Rendering Components With Router Outlets10:14
6.3Using Router Links for Navigation05:25
6.4Navigating Routes Using the Router06:24
6.5Determining the Active Route Using an Activated Route07:16
6.6Working With Route Parameters10:42
6.7Using Route Guards07:36
6.8Observing Router Events10:55
6.9Adding Child Routes08:45
7.Using the HTTP Client
7.1Sending an HTTP Request10:52
7.2Handling an HTTP Response11:22
7.3Setting Request Headers12:33
7.4Intercepting Requests09:04
7.5Finishing the Example Application12:33
8.Testing
8.1Service Unit Test Preparation10:45
8.2Unit Testing Services13:24
8.3Component Unit Test Preparation12:35
8.4Unit Testing Components07:27
8.5Unit Testing Component Templates06:58
8.6Unit Testing Pipes04:41
8.7Unit Testing Directives04:56
8.8Unit Testing Validators04:48
8.9Unit Testing Observables11:37
8.10Unit Testing HTTP Interceptors06:16
9.Building for Production
9.1Building for Production03:40
10.Conclusion
10.1Conclusion01:32
5.10 Working With the `@HostListener` Decorator
Hi folks, in this lesson, we're going to take a look at the HostListener decorator. We can easily add listeners for events that might occur inside components using the event binding. But there may also be times when we want to subscribe to events that might occur outside of our components. We can use the HostListener decorator to do this, and that's what we're going to do in this lesson. Throughout this section of the course, we've been focused on building a feedback form. The form doesn't actually hook up to anything, and it won't send any feedback anywhere. But it has been a very useful aid in learning how to work with reactive forms. It has one more trick to show us before we move on, but this isn't specific to forms. It just happens to be really applicable to this kind of pop up element that we've used to display the feedback form. So at the moment, we've got this feedback link in the header, and when we click on this, the feedback form opens. And inside the form, we've got this cancel link that can be used to close the feedback form. We've also got the Send button there, it just isn't wired up, but if it was wired up, that, too, would probably close the form. Maybe after displaying some kind of success message or something. Now that's all very well and good, but people want more than that. Users should be able to close the feedback form by pressing the Esc key or by clicking somewhere outside of the feedback form. They shouldn't be forced to click some cancel link to get rid of it. Typically, if we want to allow the pop up to be closed using the Esc key in a non-angular app, we'd probably add an event listener to the document. And if the pop-up was open and the key that was pressed was the Esc key, then we'd shut the pop-up or mode, or whatever it was. We can do that here as well, it would be easy enough. But Angular does give us a cleaner way to add this kind of event handler, that's the HostListener decorator. With the HostListener decorator, we can add a document level handler for key-up events which will only be active while the feedback form is open. So, first of all then, let's import the HostListener decorator. We can get rid of OnDestroy because we aren't using an NG OnDestroy method, and let's replace it with HostListener. So now we can add a listener for key up events at the document level. The HostListener decorator takes two arguments. The first is the event that we want to bind to, which in this case is the key up event, which is scoped to the document. The second argument is an array, which is used to pass the event object through to the handle function. The handler function is then supplied after the decorator. In this case, we named the function onkeyup, but in truth, we can call the function whatever we want. The function receives the event object as an argument, because we specified in the decorator, and this will of the type KeyboardEvent. The function doesn't need to return anything, so we can set the return type to void, and let's just log the event out to start with. And now let's go back to the browser. So we should find that before the feedback form is open, we can type on the keyboard, and we don't see any console logs. But now let's open the feedback form, and let's start typing again, and this time, we start to see the keyboard events appear. So let's close the feedback form once again, and now we don't see any more keyboard events. So the HostListener is only active while the component that adds the HostListener is actually open, awesome. So, let's use the handler to actually close the feedback form, instead of just logging the event to the console. We can just check whether the key property of the events is equal to the string escape. And if it is, then we can invoke the hideFeedbackForm method of the component, and that should result in the feedback form closing. Let's just go back to the browser and test that that actually works. So we open up the form and now I'm going to press the Esc key on my keyboard and the feedback form is closed, excellent. So in this lesson, we saw how we can bind to events issued from our components at the document level using the HostListener decorator. We saw that we passed the name of the event we would like to bind to, optionally with a qualifying name space. And we saw that we can pass the event object into the handler using the second argument of the decorator. We learned that we can then provide the handler function, and that will be invoked every time the event occurs. Thanks for watching.


