- Overview
- Transcript
6.6 Working With Route Parameters
In this lesson, you'll learn how we can pass small amounts of data to a route using query parameters, and how to receive these inside a component. You'll also see how we can use a service to achieve the same effect without exposing data to the query string.
1.Introduction6 lessons, 42:00
1.1Introduction00:48
1.2Get Started With Angular-CLI11:09
1.3Developing With Angular-CLI13:17
1.4TypeScript vs. JavaScript06:54
1.5Angular Modules From the CLI04:31
1.6CLI Options05:21
2.Get Started With Angular7 lessons, 42:38
2.1Bootstrapping the Application04:30
2.2The Application Module04:15
2.3The Application Component08:06
2.4Component Styling03:06
2.5Global Styling05:11
2.6Creating a Component With the CLI09:34
2.7Creating a Service With the CLI07:56
3.Core Concepts7 lessons, 55:20
3.1Component Trees06:20
3.2Dependency Injection06:52
3.3Content Projection05:38
3.4Component and Directive Lifecycle Methods06:31
3.5Component-Only Lifecycle Methods05:28
3.6Decorators07:36
3.7Models16:55
4.Template Deep Dive11 lessons, 1:10:56
4.1Basic Data Binding With Interpolation05:35
4.2Property Bindings07:07
4.3Attribute Bindings03:29
4.4Event Bindings08:16
4.5Class and Style Bindings05:44
4.6The `NgClass` and `NgStyle` Directives05:04
4.7The `*ngIf` Directive04:41
4.8The `*ngFor` Directive09:29
4.9Inputs05:33
4.10Using Pipes in a Template07:31
4.11Using Pipes in a Class08:27
5.Forms10 lessons, 1:45:41
5.1Handling User Input With Template Reference Variables07:06
5.2Template-Driven Forms11:10
5.3Template-Driven Forms: Validation and Submission14:00
5.4Reactive Forms11:26
5.5Using a `FormBuilder`08:01
5.6Reactive Validation With Built-in Validators14:53
5.7Creating Custom Validators for Template-Driven Forms12:18
5.8Creating Custom Validators for Reactive Forms08:26
5.9Observing Form State Changes12:40
5.10Working With the `@HostListener` Decorator05:41
6.Routing9 lessons, 1:15:10
6.1Defining and Configuring Routes07:53
6.2Rendering Components With Router Outlets10:14
6.3Using Router Links for Navigation05:25
6.4Navigating Routes Using the Router06:24
6.5Determining the Active Route Using an Activated Route07:16
6.6Working With Route Parameters10:42
6.7Using Route Guards07:36
6.8Observing Router Events10:55
6.9Adding Child Routes08:45
7.Using the HTTP Client5 lessons, 56:24
7.1Sending an HTTP Request10:52
7.2Handling an HTTP Response11:22
7.3Setting Request Headers12:33
7.4Intercepting Requests09:04
7.5Finishing the Example Application12:33
8.Testing10 lessons, 1:23:27
8.1Service Unit Test Preparation10:45
8.2Unit Testing Services13:24
8.3Component Unit Test Preparation12:35
8.4Unit Testing Components07:27
8.5Unit Testing Component Templates06:58
8.6Unit Testing Pipes04:41
8.7Unit Testing Directives04:56
8.8Unit Testing Validators04:48
8.9Unit Testing Observables11:37
8.10Unit Testing HTTP Interceptors06:16
9.Building for Production1 lesson, 03:40
9.1Building for Production03:40
10.Conclusion1 lesson, 01:32
10.1Conclusion01:32
6.6 Working With Route Parameters
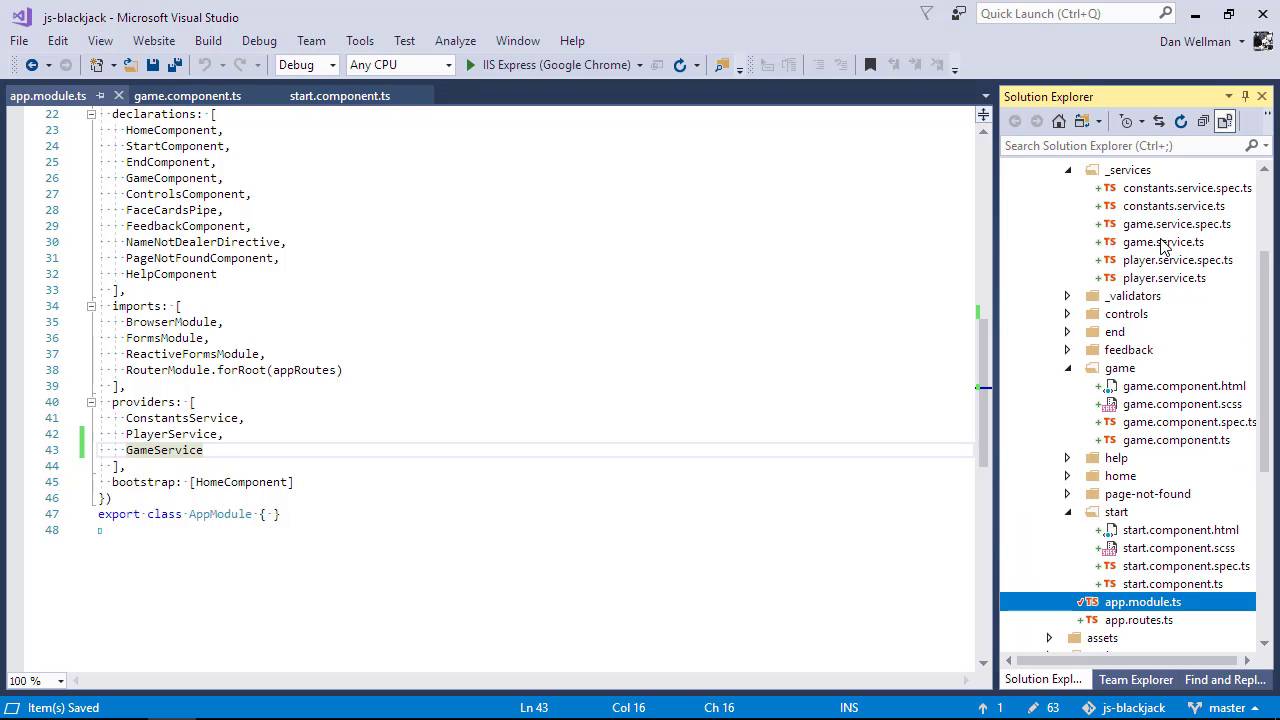
Hi folks, in this lesson we're going to see how we can work with route parameters, which are similar to traditional query parameters and allow us to send small amounts of data to the route. Let's get started. One thing we still need to take care of in our game is the aces high and easy mode check boxes in the start component. We need to get the values of these into the game component. One way that we could do that would be sending their values to the route as query perimeters. We can do that using the second argument of the navigate method in the start component. We can pass an object to the navigate method as the second argument. Inside this object, we use the key queryParams. The value of this is another object and this is how we send each route parameter to the route. Within this inner nested object, we set the acesHigh and easyMode route parameters, and these will then be made available to our route. So once we're in this file, let's just get rid of the commented out part that is in the startGame method. And now let's go to the game component. We'll need to import the activated route class again. Then we can inject it into the constructor. Then we can subscribe to the queryParams observable of the route in the ng on init method. So to start with, let's just log it out of the console to see what we get. So this works in a very similar way to how we subscribed to the URL observable earlier on, except that we subscribe to a different observable, and our arrow function is passed a different object. In this case, it's passed an object of the route parameters. So now let's see how it behaves. So we can go to the start page and let's enter a name, and let's tick one of the boxes and then let's hit start. So you can see in the URL that acesHigh=true has been appended to the euro as a additional query parameter, and let's just open up the console and we can see that an object has been logged to the console and this contains the acesHigh query parameter with the value true. So this is one way we pass these values from the start component to the game component. Note that instead of subscribing to the observable, we can get these parameters from the static snapshot of the activated route as well. The URL is updated with both values this time, because I ticked both of the boxes and the object is still logged to the console. So we don't actually need to subscribe in order to get the static snapshot. So that makes the code a little bit more simpler and means we don't have to do any special handling of the subscription, and also the objects that we're working with in this case is slightly shallower than the static snapshot of the URL that we were using earlier. So we aren't actually gonna use either the of the techniques that we've looked so far. So let's undo all of the changes in the game component and let's get rid of the imported activated route. So another way to pass these values around would be to use a service. We've already got a PlayerService, but these values are not player specific really, they're more game specific. So let's add a GameService. We can use the CLI to do this. The game service will be shared between several components. That's why we add it to the generic_services folder. We will also need to import it into the app.module.ts file. And as that's a service, we can add it to the array of providers. This service will need properties for the acesHigh and easyMode game options. Now we can import the service first of all into the start component. And then we can inject in to the constructor. So now instead of sending the data to the game component using queryParams, we can just set these properties of the game service before we navigate to the game component. So now we can inject the game services into the game component, Inject it into the constructor, And now we can just access the properties directly from the GameService. Okay, so earlier on we were doing some game setup stuff in the home component. We created a deck, shuffled it, and dealt some cards to the players. We can move some of this out into the GameService. We need to move the deck and pipe imports from the home component to the GameService. We'll also need to move the pipe property and initialization over. The initialization will need to go into the constructor, as we don't have the life cycle methods in services. So we can't add an ng on in it. Lastly, we can move the deck initialization to the game service. We can just lift the whole start game method over. We will want to import the player service in here as well. And of course, we'll need to inject that into the constructor. So now let's make a couple of minor changes to the code in the Start Game method. Instead of hard coding the acesHigh values in the deck constructor, we can use the property of the service. And instead of hard coding the easyMode value when we transform the cards, again, we can use the property of the service for this. And what we need to do is just invoke this startGame method. We can do that from the game component. Let's just get rid of the event that we were passing to the start game method, we no longer need that. And in the game component we can call the start game method of the game service And that should be all we need to do. Let's go back to the browser. And we now see some cards on the screen. So everything of this stage is largely working as expected, although it's still a little rough around the edges. For example, if we go back to the start component, We have too many cards on the screen now. So we've still got some work to do but we're making good progress. So in this lesson we saw how we can use the navigate method of Angular's router to pass query parameters to the URL of the route. And we saw how we can subscribe to the QueryParams object of the activated route service in order to access these parameters. We also saw how we can get the same parameters from the static snapshot of the activated route if we wish. We also learned that just because we can send data to a route using query parameters, that doesn't mean it's always the best option. In light of this, we reverted to using a service to pass the date around instead, which suits the requirements of our game perfectly. Thanks for watching.


