
 Lessons: 67Length: 8.9 hours
- Overview
- Transcript
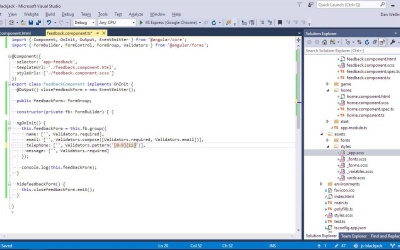
5.6 Reactive Validation With Built-in Validators
In this lesson I'll show you how to use the built-in validators when using a reactive form. This is a little different from validation in template-driven forms.
1.Introduction
1.1Introduction00:48
1.2Get Started With Angular-CLI11:09
1.3Developing With Angular-CLI13:17
1.4TypeScript vs. JavaScript06:54
1.5Angular Modules From the CLI04:31
1.6CLI Options05:21
2.Get Started With Angular
2.1Bootstrapping the Application04:30
2.2The Application Module04:15
2.3The Application Component08:06
2.4Component Styling03:06
2.5Global Styling05:11
2.6Creating a Component With the CLI09:34
2.7Creating a Service With the CLI07:56
3.Core Concepts
3.1Component Trees06:20
3.2Dependency Injection06:52
3.3Content Projection05:38
3.4Component and Directive Lifecycle Methods06:31
3.5Component-Only Lifecycle Methods05:28
3.6Decorators07:36
3.7Models16:55
4.Template Deep Dive
4.1Basic Data Binding With Interpolation05:35
4.2Property Bindings07:07
4.3Attribute Bindings03:29
4.4Event Bindings08:16
4.5Class and Style Bindings05:44
4.6The `NgClass` and `NgStyle` Directives05:04
4.7The `*ngIf` Directive04:41
4.8The `*ngFor` Directive09:29
4.9Inputs05:33
4.10Using Pipes in a Template07:31
4.11Using Pipes in a Class08:27
5.Forms
5.1Handling User Input With Template Reference Variables07:06
5.2Template-Driven Forms11:10
5.3Template-Driven Forms: Validation and Submission14:00
5.4Reactive Forms11:26
5.5Using a `FormBuilder`08:01
5.6Reactive Validation With Built-in Validators14:53
5.7Creating Custom Validators for Template-Driven Forms12:18
5.8Creating Custom Validators for Reactive Forms08:26
5.9Observing Form State Changes12:40
5.10Working With the `@HostListener` Decorator05:41
6.Routing
6.1Defining and Configuring Routes07:53
6.2Rendering Components With Router Outlets10:14
6.3Using Router Links for Navigation05:25
6.4Navigating Routes Using the Router06:24
6.5Determining the Active Route Using an Activated Route07:16
6.6Working With Route Parameters10:42
6.7Using Route Guards07:36
6.8Observing Router Events10:55
6.9Adding Child Routes08:45
7.Using the HTTP Client
7.1Sending an HTTP Request10:52
7.2Handling an HTTP Response11:22
7.3Setting Request Headers12:33
7.4Intercepting Requests09:04
7.5Finishing the Example Application12:33
8.Testing
8.1Service Unit Test Preparation10:45
8.2Unit Testing Services13:24
8.3Component Unit Test Preparation12:35
8.4Unit Testing Components07:27
8.5Unit Testing Component Templates06:58
8.6Unit Testing Pipes04:41
8.7Unit Testing Directives04:56
8.8Unit Testing Validators04:48
8.9Unit Testing Observables11:37
8.10Unit Testing HTTP Interceptors06:16
9.Building for Production
9.1Building for Production03:40
10.Conclusion
10.1Conclusion01:32
5.6 Reactive Validation With Built-in Validators
Hi folks. In this lesson, we're going to see how we can add validation to a reactive form. And we're gonna use some of Angular's built-in validators that match the normal HTML validation attributes. So we saw earlier in the course that we can add these built-in validators using the HTML validation attributes in a template driven form. But the feedback form is a reactive form, so today we're going to add validations without using the template. In the component class for the feedback component then, we're using the forms builder to add our form, at the moment, each control just has an empty string as the value, so we'll need to update that. But before we do that, we need to import Angular's validators. So the validator class also comes from the forms module, but we don't have to inject this into our constructor or create a new instance of the class. Lets just use one of Visual Studio's features and take a peek at the class. So we can see that the validators class contains a number of validator functions, and all of these are static. That means that we can just use them straight off the class, without needing to create an instance, and that makes them really convenient to use. So Visual Studio code also has this peak feature. And it's incredibly useful to look at some Angular's internal classes just to get an idea of how they work. I'm not sure that other IDs have this feature or not. But if you're doing Angular type script development and you're using Visual Studio, don't forget that it exists. Okay, so now that we've got the validators, let's make the name component required, so to do that we need to change the value of the name control to an array. So the empty string for the initial value of the control will be the first item in the array. And then we can add any validators that we want to use as additional items in this array. So let's just use the required one. We just pass the required method from the validator's class and this tells Angular that the name field is required. Let's just go back to logging out the feedback form again. Now let's go back to the browser. Let's open up the form, and let's click into the Name field and then click out of it again, and now let's open up the console. So we can see that the form group, that's the outer form itself, the whole form has been logged. So let's open that up and we can see the status the form, at this point now is invalid. And let's go in to the controls. And let's find the name control. And we can see that this control is invalid and it has this errors object, and it says required: true. And what this means is that an error has been generated. And the error has been generated because the field is required. Let's look at one of the others, so we can see that this one is valid and the errors object is null. So this is super useful and we can use the error's object for all sorts of things like showing an error message. So actually, all of the fields in the feedback form are required except possibly for the telephone field. So let's go back to the component class and just update the other field controls. So, we'll want to make all of them arrays. Let's make all of them required except for the telephone field. So there are still other validators that we want to use. The e-mail should be a valid e-mail address actually, and not just any old characters. And the telephone should be a number, not any letters or special characters. So let's add some more validators. Angular has a built in e-mail validator already. Let's add that one to the e-mail control. So let's go back to the browser now. And let's open up the feedback form. In the e-mail address then, let's just type any old characters and we can see that we get some errors in the console here. We get quite a few of them actually. We're not sure exactly what this error means, but we know that it's something to do with the validators. So, you might think that we can just provide as many validators as we want to because the value is an array, so that would make sense, that is what I thought. But actually, to use multiple validators we need to compose them together, this isn't as difficult as it sounds because the validators class contains a method that will let us do that. Okay, so the compose method is also a static method so we still don't need to up an instance of the validator's class. And we need to pass an array to this compose method, and this array should contain all of the validators that we want to use. So that wasn't too difficult. Let's go back to the browser now. And let's open up the Feedback form again, and let's just type any old rubbish into the E-mail address field. We don't get a bunch of errors this time. So lets just look at the form that we've looked at the console, and let's find the e-mail control. And this time we can see that the errors object is populated with e-mail true, so the field is required but we don't see the required error because it has some text in it, but that text isn't a proper e-mail address, so we see the e-mail error. So there isn't a built in validator to validate a telephone number, we don't need to validate every single telephone number in the world, however. So let's just use another of Angular's built in validators, the pattern validator, which can validate against irregular expression. So for the telephone control, let's use this validator. This validator is different from the others that we've looked at so far. For the pattern validator, we have to tell it what the pattern we want to validate against is. So for this validator, we do have to invoke it. And we pass it the regular expression that we want to use. So in this case we've just said that a valid phone number is just 11 numbers. Obviously this is much simpler than a proper phone number validator but this is an angular tutorial and not a regular expression tutorial and I think this is fine for our needs here. So now that we have some validations, we can add some error styling and error messages. We already know how to do this. We'll do it in a slightly different way this time. Let's go to the template. So we use the NG Class directive once again. The form group feedback form has a method called get. Any form which is a form group has this get method. And this allows us to access any control in the form without actually reaching too deeply into the form object. Like, we could use feedbackform.controls.name.touched. But then we're reaching quite deeply into this complex nested object structure. Using the GET method is easier and safer. Okay, great, so let's add this to the other rows as well. Okay, good, and now let's add some error messages as well. So we can use a small element here as we don't have much room in our little form and we can use an "ngIf" again to conditionally include the error in the dome if the control is both touched and if it has an errors object. The other error messages will be similar. Okay great. So a similar kind of thing each time, we just reference different controls and use slightly different messages for each one. And let's just make sure that small elements pick up the same styling that spans had in our other form. We just need to add small to the selector list in forms.sess. And let's see how it looks in the browser. Excellent, we didn't see a message for telephone because that's not a required field but let's chuck some letters in there instead of numbers, and then we do see the error message for that one as well. So we just have one minor problem now. So let's put some random letters in to the e-mail field. So we know that we're still seeing the error styling and the error message because we haven't entered an e-mail address in the correct format. But the user won't know that. Because the message is still just saying e-mail is required. So what we need to do is have different error messages for the e-mail field. And display each one depending on what the actual error is. So let's see if I can just make this a bit more readable. That's a bit better, and now let's add our second error message. Okay, so just like we have this get method, which can get any form control, we also have this has error method, which we can use to get a specific error. This is useful because we don't have to check that the errors object exists before we try to inspect the individual properties of this object. So note that to avoid showing two errors for the e-mail control, we can just check that it doesn't have the required error when we check the format of the e-mail address So now we're saying if the e-mail field has been touched and it doesn't have the error required and it does have the error e-mail. Then show the error message about the valid e-mail address. And this has error method is useful and it's convenient and it's safe to use. So let's roll that out to the other error messages as well. Perfect. It may seem a little verbose using this has error method in some cases. Because it's longer than using dot errors, but doing it this way makes it easier to add additional messages later on, and that's a pretty common thing to happen. So let's just go back to the browser and check that everything is still working. So the e-mail is required, message gets displayed when the e-mail address field is completely empty. And if we just chuck any old characters in there, instead of a valid e-mail address, we'll see a valid e-mail message instead. So as you finish up today let's just get rid of that console log from the ng on in it method of the feedback component. It was just for testing and we don't actually need it anymore. So in this lesson, we saw how to add built-in validators to a reactive form. We learned that we need to import Angular's validators class into our component, and that we can then get each of the validators that we want to use and pass them to the group method along with the controls as we create them. We also learned that if we want to use multiple validators, we should compose them using the compose method of the validators class. Plus we looked at some additional techniques for adding error styling and error messages to the form and so that we can make use of the get method to get a control by name in the template. And the has Error method to check if the control has a specific error. We aren't restricted to using these methods in the template, either. We can also use them in the component class. We just didn't need to in this example. Thanks for watching.


