
 Lessons: 67Length: 8.9 hours
- Overview
- Transcript
9.1 Building for Production
To wrap things up, I'll show you how to create a deployment-ready production build for our app. I'll also show you how to preview the production build using the Angular CLI.
1.Introduction
1.1Introduction00:48
1.2Get Started With Angular-CLI11:09
1.3Developing With Angular-CLI13:17
1.4TypeScript vs. JavaScript06:54
1.5Angular Modules From the CLI04:31
1.6CLI Options05:21
2.Get Started With Angular
2.1Bootstrapping the Application04:30
2.2The Application Module04:15
2.3The Application Component08:06
2.4Component Styling03:06
2.5Global Styling05:11
2.6Creating a Component With the CLI09:34
2.7Creating a Service With the CLI07:56
3.Core Concepts
3.1Component Trees06:20
3.2Dependency Injection06:52
3.3Content Projection05:38
3.4Component and Directive Lifecycle Methods06:31
3.5Component-Only Lifecycle Methods05:28
3.6Decorators07:36
3.7Models16:55
4.Template Deep Dive
4.1Basic Data Binding With Interpolation05:35
4.2Property Bindings07:07
4.3Attribute Bindings03:29
4.4Event Bindings08:16
4.5Class and Style Bindings05:44
4.6The `NgClass` and `NgStyle` Directives05:04
4.7The `*ngIf` Directive04:41
4.8The `*ngFor` Directive09:29
4.9Inputs05:33
4.10Using Pipes in a Template07:31
4.11Using Pipes in a Class08:27
5.Forms
5.1Handling User Input With Template Reference Variables07:06
5.2Template-Driven Forms11:10
5.3Template-Driven Forms: Validation and Submission14:00
5.4Reactive Forms11:26
5.5Using a `FormBuilder`08:01
5.6Reactive Validation With Built-in Validators14:53
5.7Creating Custom Validators for Template-Driven Forms12:18
5.8Creating Custom Validators for Reactive Forms08:26
5.9Observing Form State Changes12:40
5.10Working With the `@HostListener` Decorator05:41
6.Routing
6.1Defining and Configuring Routes07:53
6.2Rendering Components With Router Outlets10:14
6.3Using Router Links for Navigation05:25
6.4Navigating Routes Using the Router06:24
6.5Determining the Active Route Using an Activated Route07:16
6.6Working With Route Parameters10:42
6.7Using Route Guards07:36
6.8Observing Router Events10:55
6.9Adding Child Routes08:45
7.Using the HTTP Client
7.1Sending an HTTP Request10:52
7.2Handling an HTTP Response11:22
7.3Setting Request Headers12:33
7.4Intercepting Requests09:04
7.5Finishing the Example Application12:33
8.Testing
8.1Service Unit Test Preparation10:45
8.2Unit Testing Services13:24
8.3Component Unit Test Preparation12:35
8.4Unit Testing Components07:27
8.5Unit Testing Component Templates06:58
8.6Unit Testing Pipes04:41
8.7Unit Testing Directives04:56
8.8Unit Testing Validators04:48
8.9Unit Testing Observables11:37
8.10Unit Testing HTTP Interceptors06:16
9.Building for Production
9.1Building for Production03:40
10.Conclusion
10.1Conclusion01:32
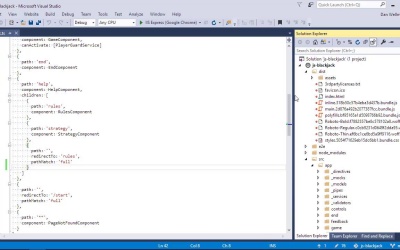
9.1 Building for Production
Hi folks. In this lesson, we're going to see how we can get our app ready to be deployed. We've finished development, we've written our unit tests, so now we're starting to think about deployment. Thankfully, the Angular CLI makes this process incredibly easy. So far, we've been using NgServe to run our application locally on a development server. But in this mode, Angular does things like loading the template asynchronously and compiling the application in the browser. These things are useful for development, but they aren't especially useful for production because they're not completely secure or as performant as they could be. In order to create a deployable production build then, we can run the NG build command and use the dash dash prod flag. So this build takes a bit longer than a regular development build becauseAangular will be pre-compiling templates and compiling the application. And it looks like we've got an error in the route's file. Let's just go and fix that. And it looks like we're missing a closing curly bracket here. And let's try that production build again. So this build will take a bit longer, because Angular will be pre-compiling all the templates and building the app. Once it finishes though, we should see a new dist folder, and inside here should be the deployable assets that the Angular CLI has created for us. So we can see that we have this dist folder now. And inside the dist folder, we have all our concatenated and minified files, we've got a separate one for the inline bundle. We've got one for the main bundle, so that's mostly all of our code. There's one there for the poly fills. And also, the fun files and a combined minified CSS file has been added too. So we'll still need a web server to actually be able to run the index.html page that's been put into the dist folder for us. Normally, I might use the built-in visual studio development server to run this file, but that's not gonna work in this case either. But luckily, the Angular CLI allows us to run the built-in development server in production mode. So we can add the hyphen hyphen prod flag to the NG Serve command. And this will do a production build, and it will then launch the Webpack Dev Server, so that we can preview the built version of the application. Everything looks the same as it did before. Let's just open up the console, and let's just open the sources panel this time. And we can see that we don't get access to any Webpack things. Sometimes, there's a Webpack expandable option down here and that contains all of the individual files. We don't have that this time. We just have the combined and concatenated files here. And we can see that it definitely is minified, so it definitely is part of our production build. So, in this lesson we've wrapped up the practical side of the course with a quick look at how we can create a deployable bundle that is ready for production using the Angular CLI. Thanks for watching.


