
 Lessons: 34Length: 3.4 hours
- Overview
- Transcript
4.2 Taking Advantage of the Express Router
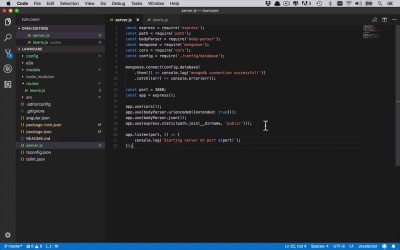
In the last lesson, you learned how to define a basic route in the server.js file and handle a request. While this will work, it doesn't scale very well into larger apps with many routes. So, in this lesson, you'll learn how to use Express routing to define any number of routes that you need in your apps, while still keeping a clean app structure.
1.Introduction
1.1Introduction01:02
1.2Prerequisites06:19
2.Getting Started
2.1Creating the App Structure11:46
2.2Creating the Server-Side Entry Point10:14
2.3Starting the Angular and Express Apps08:48
3.Setting Up the Mongo Database
3.1Getting MongoDB Up and Running06:08
3.2Connecting to MongoDB06:47
3.3Creating the Database Schema07:49
3.4Creating a Simple Data Access Layer07:09
4.Creating an API With Express
4.1Handling Requests in Express09:57
4.2Taking Advantage of the Express Router05:52
4.3Adding the `GET` Handler to the API05:34
4.4Adding the `POST` Handler to the API03:18
4.5Adding the `PUT` Handler to the API02:17
4.6Adding the `DELETE` Handler to the API02:18
5.Building the Front-End Angular App
5.1Creating the Front-End Models06:57
5.2Creating an Angular Service07:31
5.3Making HTTP Requests From the Service08:33
5.4Setting Up the User Interface09:05
5.5Creating All the Components05:28
5.6Adding Routing to the App08:18
6.Creating the App Components
6.1Adding the View Lawn Markup05:55
6.2Adding the View Lawn Code06:51
6.3Adding the Add Lawn Markup04:34
6.4Adding the Add Lawn Code07:41
6.5Adding the Edit Lawn Markup03:06
6.6Adding the Edit Lawn Code04:11
6.7Adding the View Application Markup02:54
6.8Adding the View Application Code07:46
6.9Adding the Add Application Markup02:16
6.10Adding the Add Application Code04:49
6.11Adding the Edit Application Markup04:20
6.12Adding the Edit Application Code05:39
7.Conclusion
7.1Conclusion03:18
4.2 Taking Advantage of the Express Router
Now I'm gonna show you a little bit more of an elegant way to separate the different API's of your project into multiple files so that we can associate them with certain types of paths. So the first thing that I'm gonna do is I'm gonna create a new folder, and I'm gonna call this folder routes. And then within here for each different type of API, I'm gonna create a separate file. So in this case, I'm really only gonna have one API that's gonna deal with my entire application because I'm associating the applications with the lanss and I'm gonna deal with it altogether as one big object. But you could absolutely separate those two things in their own routes and their own objects, one for lawns and one for applications. But for simplicity I'm just gonna keep things together. So I'm gonna create a new file and I'm gonna call this lawns.js. So this is gonna be my lawns route. So what is this gonna look like? Well the first thing that I need to do is I need to bring in express again. So I'm going to require express. And then I also need to get the express router, so I'm going to get the router, which is going to be = express.Router, just like that. All right, so now what does this do for us? Well now I can do basically the same thing that I was doing before where I was doing the gets and dealing with all of those things. I can do all of that within this specific file with respect to everything to do with lawns. So let's take the basic example that we worked on in the last lesson and bring it into this room. And I'll show you how this is all gonna work in the grand scheme of our application. So we had something very simplistic before, we had our router and we were dealing with a get request. And that get request was just kinda going to the route, like this, and then we had a couple parameters, request, response, and next. And then we had the body of our function here, and then we sent back response.send and we just sent, hello from our app, or something like that anyway. All right, so now we have this basic concept of our router and we're handling the request in a simple way, in a very similar way that we did before, but this is all happening in a different file. And now I wanna make sure that I make the result of this file of this module accessible outside of this file. And the way you always do that is using module.exports, and I wanna export this router. So that's great. Now I've created this separate file that's gonna handle all of the requests for my lawns API. But how do I actually use this? Well the first thing I'm gonna do is I'm gonna save this. And then I'm gonna back into my server.js file, and relatively similarly to what we did before when we were creating these routes, I'm gonna come into about the same section and now I'm going to do something a little bit different. Instead of doing app.get, because I've already done that in my lawns route over here, I wanna be able to use what I've done here in this server.js file. So the first thing that I need to do is I need to get access to this file. So I'm gonna say, const, and I'm gonna call this the lawns router, is gonna be equal to require, and I'm going to go in and get /routes/lawns. And now I have the lawns router or a reference to it here. I can now come into my body and I can then use this route, and then I can specify what I want this route, or this router, to be attached to. So I can specify what the URL structure base is going to look like so that my Express application knows when it needs to hand off this request to this other external router. So for this application I'm gonna be specific about this and I'm gonna say, every time that you make a request that goes to the base of local host port 3000, because that's where our application lives, /lawns. Every time the URL looks like that I wanna hand off the processing to my lawns router. So now by doing this, when my application sees that request coming into local host port3000/lawns, regardless of what it is after that, it could be the route, it could have parameters, it could be gets, puts, posts, or deletes, once it sees that, it's gonna hand off that request to this lawns router. And it's gonna try to handle that within here. So now that I've made this change, let's go back to our application. And you're gonna see now if I try to go to the route that I was at before, you're gonna see that this doesn't work anymore. And that's because that route not only doesn't exist anymore but now we're only talking about routes that start with lawns. And so if I were to issue that request, you now see hello from our app. And I could continue to do the same thing as I did before, I could add additional routes in here, additional handlers to get a get with an ID on the end of it. And everything's gonna work the same way, but now we're just looking for routes that begin with /lawns. And once again, I could create another route file for applications, and then I could say app.use. And if I wanted to specify the URL, it was gonna look like /applications, and then I could create an applications router that would handle all those requests, I could absolutely do that. And that's how you can more neatly structure your application within Express to handle different types of routes or APIs for different types of requests. So now that we know the basics of that, in the next couple of lessons we're gonna start to build out the actual API request handlers that we're gonna be using for our application.


