- Overview
- Transcript
6.11 Adding the Edit Application Markup
This final UI component will be displayed when the user clicks on the Edit button beside an application in the View Application component. It will display a modal allowing users to modify any existing data associated with an application.
1.Introduction2 lessons, 07:21
1.1Introduction01:02
1.2Prerequisites06:19
2.Getting Started3 lessons, 30:48
2.1Creating the App Structure11:46
2.2Creating the Server-Side Entry Point10:14
2.3Starting the Angular and Express Apps08:48
3.Setting Up the Mongo Database4 lessons, 27:53
3.1Getting MongoDB Up and Running06:08
3.2Connecting to MongoDB06:47
3.3Creating the Database Schema07:49
3.4Creating a Simple Data Access Layer07:09
4.Creating an API With Express6 lessons, 29:16
4.1Handling Requests in Express09:57
4.2Taking Advantage of the Express Router05:52
4.3Adding the `GET` Handler to the API05:34
4.4Adding the `POST` Handler to the API03:18
4.5Adding the `PUT` Handler to the API02:17
4.6Adding the `DELETE` Handler to the API02:18
5.Building the Front-End Angular App6 lessons, 45:52
5.1Creating the Front-End Models06:57
5.2Creating an Angular Service07:31
5.3Making HTTP Requests From the Service08:33
5.4Setting Up the User Interface09:05
5.5Creating All the Components05:28
5.6Adding Routing to the App08:18
6.Creating the App Components12 lessons, 1:00:02
6.1Adding the View Lawn Markup05:55
6.2Adding the View Lawn Code06:51
6.3Adding the Add Lawn Markup04:34
6.4Adding the Add Lawn Code07:41
6.5Adding the Edit Lawn Markup03:06
6.6Adding the Edit Lawn Code04:11
6.7Adding the View Application Markup02:54
6.8Adding the View Application Code07:46
6.9Adding the Add Application Markup02:16
6.10Adding the Add Application Code04:49
6.11Adding the Edit Application Markup04:20
6.12Adding the Edit Application Code05:39
7.Conclusion1 lesson, 03:18
7.1Conclusion03:18
6.11 Adding the Edit Application Markup
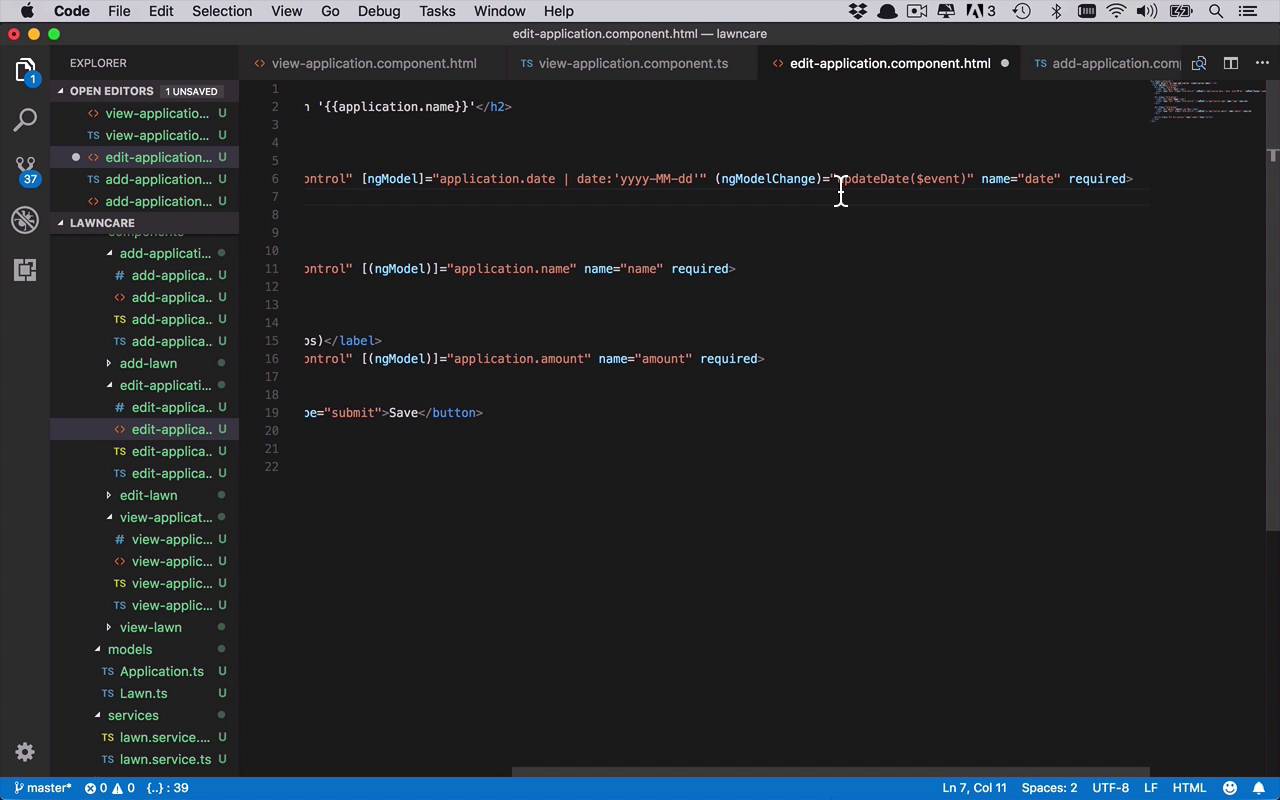
Here we are coming down the home stretch. So now we have all the functionality up to the very end where we now are gonna need to edit an application if we have, kind of, input some improper data we want to make some modifications. So we're gonna go into our edit application. We’re gonna go into the actual markup, go ahead and paste this in here. And I did mention before that there is a spot in here where we’re gonna have to make some slight changes. And that is just in the interesting way that dates get bound into angular, and being able to make sure that if you are using a date picker that picks the correct one, and if you update it, if everything is updated properly. But let's go and take a look at what this looks like. Looks like a very simple form and it really is. It's very similar to what we have done before. We're simply gonna be updating the date, the name, the amount, and all those things that we've associated with an application. But what we have to do in this case is, instead of being able to do two-way binding on a model, like we've done for pretty much everything else in this course when it comes to edits. We have to break apart the actual bindings and the events that are happening on the date, simply because of a formatting, and for some reason it doesn't always bind properly to the UI. So what we have to do here is define the ng model being application date and specify a format using a date pipe. Now, this is not new to Angular you could do this years ago in the earlier versions, and you could specify the formatting of the date, and you can still do that. And so we're gonna continue to do that here. But the difference here is that we're now gonna subscribed to an ngModel\Change event. And one of the reasons that we're doing that, like I said before, if you just do the two way data binding you don't always get the UI element to bind properly, to an existing date if the format isn't right. So we are paying more attention to the formatting on this side. And then if something changes we gonna have function fire on the backed that we can make sure that we are updating and taking in consideration the proper formatting and all that sort of good stuff. So not a big deal, but it is kind of a stumbling block sometimes if you're aware that you can run into problems there. So this is gonna our edit details for the lawn application, or whichever one you've selected. So we can go head and save that. But in order for this to actually show up, we're gonna have to go into the view-applications and we gonna have to uncommon this one right here this, just like this. And were gonna go ahead and save that. And based on what we looking at here for the bindings, I'm pretty sure that if you come back over here everything is gonna blow up and you're not gonna see anything. So that's the step that I've kind of been not showing you as we kind of go into some of these new modules, because things tend not to show up depending on what we're doing. So the way that I got around that was I simply defined these other inputs in here previously, so I'm just gonna have to put them in their right now. So I need an application, and a Lawn. So we'll come into our edit-application, actually class right now, and I'll specify two inputs so I'll say Input is going to be application, and that's gonna be a type Application. We'll have to make sure we bring all of this in, lots of imports, and we have to make sure this is an at. And we'll go ahead and import that as well. And then we'll do another one where we're gonna have to do an Input of lawn, which is gonna be of type Lawn. Go ahead and bring that guy in. So now at least those things exist. I can go ahead and save that. And now we're gonna see that we can actually click on these, and we'll see something show up, and you'll see the proper bindings here. So what we're gonna do now, in the next lesson, is we're going to finish up by writing some code on the backend of our edit application component. So that we can properly update some of this information if for some reason something has gone wrong, or we have input something incorrectly. So let's go ahead and take a look at that in the next lesson.


