
 Lessons: 34Length: 3.4 hours
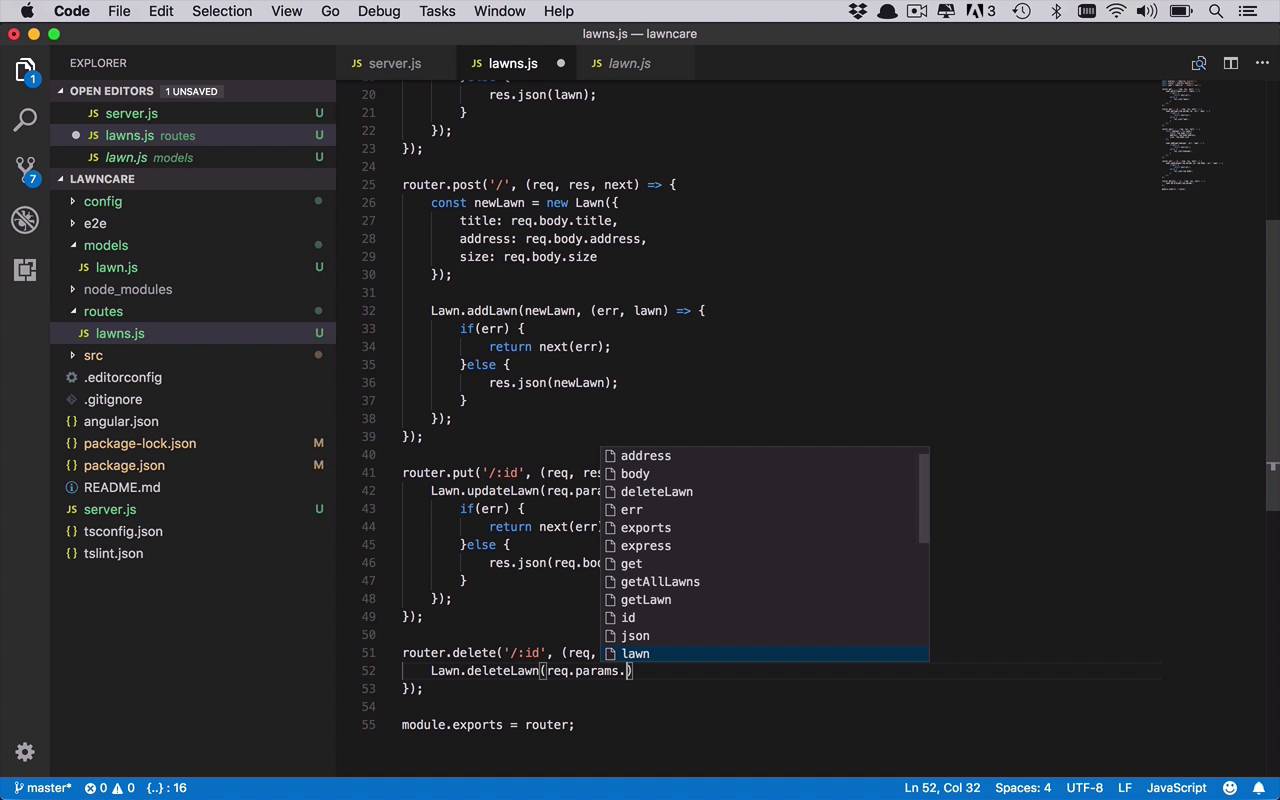

- Overview
- Transcript
4.6 Adding the `DELETE` Handler to the API
Adding, retrieving, and updating objects in our app is great. But there is one crucial piece of the puzzle that we're missing. We need to be able to delete objects from our app. In this lesson, we'll do just that by creating a DELETE request handler.
1.Introduction
1.1Introduction01:02
1.2Prerequisites06:19
2.Getting Started
2.1Creating the App Structure11:46
2.2Creating the Server-Side Entry Point10:14
2.3Starting the Angular and Express Apps08:48
3.Setting Up the Mongo Database
3.1Getting MongoDB Up and Running06:08
3.2Connecting to MongoDB06:47
3.3Creating the Database Schema07:49
3.4Creating a Simple Data Access Layer07:09
4.Creating an API With Express
4.1Handling Requests in Express09:57
4.2Taking Advantage of the Express Router05:52
4.3Adding the `GET` Handler to the API05:34
4.4Adding the `POST` Handler to the API03:18
4.5Adding the `PUT` Handler to the API02:17
4.6Adding the `DELETE` Handler to the API02:18
5.Building the Front-End Angular App
5.1Creating the Front-End Models06:57
5.2Creating an Angular Service07:31
5.3Making HTTP Requests From the Service08:33
5.4Setting Up the User Interface09:05
5.5Creating All the Components05:28
5.6Adding Routing to the App08:18
6.Creating the App Components
6.1Adding the View Lawn Markup05:55
6.2Adding the View Lawn Code06:51
6.3Adding the Add Lawn Markup04:34
6.4Adding the Add Lawn Code07:41
6.5Adding the Edit Lawn Markup03:06
6.6Adding the Edit Lawn Code04:11
6.7Adding the View Application Markup02:54
6.8Adding the View Application Code07:46
6.9Adding the Add Application Markup02:16
6.10Adding the Add Application Code04:49
6.11Adding the Edit Application Markup04:20
6.12Adding the Edit Application Code05:39
7.Conclusion
7.1Conclusion03:18
4.6 Adding the `DELETE` Handler to the API
And now for my final trick, we're gonna add in the functionality for the delete. And we're gonna be doing this very similarly to what we've done so far. So we're gonna start with our router and this time we're gonna handle the delete function. And now remember, we're gonna be doing the deletes by the ID. Again, we could have done this a couple of different ways. And just as a refresher, what we wound up doing in here is for the delete, all we are passing in is the ID and then the callback. And actually, there's really not a whole lot to do in the callback. Maybe just process the error because that's all we're really gonna be dealing with. There's really nothing else that we're gonna expect to be passing back. Cuz once we're deleting an object, we're not really expecting much else to be there for that particular object. But you can obviously change a simple notation to follow whatever sort of patterns you would like to. So we're gonna have the response or the request, the response and the next. And then we are also going to be using our Lawn.deleteLawn function. And we need to be passing in the ID, so once again that's gonna be coming from the url, so we'll say, request.params.id. And then we can pass in our callback. And then in here we'll say once again, if error then we'll go ahead and return the next error. And then you could just leave it at that. There's really not a whole lot or any really main reason to do the second part of it cuz we wouldn't be expecting to be getting much back from this. Or you can add it in there just to be complete or at least to follow the same pattern that we've done before. But it's really not overly necessary. So there we have our delete, we're passing in the ID. We will use our deleteLawn function. We're gonna pass in the parameter id coming from the URL. And then if everything goes well, then we should no longer have that lawn in the database, and then we can do whatever we want from the front end perspective. We can remove it from the UI, so on and so forth. But I'm gonna leave that all for the next section when we start to build out the UI. Now that we have some basics at least from a route perspective, we have all of our git functionality, our post functionality put and delete. And we'll be ready to take the next step.


