
 Lessons: 34Length: 3.4 hours
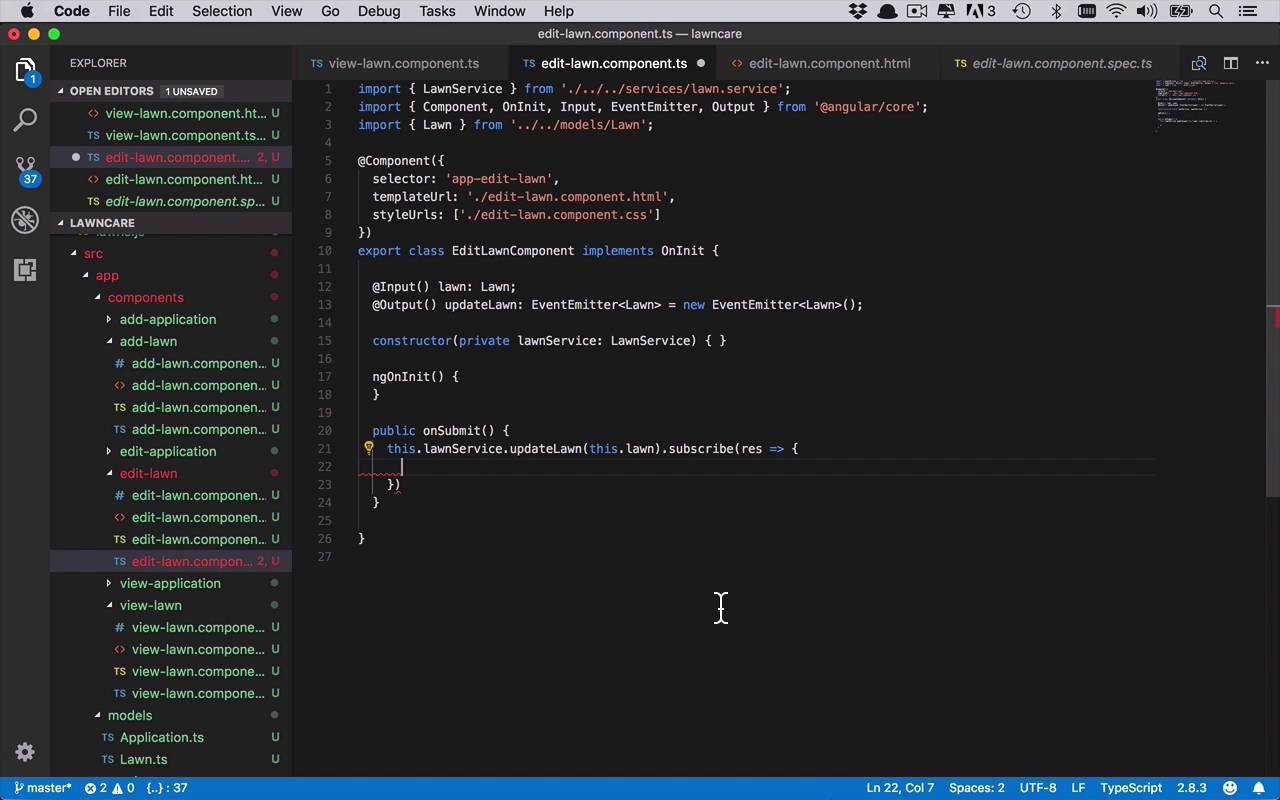
- Overview
- Transcript
6.6 Adding the Edit Lawn Code
In this lesson, we'll code out the Edit Lawn component.
1.Introduction
1.1Introduction01:02
1.2Prerequisites06:19
2.Getting Started
2.1Creating the App Structure11:46
2.2Creating the Server-Side Entry Point10:14
2.3Starting the Angular and Express Apps08:48
3.Setting Up the Mongo Database
3.1Getting MongoDB Up and Running06:08
3.2Connecting to MongoDB06:47
3.3Creating the Database Schema07:49
3.4Creating a Simple Data Access Layer07:09
4.Creating an API With Express
4.1Handling Requests in Express09:57
4.2Taking Advantage of the Express Router05:52
4.3Adding the `GET` Handler to the API05:34
4.4Adding the `POST` Handler to the API03:18
4.5Adding the `PUT` Handler to the API02:17
4.6Adding the `DELETE` Handler to the API02:18
5.Building the Front-End Angular App
5.1Creating the Front-End Models06:57
5.2Creating an Angular Service07:31
5.3Making HTTP Requests From the Service08:33
5.4Setting Up the User Interface09:05
5.5Creating All the Components05:28
5.6Adding Routing to the App08:18
6.Creating the App Components
6.1Adding the View Lawn Markup05:55
6.2Adding the View Lawn Code06:51
6.3Adding the Add Lawn Markup04:34
6.4Adding the Add Lawn Code07:41
6.5Adding the Edit Lawn Markup03:06
6.6Adding the Edit Lawn Code04:11
6.7Adding the View Application Markup02:54
6.8Adding the View Application Code07:46
6.9Adding the Add Application Markup02:16
6.10Adding the Add Application Code04:49
6.11Adding the Edit Application Markup04:20
6.12Adding the Edit Application Code05:39
7.Conclusion
7.1Conclusion03:18
6.6 Adding the Edit Lawn Code
The code behind our edit-lawn component is actually gonna be quite simple. So we have this input now, which basically is just another mechanism for us to communicate with our parent component. So we have the output, which is going to admit events that our parent can subscribe to, and then we have the input, which is a mechanism for the parent to pass something into the child, and that's really all it is. So we're passing in the appropriate lawn that we want to show the edit details for in this component, but at the same time at the time when we actually save, or hit the submit button here, we do want to let the parent know that we have made an update. And then we can do something very simplistic by, maybe, just going and regarding all of the lawns, and then refreshing our view. So in order to do that, once again, we're going to need another event that we can subscribe to. And we're gonna call this updateLawn, and in this case this is going to be another EventEmitter. And we're going to have to make sure that this goes in the right place, again, not in events. And then this is going to be generic. And this is going to have a type of lawn. And it's gonna be equal to a new instance of the event emitter of type Lawn, just like that. Okay, and then we're also gonna have to bring in output. So now we have a mechanism for input and output. So you can do multiple variations of all of this. Once again, we're going to need another instance of our LawnService, so that we can communicate the changes to the backend. And then at this point, ngOnInit, we're really not going to do anything when we first initialize this. All we really have is one thing that's going to be happening, and that's going to be our onSubmit. And in this case, this is going to be pretty simple and very similar to what we've seen before, so we're going to say this.LawnService, we want to update a lawn this time. We're gonna say this.Lawn, so the one that we've passed in and that we've modified. And then we're going to subscribe to this completion event. And then once we have gotten our response, which is the updated version, let's go ahead and simply do this.updateLawn, and we can emit that event, passing in the result, which will hopefully be the updated version of that lawn. So, now we got this part taken care of. But then once again, on the view lawns component side, in the actual markup you're going to see that we have this updateLawn, and we need to have this on updateLawn event here. So, let's go ahead and add that part in right now. So in order to do that, we'll go back to our view-lawn.component.ts. And down here at the very bottom, just like we have onAddLawn, we're going to say onUpdateLawn, and this is going to be our lawn, which has been newly updated. And then at this point, we'll simply say this.LawnService.getAllLawns, and actually we don't even have to do that, because we've already created a load lawns function, so we are simply going to say this.LoadLawns. So, now that we've done that, we can go ahead and save all of this. And once again, if we have saved everything properly, and written everything properly, and this now reruns and refreshes, you're gonna see, initially, we are getting these two objects, which is good. Now, let's say I come in here to Edit this one, and I wanna say, maybe this isn't my Home, maybe this is my Vacation Home. Now, the interesting thing that you're gonna see there, because we're doing two-way data binding, it's not only changing the data in this model, it's also changing the data in the parent, which is pretty cool. And maybe this isn't 123 Main St., it's 12345 Main St., and it's 20000 square feet, so it's pretty big. So then we can go ahead and click Submit. And now we have persisted the data, the modifications that we've made. And we can come back in here and verify that, that it truly is now Vacation Home 12345 Main St., and 20000 square feet. So now we're able to successfully list all of our lawns, we're able to add new lawns, and edit lawns. And now we need to start taking a look at the applications and the things that we're putting in to our lawn, and we're gonna start taking a look at that in the next lesson.


