
 Lessons: 14Length: 1.3 hours
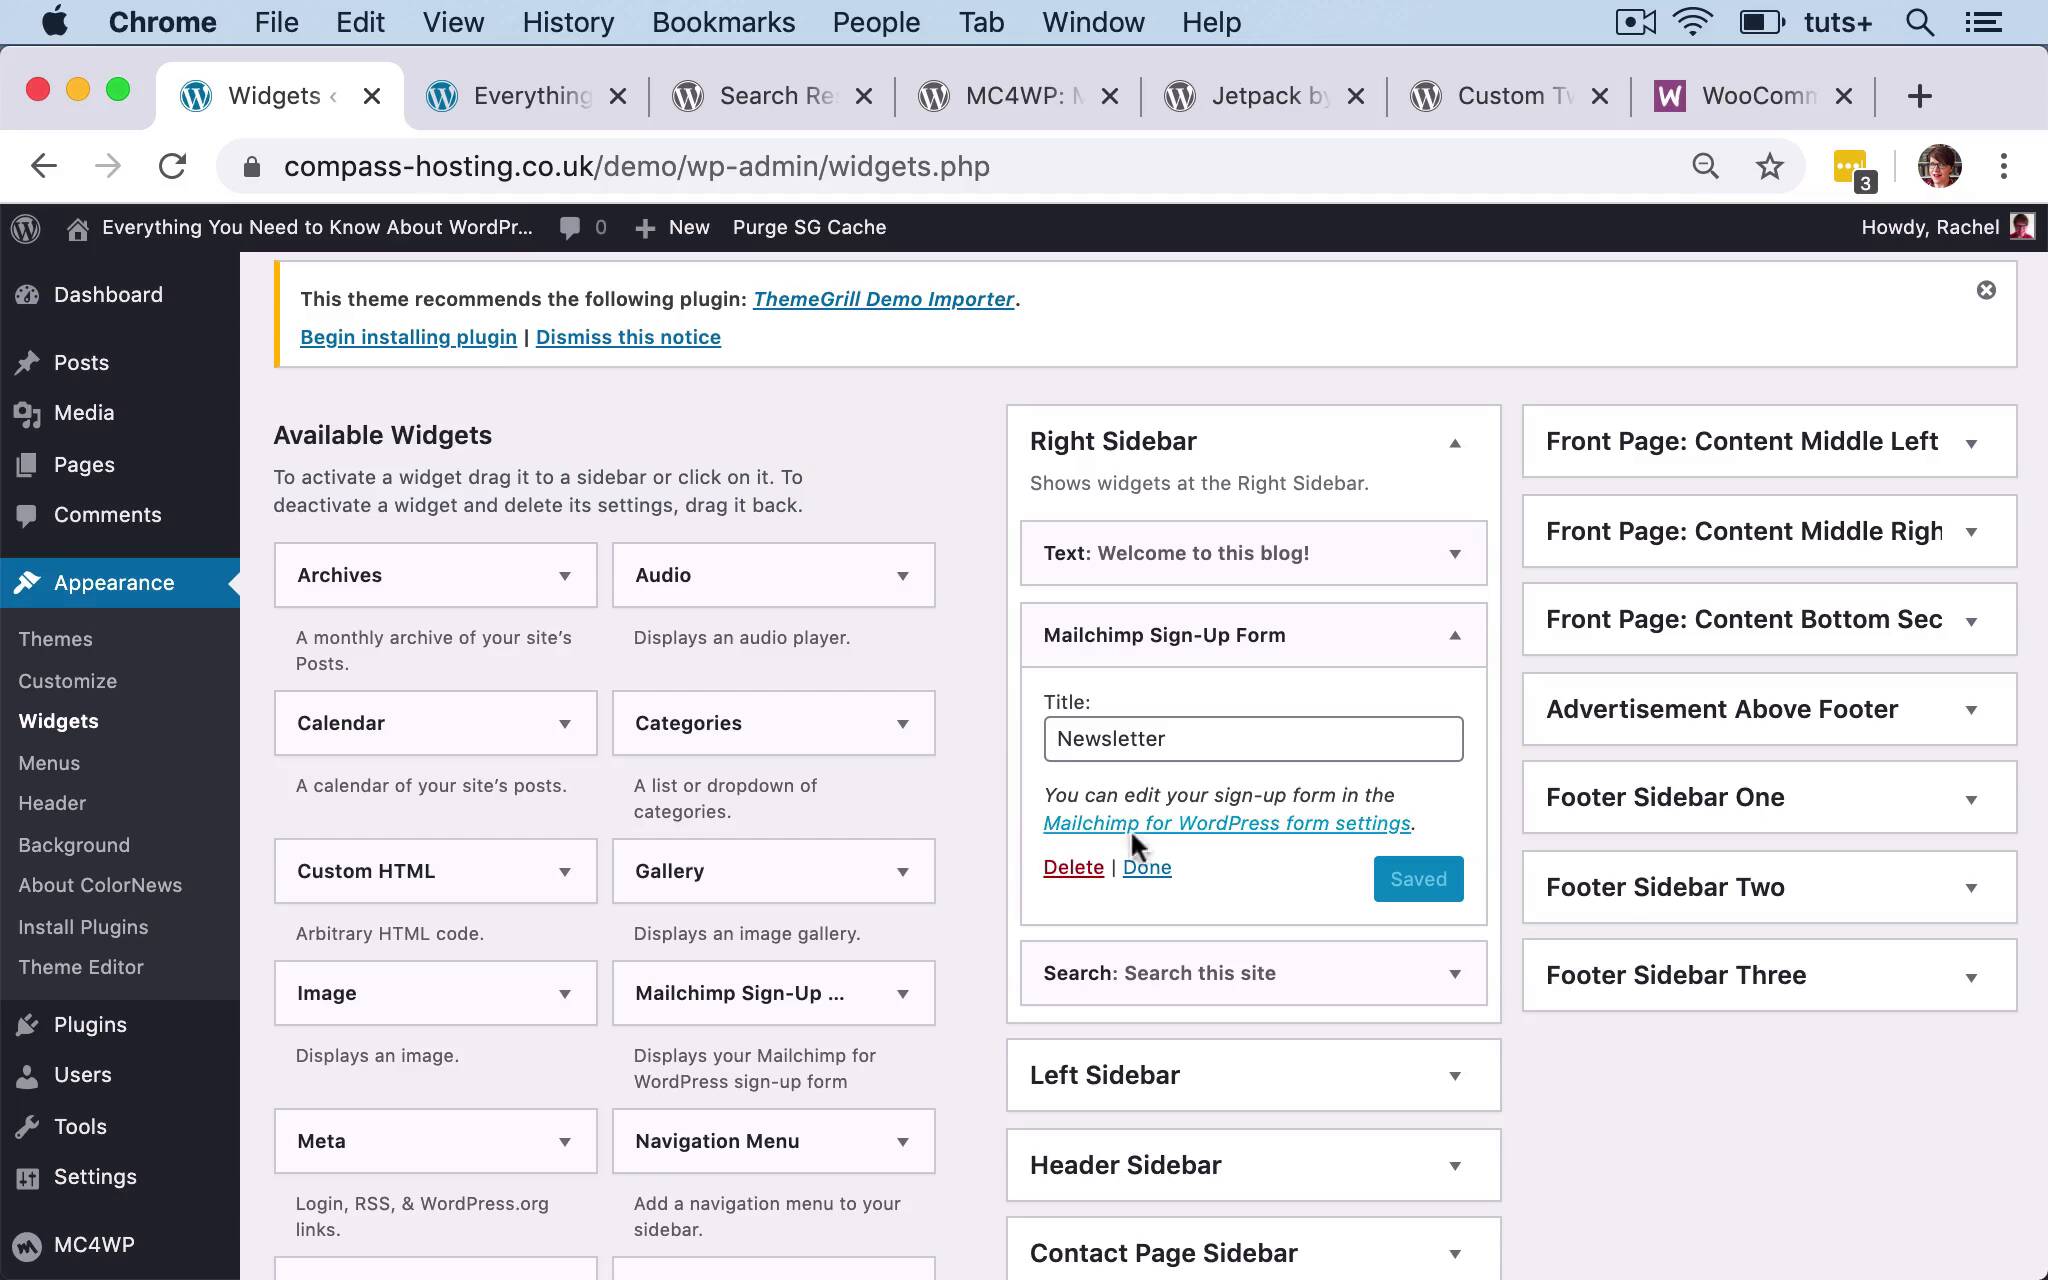

- Overview
- Transcript
3.3 Adding Extra Widgets via Plugins
In this lesson, you'll learn about the kinds of widgets you can add via plugins and how to install them.
Related Links
1.Introduction
1.1Introduction00:53
2.Understanding WordPress Widgets
2.1What Is a Widget?06:54
2.2Examples of Widgets13:05
3.Adding Widgets to Your WordPress Site
3.1Adding Widgets via the Widgets Screen03:38
3.2Adding Widgets via the Customizer05:59
3.3Adding Extra Widgets via Plugins07:43
3.4Adding Widgets to Posts and Pages05:11
4.Widget Areas
4.1Understanding Widget Areas05:50
4.2Add a Widget Area to Your Theme: Registering the Widget Area07:03
4.3Add a Widget Area to Your Theme: The Theme Template Files07:13
5.Coding Your Own Widget
5.1The Widgets API03:36
5.2Coding a Call-to-Action (CTA) Widget06:52
5.3Coding a Query Widget03:54
6.Conclusion
6.1Conclusion02:34
3.3 Adding Extra Widgets via Plugins
Hello, and welcome back to this Tuts+ course on WordPress Widgets. We've already taken a look at all of the widgets that are provided out of the box by WordPress. And as you can see from what we have already done this site, it gives you a lot of flexibility. But what if you want to add something to a widget area that isn't included in any of those widgets? Well, the good news is, there are thousands of plugins that you can add to your website that include widgets. So sometimes you'll find there's a plugin that's specifically for a widget, and then other plugins might include widgets. So let's take a look at some examples. So here, I've gone to the WordPress plugin directory, and I've searched for widget. And you can see that there are plenty of results. So if I scroll down, there are 49 pages of plugins that include widget when you search for them. Now, some of these will be plugins that are specifically for adding a widget to your site. So here for example, we've got the Google Reviews Widget plugin. Some of them will be for managing your widgets. So this Widget Importer & Exporter plugin, it's really useful if you want to import and export your widget settings from one website to another. And I've used that quite a lot in the past. Widget Context is another one that helps you manage your widgets, because you can use it to specify which pages or posts you want widgets to appear on. And then there will be plugins that include widgets as part of the plugin, but where the plugin isn't just about a widget. So a good example of that is the WooCommerce plugin, which is a free ecommerce plugin. WooCommerce gives you a lot more than just a widget or two, it adds a store to your site. But as part of the plugin, you also get some relevant widgets. So you'll get things like a shopping cart widget, for example. So you can display in a widget area exactly what people have got in their cart right now. So, if you're looking for a widget, obviously you don't just want to search for widget. You want to think about what the functionality is that you need when you're searching for that widget. And here are some other widgets that you might add, and I'm gonna show you how to add these widgets during this course. So here we have the Mailchimp for WordPress widget. This is a useful one if you want to add newsletter sign up to a sidebar or footer in your course. The Jetpack plugin adds a lot more than just widgets, a bit like WooCommerce. But I find it really useful for the social media widgets that it includes. Because instead of installing different plugins for different social media channels, I can just install Jetpack, and I'll get widgets for Facebook and Twitter and Instagram. But alternatively, if you don't want to install Jetpack, and you just want a widget for Twitter, you could use this custom Twitter feeds widget, which is just one of many Twitter widgets that are available to you. So, let's take a look at how you install and activate these. So to do this, you click on plugins, and Add New. And then you search for your login. So, this one here, I want to install is MC4WP. So I will search for that. And here you can see that it's been listed. So I'll click on Install Now to install it. And then once that's changed to an Activate button, I'll activate it. So I can now go into my widget screen, and I have a Mailchimp sign up widget. So I can add that here in my sidebar. That's called Newsletter. And then if I refresh my screen, you can see that I've got newsletter sign up. Now at the moment, that's empty. And the reason for that is because I need to configure the form. So here, I need to go into the Mailchimp for WordPress settings, and I need to do things like entering my API key, naming my form, and adding fields to that form. So there's more setup that needs doing, but it shows you that it's quite easy to add extra widgets to your site that interact with other APIs. Let's take a look at how we add this custom Twitter feeds widget. So again, I'm gonna go into Plugins > Add New. And then I'll search for custom Twitter feeds. And here it is, click on Install Now, I then activate the plugin. And when I go to my widget screen, you can see that I've got the custom Twitter feeds widget available. So, Save that again, there will be settings. So here on the Twitter feed screen, we need to configure that with Twitter and get an access token, so that we can access our Twitter feed. So if I refresh the screen at the moment, there's an error message, because I haven't done that. And that message is only visible to admins, which is good, cuz if somebody comes to visit my site, I don't want them seeing that. But right now the Twitter and the Newsletter widgets aren't actually working. But you then go and set them up using the instructions for the relevant plugins to do that. And then finally, let's add Jetpack. And you see that's already in the featured list, because that's a very commonly installed plugin. Now Jetpack gives you a lot of functionality. So you might decide that it's too big a plugin for you to install, if you just need a couple of widgets. The first thing you'll need to do is set up Jetpack by either logging into a wordpress.com account that you already have, or creating one. Because it links to wordpress.com and it pulls in the features from wordpress.com, which includes extra widget areas on top of the ones that you get with self hosted WordPress. So, I'll demonstrate on the widget screen for a site that I'm already running, that's got Jetpack set up and linked to wordpress.com. So you can see here there's a number of widgets with Jetpack in brackets after them. So, there's Authors, Blog starts, Flickr, Goodreads, Gravatar Profile, Milestone, My Community, RSS Links, Social Icons, Twitter Timeline. There should also be a Facebook one as well, I think, yes, Facebook Page. So by adding Jetpack, you get access to a whole bunch of widgets. And if I remember right, this particular widget has got a Jetpack plugin there. For example, it's got the Flickr plugin. And it's also called the Facebook page Jetpack plugin. It's not actually a Facebook page plugin, it's a Facebook page feature of the Jetpack plugin. So that's how you can add extra widgets to your site by installing a plugin. And you'll find that there are hundreds if not thousands of free plugins that include widgets. But sometimes you'll find that you can't find what you need amongst those free plugins on the theme directory. So you might choose to install a premium plugin such as these ones on the CodeCanyon website. So here, I've searched for widget, and there are a whole bunch of widget plugins that you could add to your site. So that's how you add extra widgets to your site by installing plugins. In the next part of the course, I'll show you another way to add a widget to your site. And that's by using the widget blocks provided by the Guttenberg interface. See you next time, and thanks for watching.


