
 Lessons: 18Length: 1.7 hours
- Overview
- Transcript
2.5 Handling Multiple Intents and Slots
In the previous lesson, we created a simple event handler, but it is rather limited. How are you supposed to handle multiple intents in a single function? How are you supposed to handle variable data? You are going to learn all of these things in this lesson.
1.Introduction
1.1Introduction01:03
1.2Prerequisites06:17
2.Alexa Skill Basics
2.1Alexa Skill Kit Walkthrough08:25
2.2AWS Lambda Walkthrough10:14
2.3Creating the Hello World Skill08:00
2.4Creating the Hello World Lambda Function10:14
2.5Handling Multiple Intents and Slots07:03
3.Building a Real-World Skill
3.1Creating the Skill06:37
3.2Creating the Lambda Function03:48
3.3Creating a Node.js App for Your Lambda Function07:11
3.4Creating Your First Handler04:38
3.5Creating the Setup Data for Your Skill03:00
3.6Finishing the Get New Courses Handler03:49
3.7Create the `GetCourseTeaser` Handler07:08
3.8Create the `AddToWatchList` Handler06:30
3.9Create the `GetWatchList` Handler03:43
3.10End-to-End Testing03:37
4.Conclusion
4.1Conclusion02:33
2.5 Handling Multiple Intents and Slots
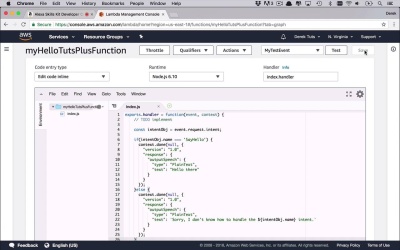
Now I know what you might be saying, at this point, you might be saying, well, Derek, this is pretty cool, I can communicate with Alexa. I can create these intents. I have this really cool Lambda function. And I can get a response from this skill that I've now created and be able to interact with Alexa. But to this point, it's only doing one thing. And it's only responding with this same response every time, with just this Hello there. What if I wanted to add additional intents? And if I were to go back and look at my builder, what about this name here? So I have this concept of a slot in my intent. How do I use that? Well, in this lesson, I'm gonna show you how to be able to extend your skill and your Lambda function, more importantly, to be able to handle additional intents as well as these slots. Now, as we talked before when we were working on this test, we were able to send a request across to our function, and then we could handle that function. And the reason we were able to do that is because the skill is sending over a JSON object over to our function and then our function is handling the response coming back. Well, I can also handle the input coming in as part of that request. And the way that we do that is by accessing some of the properties that are part of this event that's coming across to me. So let's go ahead and see what that looks like. Well, the first thing that you can probably do is you can start to tease things apart here a little bit and be able to take a look at the actual request itself. So what we're gonna do is, we are going to come in here and we're gonna say, const intentObj, or intent, or whatever you wanna call it. We wanna be able to get the actual intent that's coming across, and how do we do that? Well, this is part of the event object, and part of that event object is the request. And once we get that request, we can also dig in and get the intent. Now there's a couple properties on this, but we're gonna start with this one. So the first thing that we wanna do is we wanna be able to take a look and see what the intent is. And in this case, we're really only dealing with one intent and that's the say hello intent from our skill. So at this point, we could say something like, if (intentObj.name ===, and actually at this point, we can start to get really fancy with uppercase and lowercase and all that kind of stuff, but we're gonna keep things pretty simple right now. We're just going to say, SayHello. We're going to check to see if that is our intentObj's name, and if it is, then let's just go ahead and do this right here. And we'll go ahead and cut that, and we'll stick that in here. And then if for some reason it is not that intent, we'll send something else across and we'll just spit out what it says. So we can do something like this. We'll paste this in here, and we can go ahead and do a little bit of formatting here. And we'll say, Sorry, I don't know how to handle the, and then we can go ahead and stick that intent name in here. We can say, intentObj.name, intent ,something like that anyway. Okay, so now, we've got a little bit of customization in here. And now we're checking to see what the intent type is here, and then we can go ahead and deal with that. So let's go ahead and save this. And after we've saved this, we will go back over to our Alexa skill test environment. And let's just go ahead and say, ask hello tuts to say hi. And as you can see, we get this response, Hello there. And the reason we got that is because when it sent the request across, as you can see here, it's sending a request of type IntentRequest. And then down in here, we can see now we have this intent object. And then it has a name property, and it's SayHello. And so, we know that, and so that's what we were using in our Lambda function to be able to take a look at the name of the intent. And that's how we were able to determine it was SayHello. So now we have this little bit of logic going on in here. And now, as you can see, we have this concept of slots. And now I wanna be able to use that. So let's go ahead and pick that out so we can customize this just a little bit. So now we can come in here and if it is SayHello, we can check for a slot. So we can say const slotName is === intentObj.slots.name, is the actual slot itself. And then we now that we have that, we can check a little bit on this as well. We can say if(slotName.value), so we can check to see if something exists there. And if it does, then we can kind of change this up a little bit. So let's go ahead and create a variable up here. We'll say, var greeting, and we're gonna initially set this equal to "Hello there". And so if this does have a value, we can go ahead and modify this a little bit. We'll say, greeting, and we'll append onto there, name that was passed in. And we'll go ahead and format this. And we will pass into this, the slotName.value. So now we're customizing our greetings. So we can say Hello there John, or Derek, or whoever's name that is. And if not, then we're just gonna leave it as Hello there. And then we can modify this text as well to be our greeting. So let's go ahead and save that. So now, as you can see here, we're pulling out this slot, this is the slot we're looking for. And now we have a default greeting. We can say, if(slotName.value), so if it has a value, let's go ahead and use that value, and then we'll go ahead and send through our greeting. So let's come back to our test. And now I can say, ask hello tuts to say hi to Derek, and I'll go ahead and send that through. And now we get some customization, Hello there Derek. And once again, we see that because in our intent, we have slots and this is the name. So if it was called something else like, greeting, then this value, this key would be greeting, and then we would have the additional data down here. And so as you can see, it's coming through just fine and we're able to process that on the Lambda function side. Now this is really good. And we can continue to do this and we can continue to add in handling of different intents and different slots and things like that. But as your skills get more creative and your Lambda functions become more intense, then maybe we need to investigate another option that's going to allow us to maybe do this in a much more structured way. And in the next several lessons, I'm gonna show you how to do that using something known as the Alexa SDK.


