
 Lessons: 19Length: 2.4 hours
- Overview
- Transcript
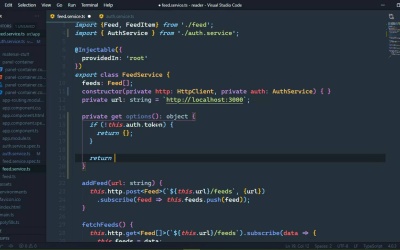
6.3 Sending the Token
Now that we have a token, we can use it to authenticate our HTTP requests. We'll update our FeedService class to incorporate the token.
1.Introduction
1.1Introduction01:23
1.2What You Need06:14
2.Getting Started
2.1Creating the Project08:21
2.2Designing the Basic Layout08:50
3.Writing the Basic Functionality
3.1Fetching the Feed List08:48
3.2Displaying the Feed List07:06
3.3Toggling the Feed List Drawer05:53
3.4Using Named Router Outlets09:22
3.5Displaying Feed Items09:11
3.6Displaying the Content12:16
4.Adding Settings
4.1Designing the Settings Panel10:03
4.2Using Services to Manage State07:13
4.3Finishing the Settings11:02
5.Managing Screen Sizes
5.1Using the `BreakpointObserver`08:03
6.Authentication and Authorization
6.1Refactoring08:24
6.2Authenticating With the Server07:58
6.3Sending the Token04:19
6.4Authorizing Routes07:05
7.Conclusion
7.1Conclusion01:06
6.3 Sending the Token
In the previous lesson, we wrote the code that sends our user credentials for authentication and does something with the resulting token. We stored it inside of local storage so that we can easily get it whenever we need to. So now we just need to get that token and include that in the headers, so that whenever we make a request from our FeedService, we include the token in our headers and that will let the server know that, hey, we are authenticated, give us our stuff, basically. So I think we need another property inside of our AuthService, one that will get the token because really that's the job of our authentication service. It's to first of all, log us in and store the token, and then also get the token. So we'll just have a simple getter. And we don't need to do any type of checking, or really anything like that. Because getItem is going to return one or two things. It's going to return the value of our token item, or it's going to return no. So that's fine. There's really nothing else that we would need to return from this token property. So that means that inside of our FeedService, we do need a reference to our AuthService. So let's go ahead and inject that. So we'll have our AuthService. And then let's write a private getter. We're gonna call this options and this is going to return an object. And the reason why is because if we don't have a token, then there's really nothing that we need to return from this except just an empty object. Because we don't want to include the authorization header if we don't have anything to authorize with. So the first thing we're going to do is check to see if we have a token. And if not, then we are just going to return that empty object and need to change the condition if we don't have a token. There we go. Otherwise, then we want to return an object that has a headers property, which is going to be a new HttpHeaders object. We of course need to import that. And then we need to define our headers. And in our case, we just want the authorization header, and the value is simply going to be the token. So we will get that from the AuthService once again. And there we go. We have our options, so that whenever we make our requests, we will simply just include this options object, and then the server will do the rest. So here for our addFeed, we will include options. Let's go ahead and just copy that and the comma before it. So fetchFeeds, we include that after the URL for fetchFeed, that is the same thing after the URL. For fetchItem, same thing. All of those are get requests. Now for removeFeeds, remember that we are making multiple requests here. So let's see. There's the Delete. There's the URL. And then we include that after the URL. And that's it. Let's go to the browser. Let's refresh or it'll probably refresh for us, so let's wait until it does so, and there we go. It is now sending our token with our requests so that we can actually do the things that we need to do. Now if we go ahead and clear that out, let's go to our development tools. Let's go to the application tab, and local storage and then the URL here. Let's clear that out. And if we refresh, then of course, this is not going to work. However, if we are not logged in, there's really no need for us to come to the feeds URL. And we can do that in a couple of different ways. What we will do in the next lesson is define a guard so that we can guard our routes. Which in our case is really going to be the feeds route. So that if we are not logged in, then we will not be able to access that route.


