
 Lessons: 16Length: 1.1 hours
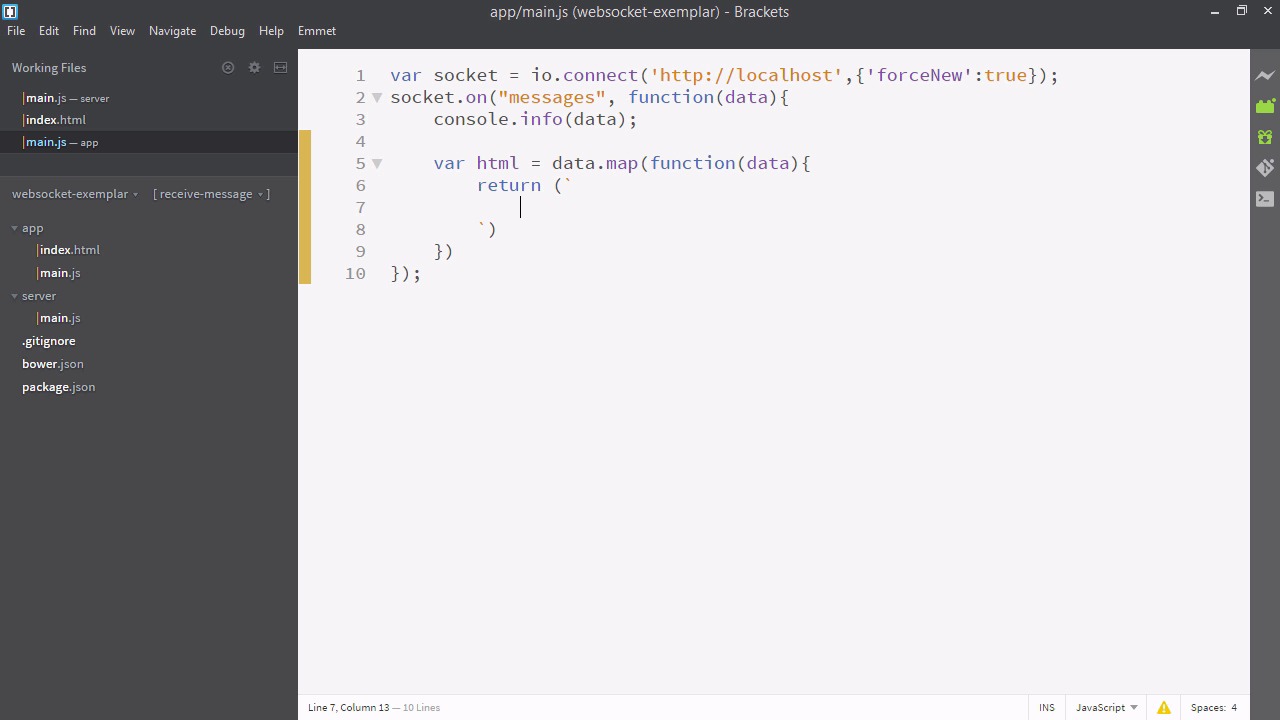
- Overview
- Transcript
3.2 Displaying Messages
In this lesson, we’ll use ES6 template strings to display the received messages.
Related Links
1.Introducing WebSockets and Socket.IO
1.1Introduction01:23
1.2What Are WebSockets?04:43
2.Scaffolding a Socket.IO Application
2.1Installing Node.js and App Dependencies02:59
2.2Creating an Express Server04:35
2.3Adding WebSockets to the Back-End03:00
2.4Connecting the Front-End Application to Socket.IO04:47
3.Building the Front-End Application
3.1Receiving Socket.IO Events03:20
3.2Displaying Messages06:22
3.3Creating Messages and Updating Collections07:50
3.4Displaying Likes02:31
3.5Providing Users With Unique Ids03:41
3.6Updating Like Counts05:03
3.7Propagating Like Counts to Connected Users04:12
4.Completing the Application
4.1Adding Moment.js04:13
4.2Adding Styles03:09
5.Conclusion
5.1Conclusion05:52
3.2 Displaying Messages
All right. In this video we'll be displaying the data that comes in from the back end. To begin let's go to our text editor. So here I am in server slash main.js. The first thing I'm going to do is add some more sophisticated messages. We just have those three strings here. So I'm actually just gonna copy in these messages I've prepared before hand. So I've just defined three of these messages and they have a number of fields a user ID, a message ID, a user name, a quintet object containing the text and the link, an array of user IDs who like that, and a time stamp. So take a moment to write in some messages, you can have any number, and they should have generally the same structure. We're going to be using all these fields throughout the course. If you like, you can just get started with user name and content and fill in the others as they become required. So with that set up, let's go down to the lower part of this file and change this array with the messages object. And if we check here in our application, here is our messages coming from the back end. That looks good. Next, let's go back to our text editor. And inside the index.html, here in the body, I'm just going to add a div with the I.D. message, messages. Now let's go to app/main.js. So, when it gets the data, we're actually going to write some HTML to put there. Normally you could use react or angular to do this, but we'll just write it up. It'll only take a minute. So we'll say ver html is equal to, and then we'll map our data. Now if this map function returns a string it will start to form a group of html. So return in brackets, and in these brackets we'll actually put two of these ticks. This makes a template string. So we can now write a string with breaking lines, so we'll write the HTML in here. So, we'll put a div, and give it a class of name. And, then, after that, we'll put a dollar sign, followed by an opening and closing curly brackets. This is a template, so we can write whatever the JavaScript is that we want right in these curly brackets. So I'll say data.username, And close this div. And lets also add a hyperlink. So here's just an a and it opens up the link of the content and it displays the text. So this isn't everything, but it's a good start. One mistake, though. Let's change d to data from this copy and pasted code. So, for the HTML to appear, we have to actually apply to the index page. So we'll say document and then we'll get element by Id. And whatever string we put in here it'll find the element with that matching Id. And you'll recall we have an element called messages. And we'll take its inner HTML property Which is whatever this property is reflects what gets displayed in the browser in the div. And we'll just make this directly equal to the HTML we just mapped out. All right, so let's take a look at our app. Very cool. We now see a list of our messages displayed. One little quirk, though, is adding these commas to the end. Why is that? Well, since this is an array, it's automatically going to join those arrays with commas. To fix that, let's go to the end of our map and add a .join(). So this will basically turn it into one long string and will separate the three elements just with an empty space, though we could use something else, like a line return. Okay. So our application is looking good. We're now displaying the data live as it comes in. All right, so in the next video, we're gonna be adding links. That's right, sending data back up to socket.io.


