
 Lessons: 16Length: 1.1 hours
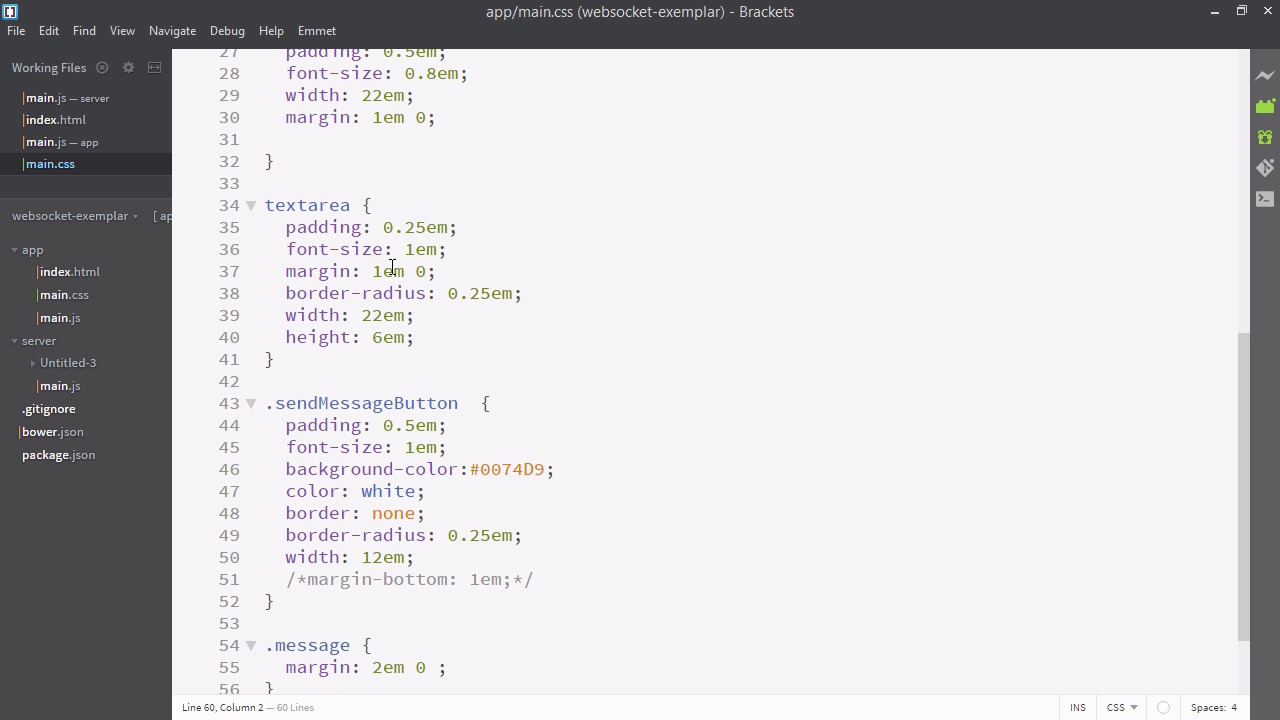
- Overview
- Transcript
4.2 Adding Styles
Finally, in this lesson, we’ll add styles to our app in order to make it presentable.
Related Links
1.Introducing WebSockets and Socket.IO
1.1Introduction01:23
1.2What Are WebSockets?04:43
2.Scaffolding a Socket.IO Application
2.1Installing Node.js and App Dependencies02:59
2.2Creating an Express Server04:35
2.3Adding WebSockets to the Back-End03:00
2.4Connecting the Front-End Application to Socket.IO04:47
3.Building the Front-End Application
3.1Receiving Socket.IO Events03:20
3.2Displaying Messages06:22
3.3Creating Messages and Updating Collections07:50
3.4Displaying Likes02:31
3.5Providing Users With Unique Ids03:41
3.6Updating Like Counts05:03
3.7Propagating Like Counts to Connected Users04:12
4.Completing the Application
4.1Adding Moment.js04:13
4.2Adding Styles03:09
5.Conclusion
5.1Conclusion05:52
4.2 Adding Styles
Alrighty, it is now the moment we've all been waiting for. The moment where we add style to our app, and turn it from just a prototype into an attractive piece. So let's go to our brackets. And we'll go to our index.html and first give your app a cool name. So I've just called mine the Ultimate Message Rater over 9000. Now that that important work is taken of, let's define a style tag. We're going to write a CSS file called main.css, so I'll just paste that in. In addition we're going to want a font from Google Fonts. I have chosen Saursans pro. I'll also copy the CSS in since we don't want to spend too much time on CSS. And we'll actually put that before main dot CSS. Okay, looking good, and now let's make main.css inside the app folder. And I'm just gonna paste the CSS in now and then talk about it very briefly. This is not a demonstration on CSS, so I'm not going to spend too much time. You can find the completed CSS in the completed project files. Or if you like, you can just write your own CSS to suit the style you'd like the app to look. Here it comes. [BLANK AUDIO] So we're just basically assigning some fonts, some sizes, some colors. That's about it. We're not doing anything with blocks or something fancy. Just making sure the app is big and clear. And I've made one mistake again. We can't have these link tags inside this script tag. That all looks a lot better now. Allright. So here is our finished app. You can see that the styles didn't turn out 100% like they looked in the opening video. Probably a missing tag. Nonetheless, I'm gonna say this is fine, because this is still a great looking app. It's fully functional. We can like stuff. We can add new messages. And this is all, of course, updated in every browser that every user is viewing it on. So we've come to the end of making the app. We've used web sockets to interconnect users in real time and let them share their interests. There's really nothing stopping you from taking this app, deploying it on something that supports web sockets like Horoku, and sharing it with all our friends. And letting you discuss in real time the matters that are interesting to you. This is the purpose of web sockets. So if you take that away from this talk, I'll be very happy because the purpose of this course was to empower you to use web sockets in the most appropriate way. So, if you've had any problems, just check out the final branch of the get repository, where you'll see this, and you can work backwards from there. In the next series of videos, we're just going to be wrapping up this exciting series of course videos.


