
 Lessons: 16Length: 1.1 hours
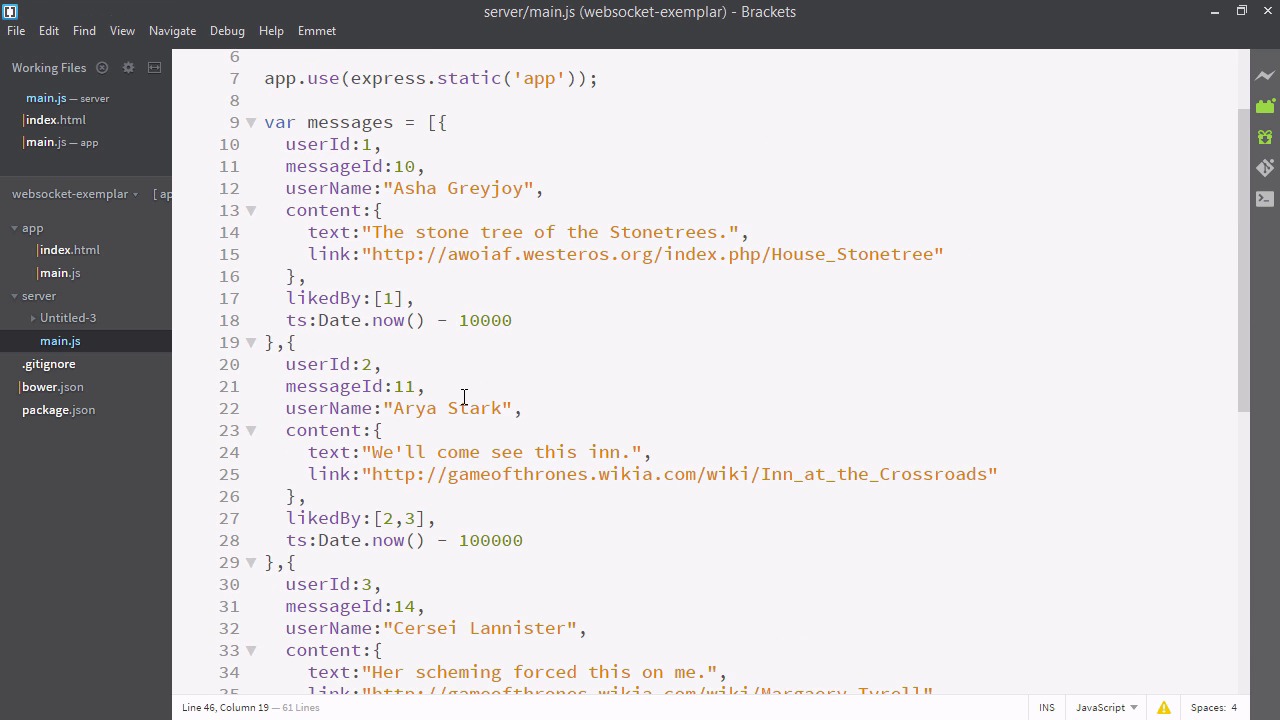
- Overview
- Transcript
4.1 Adding Moment.js
In order to nicely display the time that messages were added, we’ll use Moment.js.
Related Links
1.Introducing WebSockets and Socket.IO
1.1Introduction01:23
1.2What Are WebSockets?04:43
2.Scaffolding a Socket.IO Application
2.1Installing Node.js and App Dependencies02:59
2.2Creating an Express Server04:35
2.3Adding WebSockets to the Back-End03:00
2.4Connecting the Front-End Application to Socket.IO04:47
3.Building the Front-End Application
3.1Receiving Socket.IO Events03:20
3.2Displaying Messages06:22
3.3Creating Messages and Updating Collections07:50
3.4Displaying Likes02:31
3.5Providing Users With Unique Ids03:41
3.6Updating Like Counts05:03
3.7Propagating Like Counts to Connected Users04:12
4.Completing the Application
4.1Adding Moment.js04:13
4.2Adding Styles03:09
5.Conclusion
5.1Conclusion05:52
4.1 Adding Moment.js
So now our app is pretty much fully functional. We're just going to add a bit more functionality to make it really great. First, let's display when the message was actually written, so I'll open up brackets and let's go to our render function. And here above the input I'll add a div with a class of time. And we'll just template in data.timestamp. That looks good. All right, so here I am in my app. But, that's a little bit of a problem, because these time stamps just look like strings of integers. They're pretty hard for a human being to read. Let's patch this up. I'll go to brackets. And from there I'll pop open my git terminal. Now you want to make sure you have bower installed. And we're just going to bower install Moment. Don't forget to save. So Moment is a handy little library that allows us to display our dates and times a little bit nicer. So I'll go to index.html and here I'll just add a script tag referencing it. I'll just paste it in. So we're going to include bower_components/moment/moment.min.js. And we're going to actually need to include our bower components and what is served up by server. So we'll go to main.js, in our server directory. And here below, app.use static express. We're going to use another app use, and we're going to define bower components as bower components. Kind of simple, but with this pattern we can really kind of create and imagine our own custom front end that Express will put together for us. So be sure to restart your server. Now that we have Moment installed let's go back to our render function. And instead of data.ts, we'll wrap it in Moment. And then we'll invoke the from now method. Okay and here's our application. We can now see that the data is being represented in a readable and attractive format. One more thing, let's also sort the messages. So we'll go back to a render function and here between data and map, this is kind of tricky but let's squeeze a sort in there. And be sure to dot map off the dot sort. Sort takes two arguments and if what's returned by sort is less than one argument A goes first, and if its greater than one then argument B goes first. This is a loose interpretation sorting is complicated, but that means we can just return A.ts, minus b.ts. And this will put the items in the correct order. The order that they were added. And here you can see that the oldest items are on the top and the newest items are on the bottom. If you want to reverse this, you can just change the sorting order. Our app is now almost complete. All we need to do is add the styles, which we'll do in the next video.


