
 Lessons: 16Length: 1.1 hours
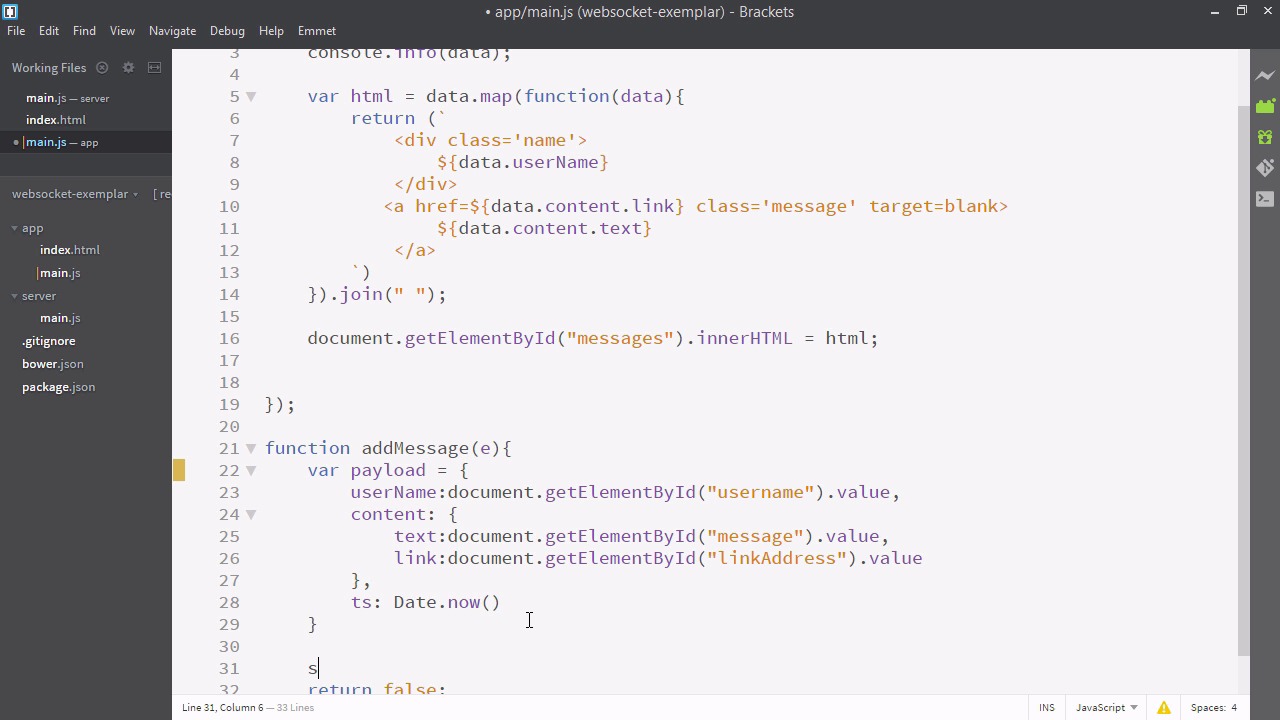
- Overview
- Transcript
3.3 Creating Messages and Updating Collections
In this lesson, we’ll use Socket.IO to send data that we create on the front-end to the back-end for processing.
Related Links
1.Introducing WebSockets and Socket.IO
1.1Introduction01:23
1.2What Are WebSockets?04:43
2.Scaffolding a Socket.IO Application
2.1Installing Node.js and App Dependencies02:59
2.2Creating an Express Server04:35
2.3Adding WebSockets to the Back-End03:00
2.4Connecting the Front-End Application to Socket.IO04:47
3.Building the Front-End Application
3.1Receiving Socket.IO Events03:20
3.2Displaying Messages06:22
3.3Creating Messages and Updating Collections07:50
3.4Displaying Likes02:31
3.5Providing Users With Unique Ids03:41
3.6Updating Like Counts05:03
3.7Propagating Like Counts to Connected Users04:12
4.Completing the Application
4.1Adding Moment.js04:13
4.2Adding Styles03:09
5.Conclusion
5.1Conclusion05:52
3.3 Creating Messages and Updating Collections
We'll now attempt to send data back up to the server. So, basically the way this is going to happen is we're just going to have a simple form on this page, which will allow us to create a new message. So, let's go to index.HTML. Now what I'm about to paste in is just an HTML form. And since this course is related to socket.io and not HTML forms, I'll just paste it and discuss what is going on inside briefly. We won't spend too much time on this form. Once I paste it, you can either type it in yourself or copy and paste it from the finished course files. All right so we have a form and when we submit this form it's going to call the method add message on itself, we haven't written that method yet. Inside the form is two inputs for username and link address and one for text area. Let's have a look at how this looks. So, there it is. It's just a simple form with a name, a link, a message, and a button to submit it. Of course, if we press this button, it'll give us an error, if we fill this in, nothing will happen. It will actually just refresh the page. Why? Because we haven't written the add message method yet. Let's do that now. So we'll go to main.js. Now let's add a function to the global scope called add message. First, we want to make it return false. That will stop the page from refreshing. Next, let's define a payload for the object that we want. We know we need to have a username, and in our form we know we have an element with the ID username. That's where the user is going to have input their name. So i'll just paste this in. So the username's gonna be equal to document.getElementById.username and then it's value. So this also needs a content object. So let's add that. And our content had a text, which is equal to the div with the ID messages value. I'll just paste in the last line and change it to messages. Message with one S and a link field. And we'll change this string to LinkAddress. And while we're here we'll just add a time stamp, and we'll make that equal to date.now. Oh, and just a little error here, this should be an equals sign. So now we have this payload we'll emit the payload through the already defined socket. We'll say socket.emit And we need a type for this message. So we'll just say new message. And we'll pass the payload. So that's good. One more thing. We now need to deal with this payload on the back end. So let's go to server/main.js. So here inside this on connection block, inside this block is going to refer only specifically to the socket that just connected, so we can listen to that socket for events. We can say socket.on, and remember that type is new message. Now this is going to be fun because this signature is actually the exact same one we use as on the front end. You only have to learn it once and you're writing socket.io both in your back end and your front end. It's very cool. So, we have our function, which takes data. And this is just gonna be very simple. We're not gonna do a lot of work here. We'll just push the new message to Messages. And we'll emit messages again. So let's copy the socket.emit messages and we'll have it again here. So our application is emitting the data first when it connects and then again whenever a new, a new message is added. One thing though, if you say socket.emit, notice socket was the argument passed in this function. It will only send it to this socket. With this functionality though, if you add a message to the message board, you probably want everyone else who's connected at the same time to be able to view it. So to do so you have to make it io.sockets.emit. This will essentially give this socket the ability to communicate with the other sockets through our back end. Well, that was quite a bit of work, so let's restart our server and have a look at if it works. All right, so here's our application. Let's try adding a new link. And there you have it. Our link is added to the page in real time. So you may ask, what's so cool about this? We spent 25 minutes and all we've done is made a list of items. Well, here I have my Chrome browser and my Firefox browser both opened to my app. Let's see what happens if I add a new message via Firefox. It appears in real time on the other page. Very cool. So this would be a bit more effective if it was over multiple computers, but that's exactly the kind of thing socket.io does. In the following videos, we're gonna be fleshing out our app and making it more full powered. But already, it should be very clear how powerful and easy to use socket.io is.


