

- Overview
- Transcript
1.2 What You Need
In this lesson, we'll talk about what you need to follow along in this course. I assume you have a PHP environment already set up, but I'll show you some options if you don't. We'll also install Laravel and create a project.
1.Introduction
1.1Introduction02:09
1.2What You Need07:42
2.The Static Site Project
2.1View and Routing Basics10:22
2.2Layouts and Sub-Views07:58
3.The Shoutboard Project
3.1Database Configuration and Migrations14:23
3.2Creating the Model09:38
3.3Creating Messages14:20
3.4Viewing Messages07:41
3.5Adding a Message Title With Migrations07:07
4.A Ticket System
4.1Introduction to Controllers09:02
4.2Setting Up Our Database16:09
4.3Viewing a List of Tickets08:51
4.4Viewing and Editing Individual Tickets13:08
4.5Adding Authentication10:01
4.6Linking Tickets With Users14:58
5.Conclusion
5.1Conclusion01:22
1.2 What You Need
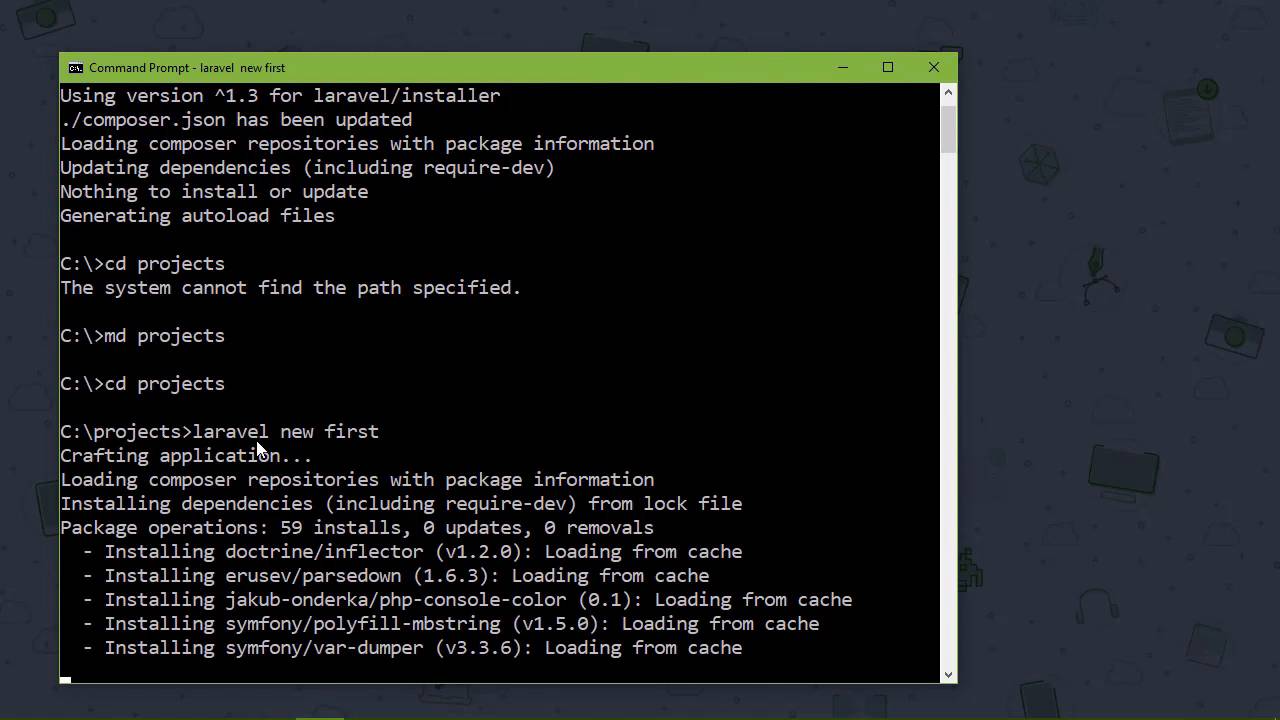
The first thing we need to do is get Layer Vell. That is the absolute first thing that we need to do and I'm going to assume that you already have a PHP environment set up. That could be on your machine, it could be on the virtual machine, it doesn't matter- as long as you have that set-up. If you don't, then you have a few options, the first is to install everything. So you would have to install PHP, My sequel, an HTTP server unless if you wanted to use the built in PHP development server and that would be an option. You can also use something like MAMP which is what I typically go for to quickly get up and running. It gives you everything that you need and it starts all of the services whenever you need them. A third option and it's actually the best is a virtual machine, if you keep your development environments separate from all of the other environments, then you are just better off. And there is an option called Laravel Homestead. This is a virtual machine and it has everything that you need for Laravel Development. So, it has PHP, My SQL, has just everything and this is what I recommend. Even if you have an environment already set up, it's a virtual machine. You spin it out whenever you need it, you shut it down when you don't and it's just a wonderful thing. So if you do a search for Laravel Homestead, there are the installation and set up instructions and you will be good to go. It gives you everything that you need for Laravel Development. Now, I am not using that because this, what you see on screen is actually running inside of a virtual machine and if Inception taught us anything is that you do not run a virtual machine inside of another virtual machine. So we are going to go through the steps of getting Laravel. Now, I already have a PHP environment set up, so the first thing we need to do, then, is get Composer, because that is how we are going to install Laravel. If you go to getcomposer.org /downloads, and that will take you to the page you're looking for could not be found. So if you just go to getcomposer.org then it'll take you to the Home screen. Just go to the Download page and then you'll follow the instructions for downloading for your operating system. And it's a very simple installation just be sure to follow whatever instructions that you are going to need for your operating system. And then from there, we just need to go to the command line and use Composer to install Laravel. So we say, composer global require and then laravel/installer. Now you don't technically need to install Laravel, you can create Laravel projects by using a different command. However, if you're going to be writing a lot of Laravel applications, well, it makes sense to install Laravel, because everything will be cached then. So any time you create a new project, which is what we are going to do, then all those files will be there on your machine ready to be used. So let's first of all create a folder that we're going to put all of our projects into. So I'm just going to call that projects, and then we're going to cd into it. Although you need to that [LAUGH] in the different order than what I did on screen And then we will say laravel new, and then whatever we want to call our project. We're going to say that this is first-project, or let's just call it first, that would be easier. And this is going to create a project, it will create a folder, and then it's going to put everything that our application needs into that folder. So our Laravel installation is going to be essentially copied and massaged if you will into our project. And you can see that we're going through and installing everything here, I say we are, the laravel Installers doing that for us. Now let's can take a few moments that's really just depends upon the speed of your machine. But give it a few moments and then we will be good to go and so now that we have a project let's cd into that folder. And we'll say php artisan serve and this is going to serve our application. You can see that we can go to local host at port 8,000 so let's just do that. Localhost8000 and we are going to see this, there's not much there but our application is working. So let's briefly look at our projects, let's load this up into my code editor. You can do the same thing on you're machine and the first thing I want to point out is this public folder. This is the root of our application and if you're going to run your application on an Azure web server like Apache or IIS. This public folder is what you want to set as your home or root directory. Because this index.php file is the main file of our application, all of the http requests that are sent to our application go through this index php file. So it's very important that the public folder is the document's root. There's also a config folder that has several files in it, each of them are named for individual components of our applications and this is where our configuration is specified. So, if we look at app.php this is going to contain all of the configuration options for our application. You can see that the first one is called APP_NAME. So, if we wanted to change the name our application, we could do that here. And each one of these options are documented. So, if you are not sure of what a particular option does, just read the documentation that's why it is there. So that's the config folder, if we would look at the app folder, this is where a lot of our applications code lives and for the most part this is where we are going to put our code. If you look in the Http folder there is these Controllers folder and whenever we create our controllers, they are going to go inside of this Controller's folder. If we wanted any type of custom Middleware, we could write that and add it to this Middleware folder. Now all middleware is a piece of code that processes something about a request and there's other folders. You can see console, exceptions, providers, there's just a lot of things here that we may or may not touch upon. This database folder is as it implies, related to the database, there's a folder called, migrations so whenever we start incorporating the database, then we will be doing some migrations and we will see some things being added to our migrations folder there. So we now have our environment setup, we installed composer and we used composer to install Laravel which we then used to create a project. But this project was just something that we're going to throw away because in the next lesson we're going to start our first practical project.


