

- Overview
- Transcript
2.2 Layouts and Sub-Views
Blade, Laravel's view engine, has several important features, such as layouts and sub-views. You'll learn about those in this lesson.
1.Introduction
1.1Introduction02:09
1.2What You Need07:42
2.The Static Site Project
2.1View and Routing Basics10:22
2.2Layouts and Sub-Views07:58
3.The Shoutboard Project
3.1Database Configuration and Migrations14:23
3.2Creating the Model09:38
3.3Creating Messages14:20
3.4Viewing Messages07:41
3.5Adding a Message Title With Migrations07:07
4.A Ticket System
4.1Introduction to Controllers09:02
4.2Setting Up Our Database16:09
4.3Viewing a List of Tickets08:51
4.4Viewing and Editing Individual Tickets13:08
4.5Adding Authentication10:01
4.6Linking Tickets With Users14:58
5.Conclusion
5.1Conclusion01:22
2.2 Layouts and Sub-Views
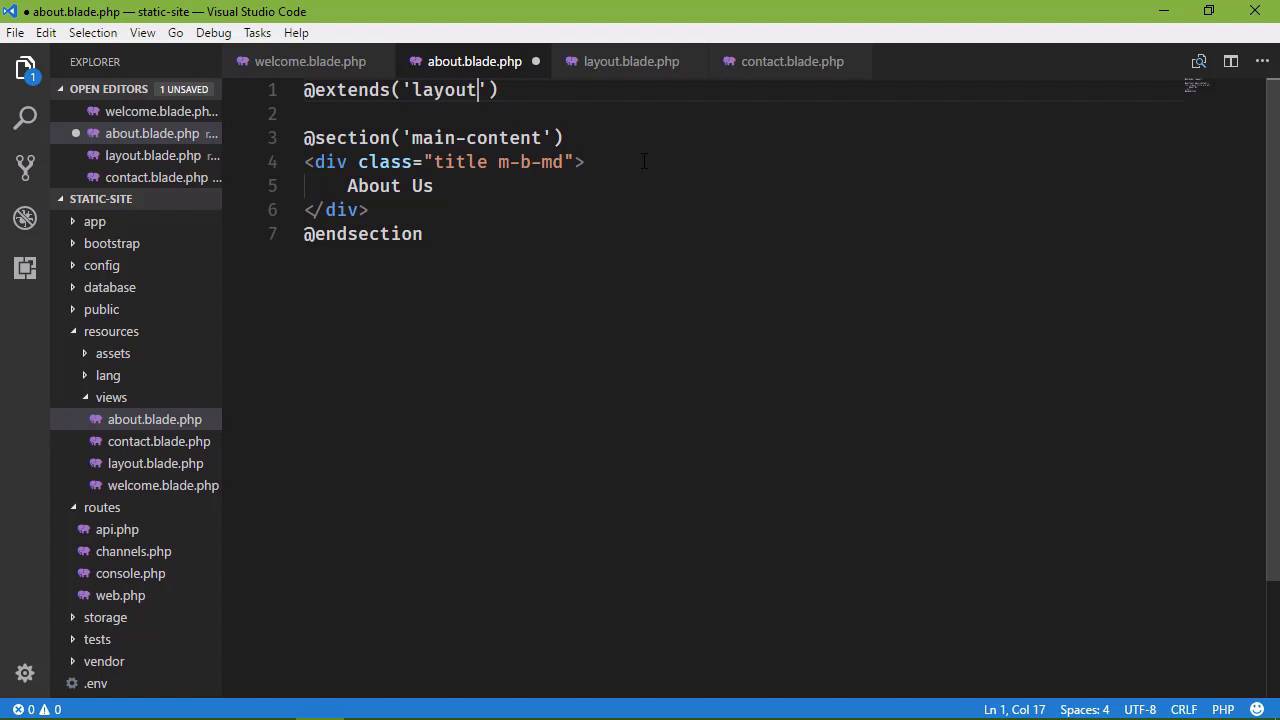
In the previous lesson, we created our first project. It is simply a site that is displaying static content, and we looked at two things. We looked at routes and then we looked at Views and we created two views. An about view and a contact view, and those views are based upon the welcome view that was given to us by the Laravel installation. Now, if you'll remember, one of the things we did is we tucked the content inside of the welcome view. And then we pasted it into the about and contact views, and then we made a few modifications to each one of these views. And it was rather tedious. We had to go to each individual file, make the same changes over and over again, and well there's got to be a better way, and there is. Because our time is better spent not repeating the same steps over and over and over again. And plus we are human. We will eventually screw something up. So the templating engine in Laravel is called Blade, thus the .blade.php. Any file that ends with .blade.php is considered an asset of the templating engine. And so, Blade has something called a layout page. It's where we can define the layout for our views. So basically, it would contain everything that we have inside of our view, except for the actual content itself. Instead we would have a placeholder, so that our actual views. Like the about view in this case, will then put the content wherever it is supposed to go. So inside of our about view, eventually we're going to have pretty much just this. There's going to be a few extra things. But this way the individual views are responsible solely for their content. The layout and any static assets like CSS, JavaScript and things like that are then the responsibility of our layout page. So let's create a layout page. I'm just going to create a new file. Now we can call this whatever we want. I'm going to call it layout, and it needs to end with .blade.php. And we're going to take the content of one of our views, it doesn't matter which one, just as long as we have all of that markup there. And we're going to paste that into our layout page. Now the content within our views is this div element with the class of title and m-b-md. So this is where we are going to specify our content. So this is where our placeholder is going to be. And our placeholder is defined by this @yield, like a function, and then we give this placeholder a name. So let's say that this is the main content. Any view that is going to use this layout page is going to have a section called main content. That is then going to be placed right here at this placeholder. So, let's go to our about view, because we already have this ready to go. We're going to define a section. So we say @section. And then we define the name of the section, that is main-content. And then we ended the section with @endsection. So anything in between the opening section and then the endsection is considered the content of the section. And it is going to be placed right here where we have our main content placeholder. But we're not done here. We have to tell our about view that we want to use our layout page. So for that we say, @extends. We are extending the layout, and we simply just use the name of our layout page. If we called it, my awesome master page, or something, then it would be, my-awesome-master-page, whatever it's called. This is simply the name of the layout page that we want to use. And so let's go ahead and make the same change to our other views. So, we will get rid of all of these other markup. And just define that section, let's add the endsection there. And that is our welcome view. And then, finally, we will do the same thing for contact. So, once again, we're going to go to each individual page, or each individual view rather, and make those changes. But this is the last time that we have to do that. So we will say @endsection there. And then let's fire up our server. So php artisan serve and we also need to fire up our web browser. So, let's open that up. We want to go to, well it's already here. So we have our contact view, we can see that we have the same results that we had in the previous lesson. And, if we click on anyone of these links, we see what we would expect to see. We have our content here, but the layout as a whole is still the same. So, we are now using a layout page. But, let´s do something else. We have our menu right here. And it would be cool if we moved this into a separate file so that if we needed to use this menu in any other layout page, then we could do that. Because you can have multiple layout pages. You don't have to just define one and then use that one. If you have other views within your application that needs a slightly modified layout page or something completely different. Then you can do that. You can create that layout page and then use that within your views. So we´re going to create another file. Let´s call this menu.blade.php. And we are going to take that markup and place that inside of this menu .blade.php. Let's go ahead and line this up so that everything is nice and neat. And then instead of saying @yield we're going to say @include('menu'). So whenever we go back to the browser and we refresh the page, once again we have the same results. So if we wanted to define another layout page, let's go ahead and do that, we'll have layout and then, layout 2. So let´s rename this, we need to get rid of that .1. And we´ll say, layout2.blade. And, let´s do this. We'll change some of the style so that there is some noticeable difference. Instead of the background color of white, let's have a background-color of something not white, but yet something not black, either. Let's go with #ccc, that might be horrible, but we're still going to see what that's going to look like. And then let's change one of our views. It doesn't matter which one. Since we have Contact already pulled up in the browser, we'll do that. So we are now using the second layout page for our Contact view, but all of our other views are using the original layout. Whenever we refresh this page, we have a slightly different background color. The content is the same, the menu is the same but we're able to use a different layout page for this view. But if we go to the home or about, we of course see the styling that we saw before. So Laravel comes with a built-in templating engine called Blade and have just scratched the surface. As to what we can do within our Blade views. But of course we will go over other aspects of the Blade engine as we go throughout this course.


