

- Overview
- Transcript
3.1 Database Configuration and Migrations
This application uses a database, so we need to create a database and configure our application to use it. We'll also design our table for storing messages using migrations.
1.Introduction
1.1Introduction02:09
1.2What You Need07:42
2.The Static Site Project
2.1View and Routing Basics10:22
2.2Layouts and Sub-Views07:58
3.The Shoutboard Project
3.1Database Configuration and Migrations14:23
3.2Creating the Model09:38
3.3Creating Messages14:20
3.4Viewing Messages07:41
3.5Adding a Message Title With Migrations07:07
4.A Ticket System
4.1Introduction to Controllers09:02
4.2Setting Up Our Database16:09
4.3Viewing a List of Tickets08:51
4.4Viewing and Editing Individual Tickets13:08
4.5Adding Authentication10:01
4.6Linking Tickets With Users14:58
5.Conclusion
5.1Conclusion01:22
3.1 Database Configuration and Migrations
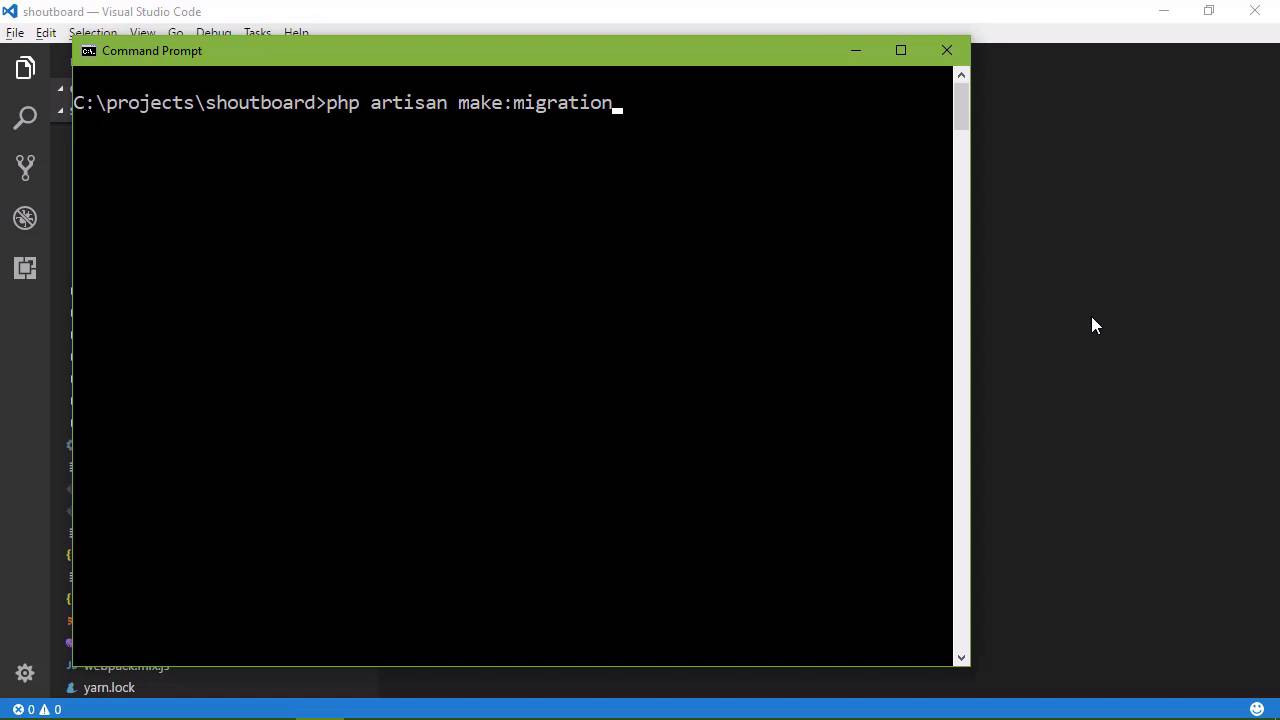
Let's get started with our next project. It's going to be a simple message board, where somebody can come and just leave a message. So it's not going to be something that we would want to release to the internet in general, although there are some websites and applications built around the whole idea around leaving anonymous messages. However, if you're working within a business environment, this could be something very useful. If you're writing web applications and want to add some type of collaboration component to them, then something like this would be useful. So let's create a new project, laravel new. Let's call this shoutboard, the idea being that this is a board for making shout outs or something. We could definitely call it something a lot better, but this is what we're going to go with. And of course, this is going to take a few moments, but when it's done, fire up your code editor. And we'll get started looking at what we need to do in order to set up our database. Now, you need a database now. I'm using MySQL and I suggest that you do the same. And you also need some way of managing.your MySQL database. That could be using the tool straight from MySQL or you could be using something like phpMyAdmin or something along those lines. There's a lot of tools available and if you're using MAMP, then it's really easy. If you just go to MAMP and then open start page, there is a link for phpMyAdmin under tools. So tools and then phpMyAdmin. I already have that open, so this is my database engine and of course, I have some databases I already created, some of these are system databases that were there from the MySQL installation. But what we want to do first of all is create a database because Laravel is not going to create that for us. So let's create a database for this application and let's just call it shoutboard and we'll just create that database. And now that we have that created, then we can use the tools that come with Laravel to create our database, but before we do that, there's a few things that we need to do. Let's first of all, go to the config folder. And inside of here we're going to see this database.php. Now, there's several things here. The first is this default and this is the setting for our application for the default connection to our database and you can see that there is this environment variable DB_CONNECTION and then there's a name, mysql. Now if you scroll on down, we see the actual connections. Now we have a name for those connections and then we have the information about that connection. So the name itself is just a name and in this particular file, they are just named according to the database engine. So, there's a SQLite, there's MySQL, there´s I think that´s I´m not sure, but you can see that there are several connections here. Now the name doesn´t mean anything, it´s just a name. So, if you had several different database connections for your application. And if you wanted to call one myslq1, then mysql2, that's fine, it's just a name. It's the actual data that goes along with that connection that's important. So we're using MySQL, so this information here is relevant to us. We could change the name, I'm not going to. But you can see that we are using the mysql driver, the host, and the ports, the database name, username, password, these are all settings that we need to set. Now as far as the host and ports, this is fine in my case because my server is on the local host. The port 3306 is standard so we're going to leave that alone, but as far as the database username and password, our database is the one that we just created, shoutboard then the username in my case is root, and the password is root. And there's really nothing else here that we need to change. But once again, if you want to read the comments, they are very descriptive as to what the settings are for, so I encourage you to do that. Okay, so we're done with those settings, now that is for our application itself. That is completely different from our environment, if we go down to this .env file, this is all of the settings for our environment. Now as far as the application is concerned, what we just did is fine. But as some of the commands that we are going to be running is going to rely upon the settings within this .env file. So the reason why we have this environment file is so that we can take our application and we can put it wherever we want to. And then we can make a modifications to this .env file and application will be set up for that environment. So in this case, the DB CONNECTION is going to be mysql, the host, the port is fine. The database's name wants to be in this case is going to be a shoutboard and then the username is root and the password is root. And so, we need to set the information into places. The first is the .env file, the second is inside of the database.php file inside of config. And once we have that set up, we can then start creating our database. Well, our database is created, we can start creating the tables within our database. Now if you are not familiar with databases, don't worry, you will be after this course because we are going to be dealing a lot with databases. But a database is really nothing more than a place that we store information and we have what are called tables inside of a database. Those tables just contain, well we call it an entity. An entity is a combination of several different types of information. So we want to store messages. And so, a message itself would be an entity and that entity would be made up of several things. The first would be the name of the person or the email of the person that left a message. The second would be the message itself. We might want to have some information about when that message was created or updated. We would also want an ID so that we could reference an individual message based upon that ID. So we want to create a table with all of this information. And we could do that manually, but we could also use artisan, now we have used artisan to fire up the development server. But artisan is much more useful than just that. It is the command line interface for Laravel and we can do a lot of things with it. One of those is creating all of the things that we need in order to interact with our database. It cannot create our database for us. But once we create our database, it can create everything else. So we are going to say php artisan and we are going to make what's called a migration. Now migrations are not as specific to Laravel, this is a concept that you will find with just development in general. Basically, in migration allows us to modify the database layout with the schema without having to do it manually. So that's any time that we write an application and we decide that we need to update the database layout or the schema, then we would do a migration so that the migration would do all that for us. And it makes it really easy for updating an application across multiple platforms or multiple installations or things like that, it's nice. So what we want to do is create a migration in this case that is going to create our message table. So we want to give this a name that is descriptive as to what this migration is for. And then so we are just going to say create_message_table and we press Enter. And Artisan is going to create that migration. Now this is going to create a PHP file. If we go to the database folder, then there is this migrations folder and there's all ready two migrations created whenever you create a Laravel project. The first is to create the user's table, the second is the password reset table. But then we can see this other file, create message table, and it gives us a class. There are two methods inside of this class. We have up, which is going to run the migration. So in this case, our code for creating our table and its layout is going to be inside of the up method. And then the down method would be for undoing everything that we did inside of the up method. Now there's an easier way of doing this and we can just delete this file. And if we go back to the command line, we're still going to say PHP artisan make migration, create message table. But then we can say --create and we could specify the name of the table that we want to create. In this case, we're going to call this messages. So now, this is going to create that same file, but it's going to automatically populate the up and the down methods. And there we go. So as far as the down method is concerned, that's all that we need. It's going to drop the messages table if it exists, that means it's going to delete it. But the up method needs some work because it is defining some columns within that table. The columns are the individual pieces of information. So the first is id, you can see that it's using a method called increments. This is what's called the primary key, it's how we are going to identify an individual message within this table. You always want a primary key, even if you don't think you need a primary key, you need one. So every table should have a primary key, that is what this first line does, and then the second line is going to create two columns. The first is for whenever a record is created, and then the second is for whenever it is updated, but we want some more things here. We want to store a person's name or an email address, so we're going to say table, we're going to call a method and then we want to specify the type of information that we want to store. In this case, we want to store a string that is going to have the person's email. And then we also need to set the link. And this is where things can become a little bit tricky. You don't want to specify a huge amount of space, but you also don't want to limit so that you're not being able to store everything. But in most cases, I don't think I've ever seen an email address that is longer than 50. So we're going to use 50 as our length for this. And then we also want to store the individual message. Now we could say string here, but instead we're going to say text because text is a large amount of text, this will allow anybody to type as much as I want well within some reason. And we're just going to call that message. So we have defined our database table layout. We just have a messages table that is going to store all of our messages. So now we want to tell Laravel that we want to perform this migration. We have gone through the process of setting it up. Now we just need Laravel to actually run that migration and create the table and all of that stuff and so in order to do that, we use artisan once again. We say php artisan migrate and whenever we press Enter, we're going to see an actual error here. Now the reason why we see this here is because I'm using an older version of MySQL and it says that there is a syntax error or access violation, specified key was too long, it says that the max key length is 767 bytes. And this is for the users table. So in this particular case, what we need to do is go to our app folder. We need to go to providers and then app service provider. And inside of this boot method, we want to say schema which we need to add a use statement. But we're going to say schema defaultStringLength(191). The reason why we saw that error is because there's been some changes to MySQL. And in my case, there was an incompatibility between the default string length. So I'm setting that to 191. You might not get that error and if you don't, that's fine. Don't worry about it. But in this case, we need to do something about it. So were going to say Illuminate/Support/Facades/Schema. And now whenever we go back and we say PHP artisan migrate, we see that the base table is already there, that's because of the migration that just ran. So if we go to shoutboard and we need to delete these two tables, because it created users. It created migration, but it didn't create anything else so we're just going to drop those. So we will tell it to drop and then once again, we will run that migration and then everything is going to be fine. You can see that it migrated for the user's table, the password, reset, and the message table. So if we look at that database again, we're going to see those tables. There's our messages table. If we click on that, then we our ID, we have our email, the message created that and updated that. And so now that we have our database setup, we need our model. Those are going to be the objects that we are going to be using within our application to actually refer to the data in our data store. And we will do that in the next lesson.


