

- Overview
- Transcript
2.3 Responding to Requests
As with any web app in any language or framework, you need to be able to respond to requests that come from web browsers. In this lesson, you'll learn the basics of how to handle incoming requests with Django. We'll define URL patterns, create a view, and then respond to a request with a standard Django construct, the HttpResponse.
1.Introduction
1.1Introduction00:53
1.2What You Need05:26
2.Django App Basics
2.1Install Django and Create a Project05:49
2.2Create an App and Run the Web Server05:15
2.3Responding to Requests06:29
2.4Creating Models07:21
3.Using a Database With Django
3.1Adding Models to the Database05:28
3.2Working With the Database06:29
3.3The Admin Portal04:59
4.Building Out the Lawn Care App
4.1Defining the App Routes07:08
4.2Rendering HTML07:27
4.3Rendering Data in an HTML Template05:08
4.4Displaying Available Fertilizers06:15
4.5Saving Time With the Render Function02:25
4.6Handling “Not Found” Exceptions06:26
4.7Using Forms and Saving to the Database09:05
4.8Adding Some Business Logic08:54
4.9Adding Some Style06:31
5.Conclusion
5.1Conclusion01:06
2.3 Responding to Requests
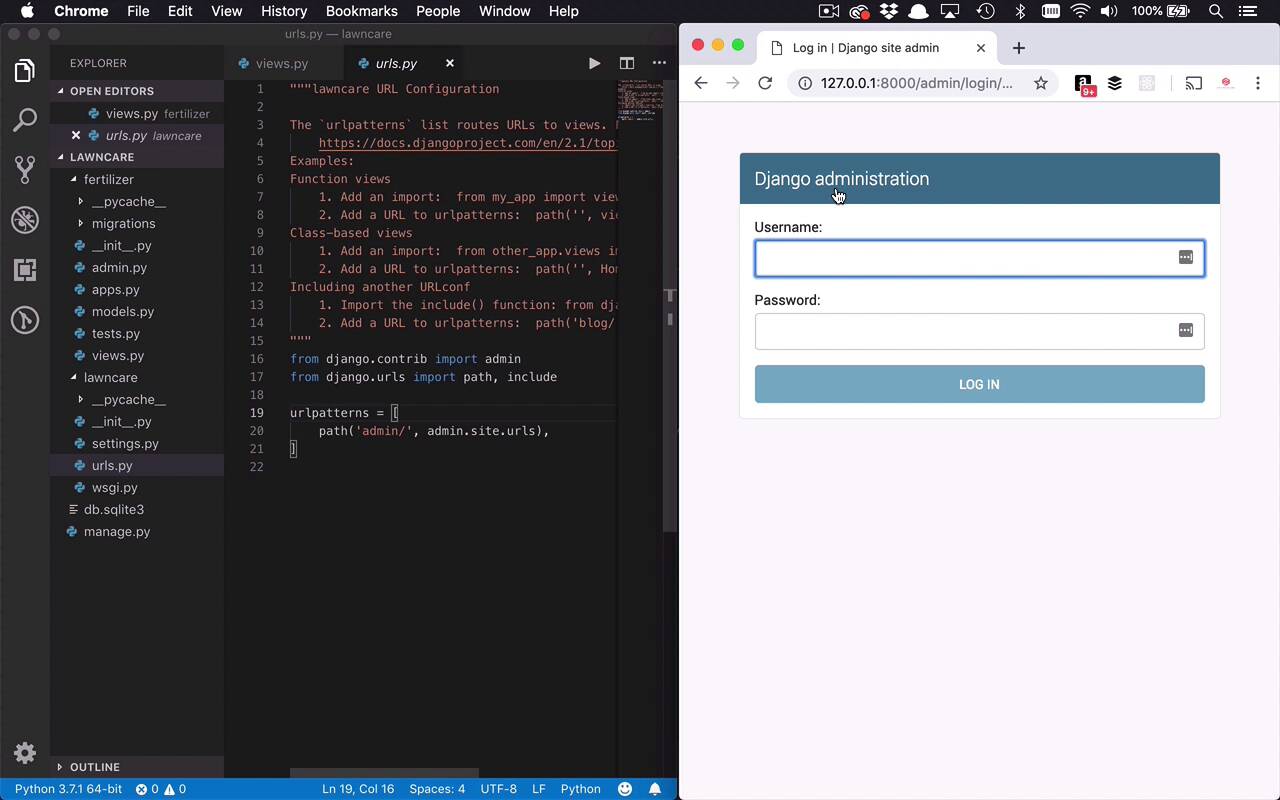
Now that we have our boilerplate app up and running let's go ahead and inject some of our own code albeit simplistic, into our application so we can display something to the end user. Now when it comes to building web applications, you're typically talking about a couple of steps. You have a request via a URL coming into your application. You have some sort of handler doing something with that request, and then you are returning a response to the end user. So now I'm going to show you how to do those steps within Django, but we're going to keep it fairly simplistic. So when it comes to our application here, our Fertilizer application, we have this views.py file. Now, really, what's going on in here is you're able to define some functions using Python to handle requests, and then do something with that request. So we're gonna keep this very simplistic, and I just wanna return kinda a hello world type thing to the end user. Or maybe just say hello and welcome to my fertilizer app. So how do we do that? Well, we want to return what's known as an HTTP response in Django. So let's go ahead and start by saying that from django.http, we want to import HttpResponse. And then within that is the ability for us to return a number of different things. But we wanna keep it very simple, like I said, and I wanna return just some text. So how do we do that? Well, we simply define a function and we give this function any name that we want. Now, I can sort of visualize how we're gonna use this by going to the main page of our application, which is also known as the index. So I'm simply gonna name this function index. But once again, you can name it anything that you want. One of the nice things about Django is that you also get access to the requests coming in, and being able to do things with a response going out. So the way that we get a hold of that is by naming a parameter that's coming into our function. In this case, I'll name it request, but once again, you can name it anything you want. And then what do we want to do? We want to give a response to the end user, and that's where we're gonna use this HttpResponse. So we're simply gonna say return HttpResponse, and we can give this some text. And I can say, Hello, welcome to my fertilizer app, just like that. All right, so that's our function. That's really all that we need to be able to give a response to the end users. So I'll go ahead and save that. So now we have this kind of processor, this index function, that can return a response, but how do we actually get paths and define things and get data into this function? It's gonna take a couple of small steps. So if you notice in the lawncare folder, you have a urls.py file. We're gonna kinda use this and cheat a little bit. So what this is doing is this is defining routes from the outside world into our application and then telling those requests so those routes coming into our application where to go and where to get processed. So right now this is saying that there's a single path called admin. And we did mention that before and we'll talk about the admin section later on. But when a request comes into the admin section, we want to go to the admin.site.urls file and that's created for us behind the scenes. But you'll notice if I go to my application and I say slash admin, you're gonna go to another section of the application and that's being defined by this urlpatterns with this path function. So I wanna do something similar to get things into my application. But for now, there's really no place to send them into my application. So I have to create that section. So I'm gonna go ahead and copy this because we're gonna duplicate something very similar in our fertilizer folder. So let's create a new file in there, called urls.py. And then I'm going to paste this in here. So within the my fertilizer app, I want to define a route or a path and I want to define the handler to where that's gonna get handled. So let's go ahead in here and we're going to define an empty path, which means basically the root of this application. Now what do we want to handle this? Well, we've already created this views.py with an index function in here, which is going to be our handler. So I'm going to import that, so I'll say from the current directory, I want to import views, I'll go ahead and save that. And now I want to say when somebody goes to that default path, I want to give or pass it over to the views.index function. And then I can also give this a name and the name is not gonna be very important right now, but later on, it will, and we're just gonna call this index. So now I'll go ahead and save them. All right, we're getting a little bit closer, now we have this route defined within our fertilizer application. But the larger project, the lawncare project doesn't know anything about this urls file yet, so I need to define the path from the outside world into my application to get it up and running. So the way that we're gonna do that is we're gonna go back into the urls.py file, and we're gonna define another path. We're gonna say path and we can give this a name and now, normally you would give this a name of your application or whatever app you're trying to funnel these requests into. Now you can leave this empty and have it be the default and that will be fine, but I like to give these names. So this is gonna be my fertilizer application, cuz remember, I could create other applications in my project and it could be watering or mowing or whatever I want it to be. So I wanna keep these things logically separated. So I have the fert path, then I want to say where I want these requests to go, and I'm gonna use the include function and I'm gonna say, I want to include everything in the fertilizer.urls path. And that's simply going to say I want to go into the fertilizer.urls file right here and include all of those paths here. So I'll go ahead and save them. So now that I've made these changes, I should have a new section of my application. And the way that I can test that out is by coming over here to my URL. And saying slash fert because that's what I defined within my URLs file. And if I were to hit enter, you're gonna see now, that I made it all the way into my application. And now we see Hello, welcome to my fertilizer app. So that's the basic way that you're going to kind of open up your application to requests from the outside world, define function handlers within your app and then do something and provide an http response. Now we're gonna spend the rest of the course now defining additional functionality and adding a little bit more creative things and a little bit more intricate things to show to the end user. But this is the basic process.


