


- Overview
- Transcript
2.1 Install Django and Create a Project
Before you can create a Django app, you need to install Django and create a project. In this lesson, we'll first install Django using pip. From there you will create your first Django project. Think of a project as a workspace that will contain your Django apps.
1.Introduction
1.1Introduction00:53
1.2What You Need05:26
2.Django App Basics
2.1Install Django and Create a Project05:49
2.2Create an App and Run the Web Server05:15
2.3Responding to Requests06:29
2.4Creating Models07:21
3.Using a Database With Django
3.1Adding Models to the Database05:28
3.2Working With the Database06:29
3.3The Admin Portal04:59
4.Building Out the Lawn Care App
4.1Defining the App Routes07:08
4.2Rendering HTML07:27
4.3Rendering Data in an HTML Template05:08
4.4Displaying Available Fertilizers06:15
4.5Saving Time With the Render Function02:25
4.6Handling “Not Found” Exceptions06:26
4.7Using Forms and Saving to the Database09:05
4.8Adding Some Business Logic08:54
4.9Adding Some Style06:31
5.Conclusion
5.1Conclusion01:06
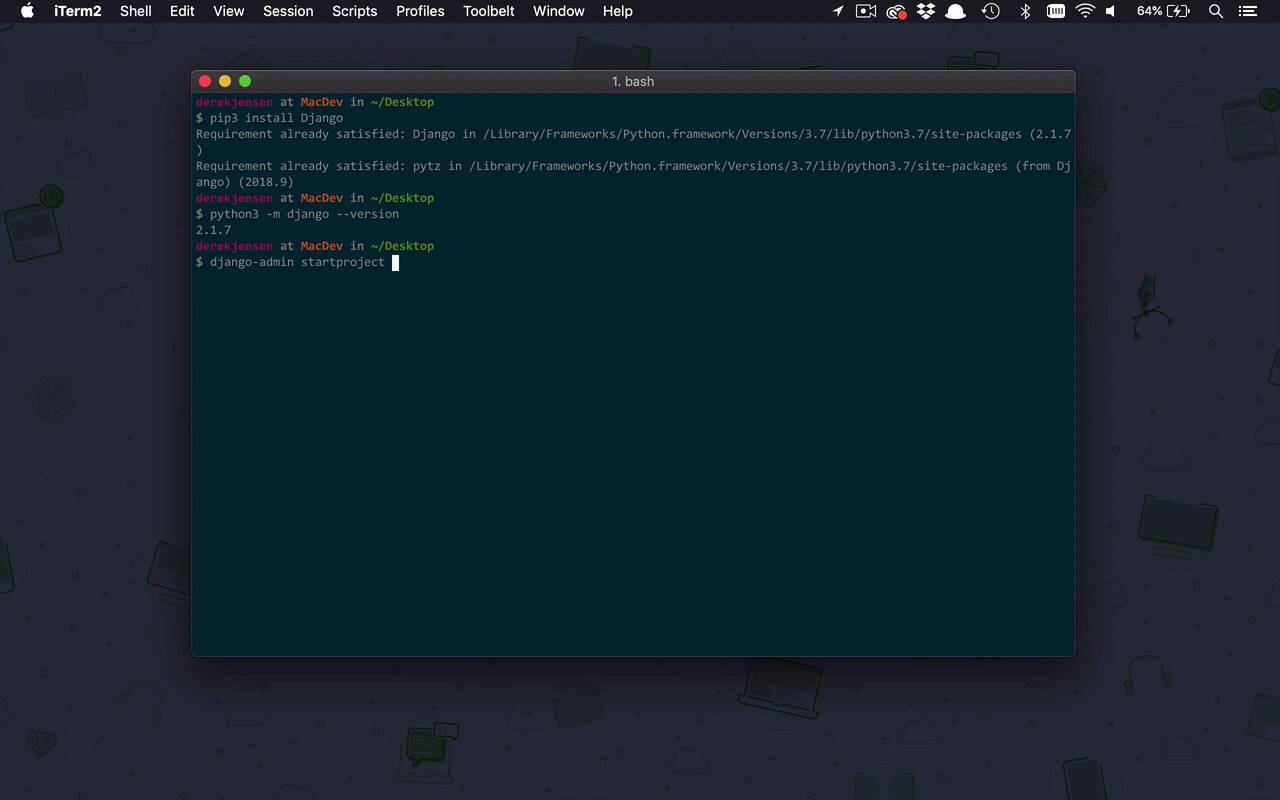
2.1 Install Django and Create a Project
The next thing that we wanna do is actually install Django on our development machine, and it's actually quite simple. So now that we have Python, as well as PIP installed, we're gonna go ahead and use that to install Django, and it's actually quite simple. All we're going to do is use pip. Now remember, if you have only installed Python 3 with PIP on your machine, then you'll be able to use the PIP command. But since I am using two versions of Python side by side, Python 2 and Python 3, I'm gonna use the pip3 command. But you may just be using the pip command, and then I'm going to use the command install and I want to install Django. So go ahead and hit Enter, and it's gonna go out there, and it's going to get the latest and greatest version of Django. As you can see here, mine is already installed. So it says that the requirement is already satisfied. So I don't have to do any more. But if you have never installed this before, it'll go through the process of downloading everything and installing it and getting it ready to go. Now at this point, once you have everything installed, you can also verify that you have it installed by using your Python command. But once again, in my case, it's python3 -m. I want to look for Django. And I wanna get the version of Django. And what this is going to do is it's going to verify the version of the install django package that you have on your machine. And in my case, I have the latest and greatest version, 2.1.7. So now we have Django installed, and we have verified the version, now let's go ahead and create our first project. Now, it's important for us to talk a little bit about terminology here. When we're dealing with Django, we're gonna be dealing with two different types of terms here. We're gonna talk about projects and we're gonna talk about apps. Now in this case, a project is really just an overall encompassing workspace almost, that we can then create apps inside of one or many apps. So in this case, let's go ahead and create a project. And the way that we're gonna do that is once we've installed Django, we also have installed a utility called the Django admin. So this case, I can say django -admin, I want to start a project, or startproject, that's gonna be the command, and then you can give it a name. So in this case, as you've probably seen a little bit in the introductory video, I'm very into lawn care these days. And I like to track the different things that I do to my lawn. So whether that's mow it, or water, it or apply fertilizer, that's kind of where we're going with this particular application. But I highly recommend you find something that you're interested in and build an app around that. That will not only help you to stay interested in the project because it's something that you're interested in. But it will also help you to stay with it so you can learn the fundamentals of Django or whatever sort of programming language, or framework, or whatever, that you're using. So like I said, in this case, we're dealing with lawn care is kind of the general premise under which I'm building this application, so I'm gonna call this lawncare. So I'm gonna go ahead and hit Enter. And it's gonna go ahead and create that application, or that project, excuse me, wherever I was, so I was at my desktop. So as you can see, it created the lawncare project here for me. And let's go ahead and change directory, let's go ahead into that project, and let's go ahead and list the files. As you can see, there's not a whole lot in here right now, but there is a folder, there's a directory called lawncare, and a manage.py. So let's go ahead and just very quickly open up our code editor. So in this case, I'm using code and I'm going to use period to say I want to open up the current directory within my code editor. So this should open up Visual Studio Code, as you can see right here. And if I were to go into my project here, you're gonna see that I have my lawncare directory, the one that was created on my desktop. And then I also have an internal lawncare directory, as well as manage.py. Now we're gonna talk about and play around with this a lot more throughout the course. But just as a very quick introduction, manage.py is actually utility file that we're gonna be using quite a bit to do different things to our application. So I'm just gonna leave it at that, and I'm gonna show you some cool things that we're gonna use that for as we continue to build out our application. The init.py file is actually just a file that kind of creates this concept of a package so that we can reference everything within the lawncare folder, all the modules or files inside throughout our application. So it's really just kind of a placeholder to do that type of thing, so don't really worry about that one too much. settings.py is obviously gonna be were all the settings of our project live. And we will come in here and make a few modifications here and there, so not a big deal, but we'll talk about that later. urls is gonna become important where we can define the urls within our application. So really, when you're building web applications, all you're really doing are two to three main things. You need to define particular URLs or routes within your application. You need to be able to receive and process requests, and then return a response. So that's really all it is, and the entry point to a lot of that is simply URLs or pads into our application. So this is where we're gonna define a lot of that later on. So we'll see how that's gonna work. And then the wsgi, you're really not gonna have to worry about that too much as we're not gonna be focusing on that method of hosting web apps in this particular course. So really, that's all you have to worry about. So now you have installed Django on your machine, you have a little bit of an introduction to the Django admin utility, and we'll see that again, coming soon. And then you've created your first project, and now you've seen some of the basic files that are in there to start. So now, we're ready to start building our actual app.


