


- Overview
- Transcript
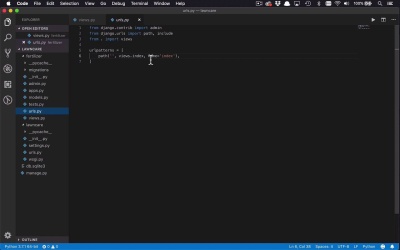
4.1 Defining the App Routes
In this lesson, you'll finish creating all the routes that are going to be used in this app. You already know the basics from a previous lesson, but it's time to create the rest of the app's routes.
1.Introduction
1.1Introduction00:53
1.2What You Need05:26
2.Django App Basics
2.1Install Django and Create a Project05:49
2.2Create an App and Run the Web Server05:15
2.3Responding to Requests06:29
2.4Creating Models07:21
3.Using a Database With Django
3.1Adding Models to the Database05:28
3.2Working With the Database06:29
3.3The Admin Portal04:59
4.Building Out the Lawn Care App
4.1Defining the App Routes07:08
4.2Rendering HTML07:27
4.3Rendering Data in an HTML Template05:08
4.4Displaying Available Fertilizers06:15
4.5Saving Time With the Render Function02:25
4.6Handling “Not Found” Exceptions06:26
4.7Using Forms and Saving to the Database09:05
4.8Adding Some Business Logic08:54
4.9Adding Some Style06:31
5.Conclusion
5.1Conclusion01:06
4.1 Defining the App Routes
The next thing that I wanna do is, I wanna start to define all of the views that we are gonna have within our application, so that we can actually do things with them later. And I'm gonna prove to you that you can really name these anything you want, it's not really gonna matter. So we're gonna have an index, we're gonna keep that one. But we're gonna change the text here, just so we can kinda put some placeholders for what these particular views are actually going to do. So in index, what I wanna do is, I want to show all the applied fertilizers. So I'm gonna show all the different applications of a particular fertilizer that I've done. So it'll be a nice little list there, so that will be helpful. Another thing that will be helpful, too, is if we have another function that's gonna list all the fertilizers, so I can say fertilizers(request). And in this case, I'm gonna return, once again, an HttpResponse, and I'm gonna say, list all available fertilizers. So I can go and see all the fertilizers that I've added in, via that an admin portal. So I can see what's available, and then ultimately apply them when I want to. Then I'm gonna wanna see the detail of a particular fertilizer. So the way I view this in my mind is, I can go to a fertilizer's page, I can see all the available fertilizers. I can click on one, and take me to a separate detail page that's gonna show me the detail about that fertilizer, all the information about it, and then give me a button to be able to apply it. So let's go ahead and say that this is gonna be a fertilizer, and we'll call it detail. You can call it anything you want, it doesn't really matter. And within here I'm gonna say, return HttpResponse, and this is gonna be, show the fertilizer detail. And then from there, I'm gonna need one more view. And really, the view is not really gonna be much of a display, but it's gonna be more of a handler. So I wanna be able to handle a certain application of a fertilizer. So we're gonna call this apply, so I wanna apply a particular fertilizer. So right now, there's really not a whole lot to these. So this is gonna be apply fertilizer, okay, so there's not really a lot to these right now. And as you're probably gonna notice, right now, the index, it's gonna show a list, so I don't really need any input. The fertilizers is really just gonna show a list as well, I don't really need any inputs. But these last two, I am gonna need a little bit of input. So if I wanna see the detail about a particular fertilizer, I need to know which fertilizer I'm looking at. And we usually do that with a unique identifier or an ID. So I can also put in here, let's just say fert_id, so I can pass an additional parameter in. And I can do the same for apply, if I want to apply a particular fertilizer, fert_id. So now I have these fertilizer IDs, I can show this information in here as well. So show the fertilizer detail of, and I'll just go ahead and put in a placeholder there. And I can go ahead and say, I want to put in there the fert_id, so I can just do a little bit of string formatting. And the same here, I wanna apply fertilizer. And I'll go ahead and put that in there as well, with that fert_id. So you're gonna see in just a minute or two, how we can also handle these parameters like that. So the first thing I wanna do is, I want to make another chain so that I can start to expose these different views to the end user. Now how did we do that before, well, we did that by creating this urls.py file. So we kind of have this root with nothing there, that's pointing to index, which is good, so now I want to add to this. I wanna say path, and this time, I want to say fertilizers, so I can go to a path called /fertilizers. And in this case, I can say I wanna go to views.fertilizer. So this is where it comes into play, where you can name these views anything you want. The function names themselves are not important. As long as you've mapped the particular path to that fertilizer, or whatever that function is, you can name it whatever you want. So I'll say the name here is going be fertilizers, and now we have two other ones. So we're gonna create two more paths, so let's go ahead and copy these. Say copy, and we'll paste two more down here. So in this case, there's gonna be a little bit of a change. So remember, the other views that I have are to look at the detail of a particular fertilizer, and to apply a particular fertilizer. But I have this fert_id parameter, how do I handle that? Well, I'm simply gonna come back in here to my paths, and now I can modify this a little bit. So if I wanna look at a specific one, I'm gonna have a slash in here, and then I wanna put in a parameter. I wanna put in a parameter that's gonna define that ID, so that I can get access to it in my route. And the way that I'm gonna do that is by specifying what the type of that parameter is, it's gonna be an integer. And then I'm gonna give it the name, whatever I want it to be called. In this case, it's gonna be fert_id. And the reason that I'm naming it that, just so that it matches this parameter here in this detail function. So once I've done that, I can now say, I want this to point to the detail function and I'm gonna call this fertilizer. So I'm gonna get a single Instance of a fertilizer here, that's gonna be the name of that endpoint. And then if I wanna apply one, I'm gonna do the same thing, I'll do a //apply. So that's gonna be the path to that particular application of a fertilizer. So once again here, I'm gonna call the Apply function, and I'm simply gonna name this apply, just like that. So now I have four paths into my app. One to get the index, which is gonna be the list of all of the applications of the fertilizers on my lawn. Then I can go to the fertilizers path, which will give me a list of all the available fertilizers. I can look at the detail of a specific fertilizer, and then I can apply one using the last path. So go ahead and save all of those changes. And if we've done everything correctly, we can come back into our application here. Right now, I'm still in the admin portal, let's go ahead and get out of there, let's go back to the root, excuse me. We'll go to fert, /fert, and once again, I can see now that I see, show all my applied fertilizers, which is good. So then I can go to fertilizers, and I'm gonna list all the available fertilizers. And now let's say, for instance, I wanted to look at a specific one, with an ID of 1. I can see now that I'm showing the detail of fertilizer number 1, because I'm getting access to that path parameter. And I could put anything I wanted here right now, it doesn't have to map to anything, because I'm simply displaying the data. And then if I decide I want to apply that, I'll simply say apply. And now I'm gonna apply fertilizer 2. So now, I have defined all of my endpoints within my application that I wanna be able to use. Now, there's not really a whole lot going on in here. And over the rest of the course, I'm gonna start to show you how we handle the input coming in. How we start to create some templates, and actually display some data to the end user.


