
 Lessons: 14Length: 2.4 hours
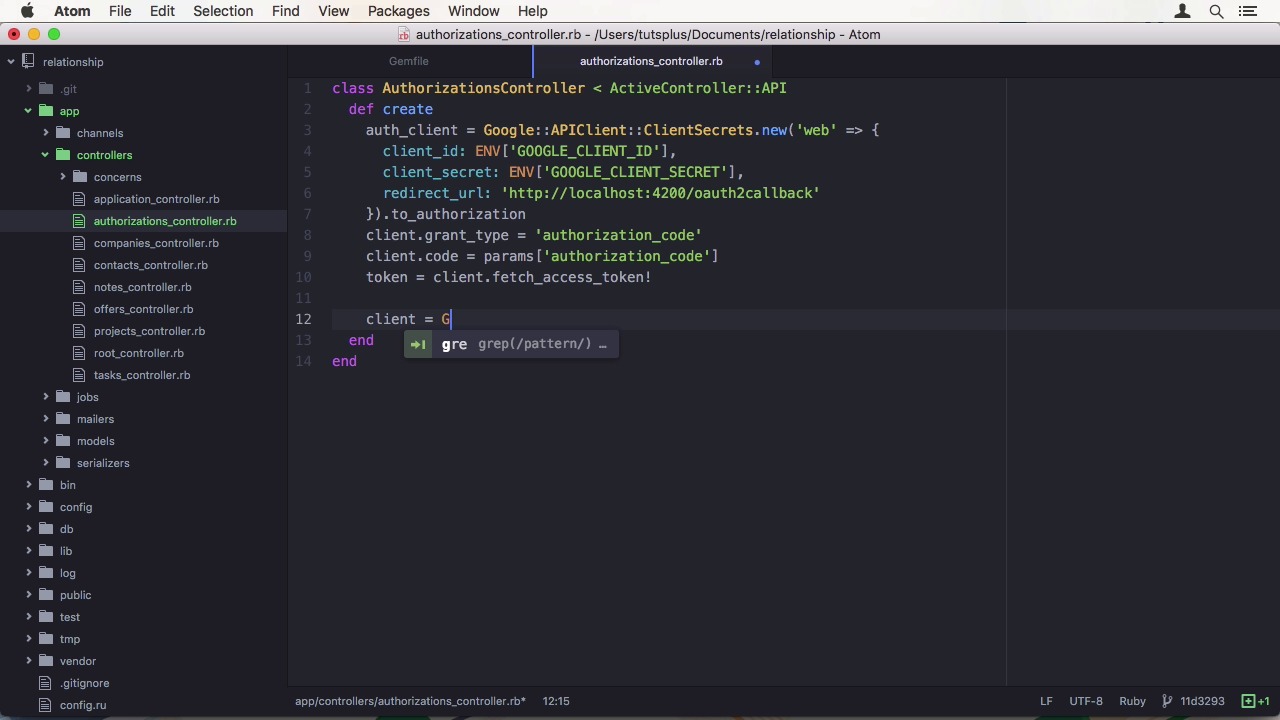
- Overview
- Transcript
2.5 Secure API Access
Without proper authentication, anyone can read or edit your data. In this lesson we’ll use the Google OAuth2 API to properly authenticate users before giving them access to the API.
Related Links
1.Introduction
1.1Introduction01:05
1.2Project Overview03:23
2.Rails Back-End
2.1Generate and Prepare the Application09:19
2.2Create Companies and Contacts10:35
2.3Add Projects, Tasks, and Offers14:47
2.4Track Customer Interaction12:01
2.5Secure API Access07:46
3.Ember Front-End
3.1Generate and Prepare the Ember-CLI Application08:34
3.2Application Layout and Authentication15:36
3.3Manage Companies and Contacts15:54
3.4Manage Projects, Tasks, and Offers19:18
3.5Add Customer Interaction14:11
4.Deployment
4.1Deploy to Heroku and Amazon S308:28
5.Conclusion
5.1Conclusion03:02
2.5 Secure API Access
Hi and welcome back to create a Full-Stack Rails and Ember App. In the last lesson, we added our last bit of the data model. Customer interaction. In this lesson, we want to secure our API by adding authentication of the Google OAuth 2 API. Google provides a document that takes you through the steps of obtaining credentials for your application. I will follow those right now for our project. First you need to sign into the developer console. You will be taken to the project overview page if you have no projects yet. Here you can create a project and all you need is a name. It doesn't have to be unique either. Google will create a unique ID for you. You will then be taken to the project dashboard. There, you want to head to enable and manage APIs. And on the left, choose Credentials. Before we can do anything with OAuth, we need to set up the OAuth consent screen. Which just requires you to choose an email address, which might get shown to the user on some platforms, as well as a product name. Of course, you can provide a bunch of additional information here. After saving, we can add a new API client key for our web application. I'm going to call this front end. Then you can set either authorized JavaScript front ends or authorized redirect URIs. For our authentication flow, we need a redirect URI. Which is going to be http://localhost:4200/oauth2callback. This is the path from our Ember front end. After we submit, we get the client ID and client secret. Now we have to add the Google API client gem to our gem file. We have to use 0.9.34 as the version here since we need some new APIs. After installing the gems with Bundler, we can start writing our controller. I'm going to add an authorizations controller that takes care of taking a code from the front end and requesting a token from the Google service. In the controller, you just need to create method to generate our token. First, we need to set up an auth client, which is going to be created from Google API client, client secrets. We use the web flow and we need to set the client id and client secret, which I saved in environment variables. As well as a redirect URI, which we don't really need but the API requires it. We then pass the to_authorization to a proper auth client. We can then set the grant type to authorization code. And set the code we received from the front end. Now we are ready to fetch our token from Google. Now that we have the token, we can fetch some additional information about the user from the OAuth 2 API. Therefore, we have to create a client for the OAuth 2 V2 API service. We need to set the auth client on it. And then we can fetch the user info from the API. We now have all the information we need. So what are we going to do with it? Well, we need a way to store the token. And maybe a reference to the user in the database. Let's create an auth token model. I'm going to keep this simple by just storing the email and the token. After migrating the database, all that's left to do is to set the auth_token and return the data to the front end. To do that, we can simply query for the email address on the AuthToken model. And then use first or create. Then we're going to update the token on the record. And return the email as well as to the token back to DMWeb. Note that this way of doing it doesn't allow us to have multiple clients logging in from multiple different devices. But for our purposes, it's good enough. In our application controller, we need a method to validate the authorization header before allowing the request. Let's add a before action to do so. In this private method, authorize_request, we extract the token from the authorization header of the regex pattern. The way I do it, it automatically puts the token into a variable called Bearer. Then we have to query the database for this token. And if we don't find the token in the database, we render an error. Otherwise we continue. Of course, this is not a very elaborate method to secure your API. You can expand it to store more data about the user. Create your own sign up mechanism. Or track the user's actions. But in our project, we don't need much more than we have. Let's try it out in our HTTP client after starting the Rails server. When we run, for instance, a get all contact request, we get a 401 unauthorized error. Great, our API doesn't allow unauthenticated access anymore. For demo purposes, I'm going to open up the Rails console for a moment and manually create an auth token. The value of the token doesn't matter. So I use something memorable. Now I have to add to the authorization header to the request with the Bearer prefix. When we run this request, we get the contacts back. Of course, this was just easier Rails site, but we will do the authentication, DMWeb, as one of the first things. This concludes the Rails part of this course. In the next lesson, we will start by generating our Ember CLI application. See you there.


