
 Lessons: 12Length: 1.4 hours
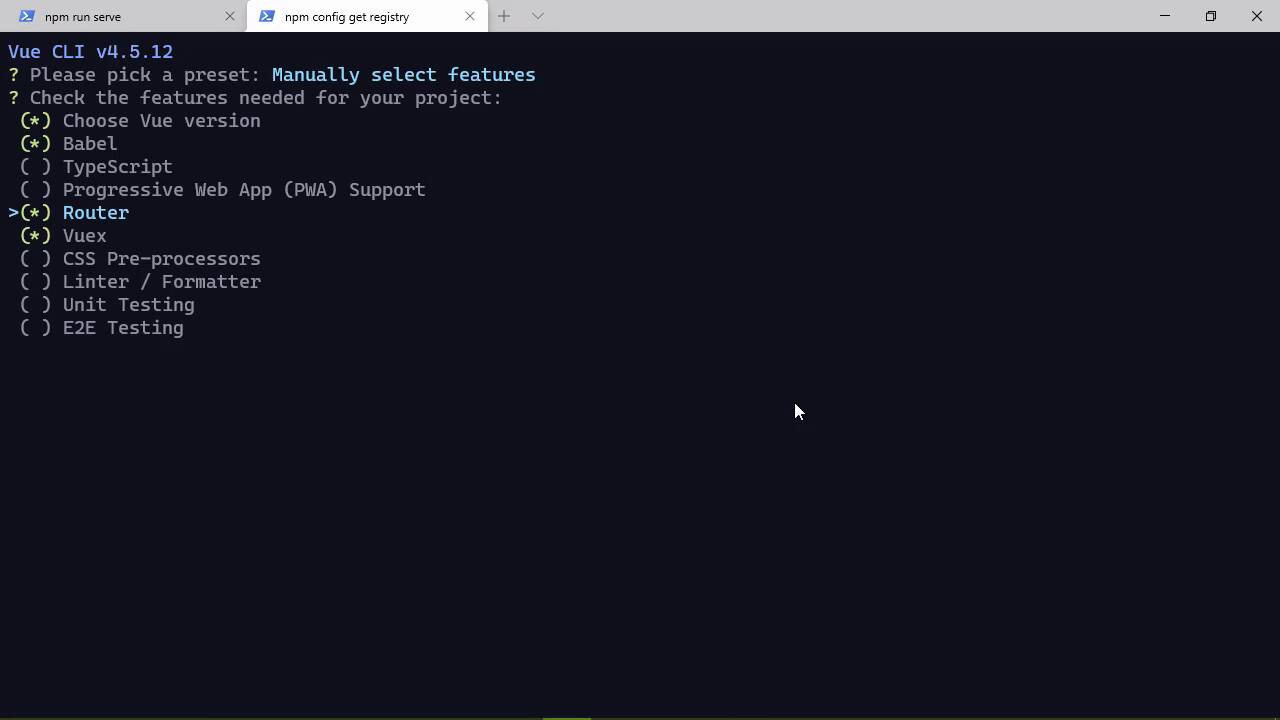
- Overview
- Transcript
2.1 Setting Up the Project
We need to set up our project, and we'll use the Vue CLI to scaffold our application—including Vuex.
1.Introduction
1.1Introduction01:25
2.Using Vuex
2.1Setting Up the Project05:54
2.2Displaying a List07:03
2.3Adding State04:57
2.4Committing and Tracking Changes09:03
2.5Using Getters to Compute Values08:44
2.6Dispatching Actions to Perform Asynchronous Work06:53
2.7Using Mapping Functions08:14
3.Advanced Vuex
3.1Using Vuex With the Composition API08:17
3.2Getter Methods09:04
3.3Don't Track Everything and Make Your Actions Chainable13:21
4.Conclusion
4.1Conclusion00:57
2.1 Setting Up the Project
Before we get started, I want to very briefly go over what you need to follow along in this course. It is a very short list, so we'll try to just knock this out within a minute or so. So the very first thing you need is Node.js. If you don't already have it installed, install it, just download the LTS version, which stands for Long Term Support. The number really doesn't matter at least as far as our purposes are concerned, so download the LTS. Install it take the defaults, it's very straightforward, and you're gonna be good to go. The only other thing I want to mention is Visual Studio code, which is what I'm going to be using in this course. The URL is code.visualstudio.com, and this is the best Environment for JavaScript, period. There is nothing that's close, although that's not true. Visual Studio, the actual Visual Studio is somewhat close, but even then, it's not as good as Visual Studio Code. You can, of course, use whatever editor that you want but on screen, this is what you're going to see me using, you can download it for Mac OS Windows or Linux. So with that out of the way, once you have node installed, then everything else is going to be done from the command line. The first thing is the service that we are going to be using. This is part of the code download, so go ahead, download that, put it somewhere on your system. And then in the command line, go to that directory and you want to run npm install. That's going to install all of the packages that this application needs to run. And then, you'll type npm run serve and that is going to start this server application. It's gonna be listening at local host Port 3000. So all of our HTTP requests are going to be sent here in order to work with our lists. Now leave that running, open up another command line and then you will want to install the vue cli, you will want to do this globally so add -g and then it is simply @vue/cli. I'm not going to run that because I already have it installed. But it will take just a few moments on your machine to install the vue cli, and that's gonna give us the ability to create a vue project and it's going to give us a very nice starting place. So once you have the vue cli installed, we can say vue create, then the name of our project. I'm just gonna call this lists-Vuex. And then this is going to walk us through the creation of our project, it's going to ask us several things. Now I have some presets that you aren't going to see however, we are going to go down to manually select features. So I'm going to take out a linter and formatter, I'm going to add Vuex. I'm also gonna add the router, we might use the router we might not we'll just see. And we of course want babel and we will continue on so we will hit Enter. We will select version three, we will hit Enter again. And we'll just take the default yes, so hit Enter. And then once again we will take the defaults here with in dedicated files and enter, you can save that as a preset if you want not and then this is going to create our project. After the project is created, we of course want to CD into that directory and there's one other thing that we want to install. So we'll say npm install and that is going to be bootstrap@next, and we want to save that. That's going to give us the latest version of bootstrap, which is the beta of five. Let's go ahead and fire up the code editor so that we can take a look at Vuex. And then from there, let's go back to the command line, we'll say npm run serve, and this is going to compile our project. And once it's done, it's going to tell us where we can point our browser, but wow, that is going on. Let's go to the source folder. Inside of our project and we want to go the store folder. Whenever we created our project, we tell it that we wanted to use Vuex. And this is where Vuex is going to live within our application. Now of course, we can change this, because this is just a file that's being imported inside of main.js. So here on line four, you can see that it is importing the store here. And whenever we create our view application, we use the store as well as the router. And then, the application is mounted in the dome. So we can define our store anywhere that we want. The only thing that we have to make sure is that we are importing the correct file. Now in order to create a Vuex store, we have this create store function. This is being imported from the Vuex package and you call this function to create our Vuex store. We pass in an object that has the initialization for our store, so we can see that there is this state. There's mutations, actions, modules, there's also plugins, getters, there's a lot of other things that we can add here. And we will, of course, be talking about that throughout this course. But it's very simple, we just call createstore, pass in the initialization object and then we have our Vuex store. So in this case, we are simply exporting that Vuex store which is then imported into main.js. So getting up and running with Vuex is very, very simple. So in the next lesson, we're going to start developing our application so that we can request data from our service application and store that data inside of our Vuex store.


