
 Lessons: 12Length: 1.4 hours
- Overview
- Transcript
2.2 Displaying a List
We need some data to work with as we develop our application. So first, we'll add some data to a component so that we can compare a typical implementation to one that uses Vuex.
1.Introduction
1.1Introduction01:25
2.Using Vuex
2.1Setting Up the Project05:54
2.2Displaying a List07:03
2.3Adding State04:57
2.4Committing and Tracking Changes09:03
2.5Using Getters to Compute Values08:44
2.6Dispatching Actions to Perform Asynchronous Work06:53
2.7Using Mapping Functions08:14
3.Advanced Vuex
3.1Using Vuex With the Composition API08:17
3.2Getter Methods09:04
3.3Don't Track Everything and Make Your Actions Chainable13:21
4.Conclusion
4.1Conclusion00:57
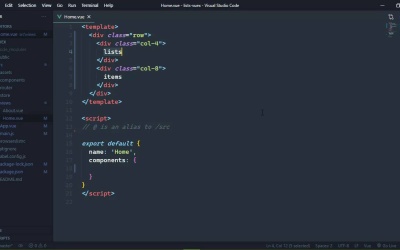
2.2 Displaying a List
In this lesson, we're going to start developing our application. And we will begin by making a few modifications. Now first of all, be sure that your application is running. And really, I mean both applications we want the service running, as well as our view application running as well. So make sure that both of those are going. Now inside of our code, we're going to start to inside of the components folder. And we are going to delete the hello world component, because we just don't need that. Now, that's going to break our application. If we go to the browser, yeah, it failed to compile because that file is no longer found. So let's do this, we need to open up a few files. We'll open up main and then App.vue and then Home.vue inside of the views folder. And there's a few things that we are going to change here. Now as far as our home vue is concerned, this is essentially going to be the main page. This is where we will have lists as well as the items that are in that list and then we can manipulate those items however we need to. So let's do this for now. Let's get rid of the template. Let's just have a div element, it says home, that's gonna be fine for now. We will delete all of the references to helloworld because we don't need that anymore. And that should at least make our application work. Yes, it does. But we're not done here. We need to go to app.vue. Let's get rid of the style. We're not going to use any of that style because we have bootstrap and I'm going to paste in some bootstrap stuff basically is just a navbar and then a container that our content is going to be displayed. So nothing really special there. Let's save that we'll close that file and then inside of mainjs, we want to import two things. First is bootstrap from you guessed it bootstrap. Now this is going to import the JavaScript portion of bootstrap. We also want to import the CSS, which Visual Studio code is going to help us out with. So the path is bootstrap/dist/css/bootstrap.min.css. There we go, if we look back at our application yes, that's working just fine. So we can close main.js. Okay, so our home, this is essentially going to be two panes here on the left hand side, we're going to have all of the lists that we can choose from, and then on the right hand side of the screen we'll be all of the items so that we can either mark something as completed or not completed. So we are essentially going to need a row that will contain two columns. So we'll start with a div with a class of row. Then inside of here we will have another div with a class of column and this will be four wide, and this will be where our lists are going to go. Then we will have another column that is eight wide because they need to be equal to 12 together, and then this will be the items. Let's make sure that is, that's not what that's supposed to be doing. It helps if you use the correct CSS class there. Okay, so there we go. We have our stuff now. Okay so we want to display our lists and of course that data is coming from our service. But before we start making HTTP requests, what I like to do is kind of get the skeleton of the application working. And then incorporate the HTTP stuff later on. So basically what we want is a component that is going to be responsible for displaying our lists. So inside of our components folder, let's create a new file. We'll just call this listscomponent.vue, and we need a template. So we'll get started with that. Now once again, we are going to be using some bootstrap stuff. So we're going to use a list group which is a component in bootstrap, and we can have just a list of links and each one of the links will be for a separate list. So let's create our script here. And it's defaulting to using the composition API, which is something that we will look at in a little bit. But for now, we're just going to use the traditional options API here. Let's have our data, which is going to return an object that will have our lists. This is going to be an array. And let's just have one list right now. We need an id because the service is going to give us our lists with an id. So this will have an id of one. I believe we will have a name and this will be our first list. And let's say that this is the hard coded list, so that we can know that this is just test data. And then each one of our lists is going to have an items array, that's where all of the list items are going to live. So we have our lists here. We can go ahead and write this component, so that we list them. So we're going to use an a element to do that. And we just need to do normal stuff here. So we're going to use a v for each list in lists, and we will set the key to the list id. Let's go ahead and set the href to a # and then we need the obligatory css classes that are going to work here. So this is going to be list group item, as well as list group item action. And then of course, the text for this is going to be the list name and then we want the closing a tag. So we have this list component that we want to use inside of our home view. So let's just go ahead and import that. And we'll just call this lists. We can of course call it whatever we want but I think lists is going to be okay. And we of course need to look inside of the components folder for list component. And then finally we will include lists in the components. So if we go to the browser, we should see this working at least because, no, we won't, because we haven't used lists have we? We can do that right up here where we have lists. So and now, we have our first hard coded list not tell you what let's add a second so that we can have two there. So let's just copy what we have. And this will at least get us something started now, we haven't used our vue x store yet, but that's okay. Because now that we see that this component is somewhat working, we can take this data and we can put it inside of our vue x store and you will learn how to do that in the next lesson.


