

- Overview
- Transcript
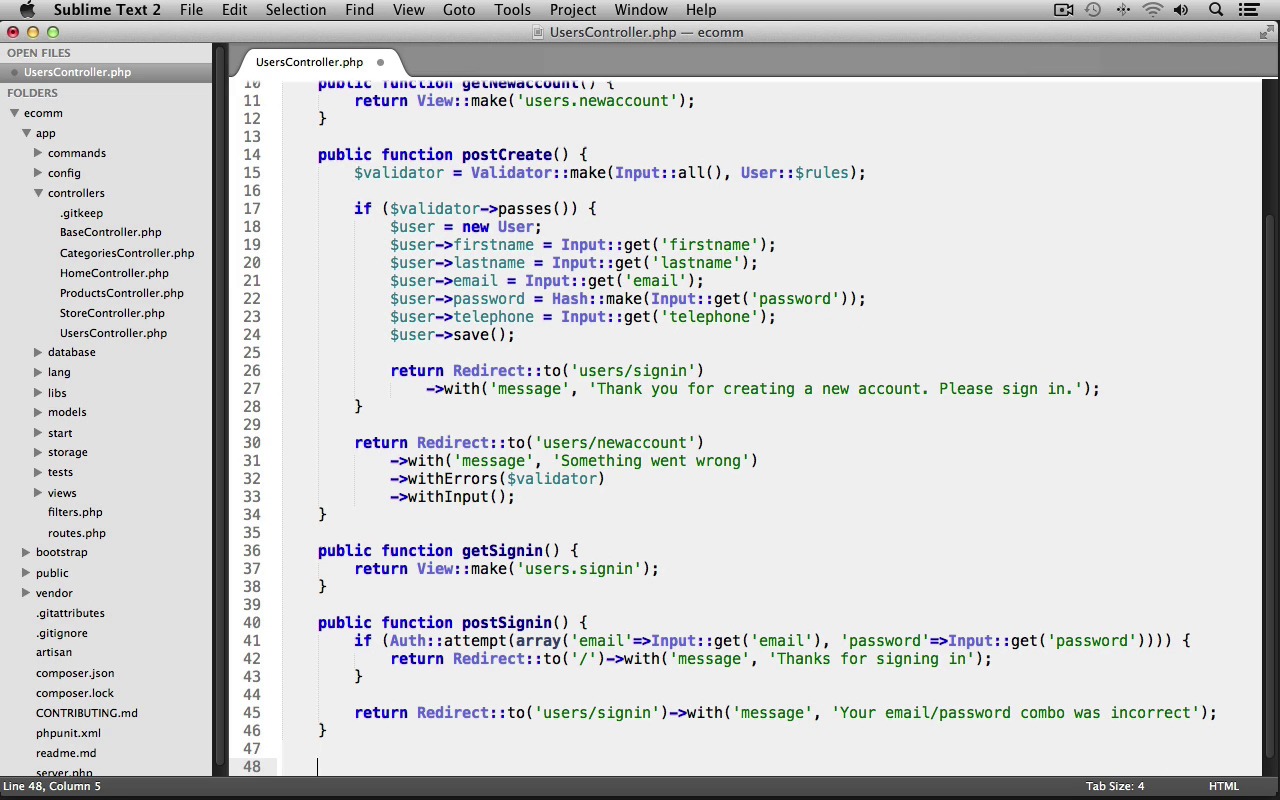
3.1 User Authentication
In this lesson we’ll build our authentication and authorization system. In order for our customers to place orders and review their previous order history, they will need to have an account.
1.Introduction
1.1Introduction00:51
2.Getting Started
2.1Creating the Categories Admin Panel29:14
2.2Creating the Product Admin Panel29:40
2.3Displaying Products16:53
2.4Displaying Products By Category10:57
2.5Searching Products06:51
3.Security
3.1User Authentication26:05
3.2Protecting the Admin Panel05:14
4.Payments & Conclusion
4.1Shopping Cart & PayPal21:54
4.2Contact Page & Conclusion03:55
3.1 User Authentication
In this lesson we'll work on building our authentication system. In order for our customers to place orders and review their previous order history they will need to have an account. So we're first going to need a table to store our user's data in. So let's create a new migration file. I'll just bring up my terminal and let's run PHP artisan migrate colon make, and I'll name this Create User's Table. There we go. Let's switch into our text editor and under app, data base, migrations. Open up that newly created users table migration and in our up method let's create our table. We'll use schema create. This is a users table. We'll pass in our closure and our table object. We're going to need our ID field for the auto incrementing primary key. So we'll use the increments method. We're going to need a string for the user's first name. And then I'm just going to duplicate this a few more times, and we'll change this one to be for the user's last name. The next one will be for the user's email. After that, we need one for the user's password. We need another for the user's telephone number and we're also going to be creating a boolean field to hold whether or not the user an admin. So this will either be zero, for the user not being an admin, or one, for the user being an admin. And by default, it'll be set to zero. So we'll just chain on the default method here, and we'll place that at zero, so by default users are not administrators. Now we also want to make sure we have some timestamps by calling the timestamps method. All right, that looks good for our users table. Let's go to our down method, and we'll reverse the migration by calling the drop method and just dropping the users table. Make sure to save your file. We can close it out. Let's switch into our terminal and we'll run the migration. PHP artisan migrate, there we go. Now let's use laravel's seeders in order to create a default admin user. So let's go back into our text editor and under database, seeds, open up DatabaseSeeder.php. And let's uncomment this call method, and let's change this to use a UsersTableSeeder. And inside of seeds, let's create a new file. I'll save this as UsersTableSeeder.php. We'll open up our php tag. We'll create a new class called UsersTableSeeder. TableSeeder and this extends the seeder class. Now, let's create a public function named run. And now we just need to create our default admin user. So I'll create a new user variable to create a new user object. We'll set the users firstname=Jon. Now, just duplicate this for the users last name, set this at doe, I'll duplicate it again, this one will be for the email, and change this to jon@doe.com. I'll duplicate this another time, we'll change this one to be for the users password. And the password is just going to be a string saying my password. And now we don't just want to save the password into the database as plain text. We want to make sure to hash it. So, we can use the hash class, call its make method, and just pass our password into it. And I'm just going to duplicate this line. We need a field for the user's telephone number. So I'll just get rid of this. We'll set the phone number to 555-777-1234. And then I'll duplicate this line again. We'll set the admin field to be a value of one making this user an administrator. And then we just need to save the user into the database by calling the save method. All right, we can close out both of our Seeder classes. Let's switch back into our terminal, and we can run php artisan db: seed. There we go. That should have created our user in the database for us. Next we need to set up our user model. So if you look under app, models, we'll see that by default Laravel ships with a user model already created for you. And it actually comes with a bunch of helpful code to get you started right off the bat. Now make sure that you don't delete anything in here as auth relies on some of this information. But let's go ahead and add our fill-able property and our validation rules to this model. So, right after the hidden property, we'll set the protected fill-able property equal to an array, and we'll going to allow the first name, the last name. Email and the telephone number to be fillable. Next, let's create our validation rules. I'll create a public static property named rules. Set that equal to an array. Let's first validate the first name field. This going to be required, it's going to have a minimum character length of two characters, and we'll also make sure it's only alpha characters, just letters, we'll put a comma here, then I'll duplicate it, and we're going to use the exact same validation roles for the last name, and now we need to validate the email field. This will also be required. We'll ensure that it's a valid e-mail address. And we'll also want this to be unique to the user's table as we don't want to have users with the same e-mail address. Now, let's validate the password. We're going to make this required. We'll also ensure that it's only alpha numeric characters by using the alpha known validation rule. We also want this to be between eight and twelve characters in length, and we're going to set the confirm validation role. That way we can create a password confirmation field in our form and that will check whether or not the user has entered in their password correctly. So let's add some validation for that password confirmation field as well. This is going to use the required alpha_num. And between eight and twelve validation rules. Now let's also validate the telephone number. This is going to be required. And we'll make sure that it's between 10 and 12 characters in length. That will allow the user to enter in a ten digit telephone number, as well as add in a hyphen between the area code and the last four digits. Now, lastly, we just need to validate the admin field. Now, this is not going to be required, but we will ensure that it is an integer if it's ever submitted through a form. And that's it for our user model. We can save it and close it out. Now we need to create our users controller. I'm just going to close up the models, close out the database, and in controllers, let's create a new file I'll save this as userscontroller.php. We'll open up our PHP tag we'll create a new class named users controller. This extends the base controller and now we need to set up our constructor to create in our CSRF before filter. So let's create a new public function. Underscore, underscore construct. We'll make sure to call the parent constructor. Then we'll call the BeforeFilter method to set our CSRF beforeFilter and we'll pass in an array so that it protects our post requests. Next we need to create an action for the new account page, which will display the new account form, so that users can register for our site. We'll create a new public function, we'll prefix this with a gethttpverb I'll name the action Newaccount. And in here we just need to return a view. We'll call it the view classes make method, and this will display a view file from a user's folder and it will be named Newaccount. Next, we need to create a create action, which will process the new accounts form submission to save the new user into the database. So let's create a new public function. We'll prefix this with a post HTTP verb and I'll just name this create. Let's start off by validating the form's submissions data. So we'll create a validator object using the validator class, calling its make method. We use the input class and pass in all of the submitted input and then we just need to use our user model roles. There we go. Now let's check if the validator has passed, so we use an if statement, and we'll check if the validator passes by calling the passes method. So if the validator does pass, we'll just create a new user. We'll set the user's first name equal to whatever was submitted from the form, using the input classes get method. Then I'll just duplicate this four more times. And this next one will be for the user's last name. So we'll change this to lastname and this one will be for the users email address, and then we need one for the users submitted password. Now just like when we were working with the database here we want to make sure to not store the password as plain text, so we wanna hash it. Let's use the hash classes make method, and we'll just pass in the password to it. And then the last field will be the user's telephone number, so we'll grab that one from the form submission. And now we just need to save the user into the database using the save method. So after saving the user, let's just return. We'll call the redirect classes two method, we'll redirect to a user/sign in URI. We haven't created that action yet but we will in a moment. This is going to be our sign in page. Now I'm just going to chain on the width method call, and let's set a flash message and we'll say, thank you for creating a new account, please sign in. Now if the validation did not pass, we'll just return. We'll call the redirect classes two method again, and we'll redirect then back to the new account page. And I'll just chain on a with method call here to give them a flash message. This will just say something went wrong. Then we'll call the with errors method, and pass in our validator object so that we can display our validation error messages. And we'll also call the with input method so that it remembers the users old form input. And that's it for our create action. Now we need a sign in action which will display a form for the user to sign into the application. Let's create a new public function. We'll prefix this with a get HTTP verb. I'll name it Signin, and we'll just return. We'll use the view classes make method. And we'll display a sign-in view file from a user's folder. Next we need to create a post sign-in action to handle processing the sign-in form submission. So let's create another public function, this time with a post HTTP verb, and we'll name it sign-in. So now we just need to attempt to log the user in, so we can use an if statement, we'll call the auth classes attempt method. We just pass in array here, we supply the user's email address, we can use the input class and it's get method to grab the submitted email address. And we also just need to pass in the password as well. Again, we can use the input classes get method, and grab the submitted password. Now if the attempt method succeeds, we'll just return. We'll call the redirect classes to method. We'll redirect them back to the home page, and we'll give them a flash message, just saying, Thanks for signing in. Otherwise if the attempt method does not succeed, we'll again return called the redirect classes to method. We'll redirect them back to the sign-in page and we'll give them a message saying your email password combo was incorrect. And now lastly for our user's controller we need to create a sign out action so that users can sign out after signing in. Let's create a new public function, we'll prefix this with a get HTTP verb, I'll name the action signout. Now, to log the user out, we just use the Auth classes logout method and then we can just return. Use the Redirect classes to method. We'll redirect them back to the users sign-in page. And we'll give them a message saying You have been signed out. And let's make sure that I spell this correctly, there we go, and that completes our users controller. We can now close this out, and now we just need to set up our routes. Let's open up routes.php and I'll just duplicate this last line. We'll change the URI to be users, and this will be for our usersController. There we go, now we can just close out the routes.php file. Next, we need to modify our main layout file so that our New Account, Sign In, and SignOut links work as well as display the appropriate links based on the user's signed-in status. So under views, layouts, let's open up main.blade.php, and let's scroll down here to our user menu. So you can see that we have two different nav menus here. We have this first one at the top, which is for when the user is not signed in. In that case, we display a Sign In link and a Sign Up link and then if the user is signed in we can display this alternate nav menu which displays a little user icon and then the user's first name, and then a sign out link. So we first need to detect whether the user is logged in or not. So at the top, right after our user menu div, let's use an if statement. And we can use the off classes check method to check if the user is logged in. Now we'll put an L statement here and then we'll end the if statement. So if the user is logged in, that means we want to display the alternate nav menu. So we'll just copy this code here, cut it out, we'll get rid of the little comment lines there, and let's paste it inside of our if statement. Then I'll just fix up the indentation, and then inside of the else statement, meaning that if the user is not logged in, that case we'll display this nav menu instead, and we'll just paste inside of the else. And I'll fix up the indentation here. Now we just need to update this image's Alt text, instead of displaying my name just in static text, we want to use the logged in user's first name. So we can use the auth class's user method and grab the user's first name, and I'll just copy this line And let's change out the linked to text here as well. We'll past that over top of it. And we'll do the same thing for the alt text for the second image here. Now we need to fix-up this sign-out link so that it links to our sign-out page. We'll just get rid of the plain HTML one here. And we'll use Laravel's link helper. This is going to go to users/signout and the link text will say Sign Out. All right, that looks good for the first nav menu for when the user is signed in. Now, down here in our L statement, we'll make a few changes to this nav menu. We just need to update these links, so I'm going to copy the link from up here and let's replace these ones, so this is the sign in link. So this'll go to the sign in URI and the link text should say Sign In and then we'll replace the sign up link. This should go to our New Account page, and this will say Sign Up. Now, I'm also going to copy both of these list item tags, including both of the links, and I'm just going to scroll down to the My Account div, and you can see we have Sign Up and Sign In links here, so I'm just going to replace these, so that they actually work. And I'll fix the indentation here. All right, our layout modifications are complete. Lastly, we just need to create the new account and sign in view files. We can close out the main layout. Let's start with the New Account view. So under the views folder, let's create a new folder named users, and inside of users, we'll create a new file. Let's save this as newaccount.blade.php, let's have this use our main layout, so we'll use Extends > layouts.main, and then we'll create our content section, and we'll stop the section here. Now, let's create a new div with an ID of new-account and we'll close the div. And I'll put a comment here saying end new-account. Let's create an h1 heading, this will say Create New Account. Now, before we create our new account form, we need to display our form validation error messages. So we can actually just reuse that from one of our admin panel pages. So under Views > Categories, we can open up index.blade.php. And we can just copy this if statement here, all the way to the end if statement. We'll close this out and let's just paste it in here to our New Account view file. Now let's open up our form. We'll use Form > Open. Pass in an array, set the URL. This is going to go to users/create. Now we need to create our fields for the user to enter in their information. So we'll create a paragraph tag, and we'll start off with the forms label for the first name field, and I'll just duplicate this. We'll change this over to be a text field for the first name, and we can copy this and let's paste it below. This one will be for the last name, and then we'll paste it again for the email address. And let's paste it again for the password. Now on this one, make sure that you update the method from using the text method to using the password method. And then I'm just going to copy this one. And we'll paste it again down here. This one will be for the password confirmation. And then I'll just copy the email field. And we'll use this for the user's telephone number. All right, that's it for our fields, now we just need our Submit button. We'll use the Form class's Submit method. This'll say CREATE NEW ACCOUNT, and let's pass in an array here as the second argument, and we'll set a class for this. We'll use the secondary-cart-btn class. And then we just need to close our form using the close method. All right, that's it for the New Account page, we can save this and close it out. Now we just need to create the Sign In view file. So under users, create a new file. We'll save this as signin.blade.php, we'll have this use our main layout. We'll create our content section. And now let's switch into our starting resources folder. And let's open up the signin.html file. Just drag and drop it into Sublime And let's go down to the signin-form section. And let's copy this section all the way down to the end signup section. We'll copy that. We can close this out. And let's paste it into our Sign In view file. Now just fix up the indentation. Now we just need to update this form, so let's start with the opening form tag. We use the open method, pass in an array, set the URL. This is going to submit to users/signin. Then we need to update this image to use the image helper, so this is the email.gif image. So we'll use HTML, Image, this is in the image folder and that's email.gif and the alt text was Email Address. Then we need to update the Email Input Form field so we use the Form class' text method, set that for the email field, and then we can just copy this whole paragraph, and we'll paste it over top of this one for the password. We'll change this to display the password image and the alt text will be Password, and we'll make sure to use the password Form field for the password. Now we need to update our button here, so let's get rid of this. We'll use the Form class' button method. This will say Sign In. We'll pass in an array. We'll set its type to submit. And we'll give it a class of secondary-cart-btn. Then we just need to close the form, so we'll use Form close. And now lastly, we just need to update the Create New Account link at the bottom, so let's change this out. We'll use the HTML class' link method, this is going to link to users/newaccount. And the text will say CREATE NEW ACCOUNT. And we'll pass in an array and give this a class of default-btn. All right, our authentication system is complete. We've wrote quite a bit of code so hopefully everything goes all right. Let's switch to the browser and give it a try. So I've already got my application up and running. I'm just going to refresh real quick. And now, since we're not logged in, you can see that our user menu asks us to sign in or sign up. So let's try signing up a new user. Here we go. Here's our Create New Account page. Let's first make sure that our validation error messages are working, so I'll just submit the form. And it looks like we do indeed have an error. It looks like I did not put a comma after the password confirmation validation role. So let's go back into our text editor. We'll go into models, open up user. And yep, there's no comma there, so let's put a comma in. Save the file and let's try again. We'll go back. And let's submit it once more. There we go, perfect. Our validation rules are working. Now let's try creating a user. And I'll create a Jane Doe user. The email will be Jane@doe.com. The password will be mypassword. And the telephone number will be 5557771234 and we'll click our Create New Account button, and great, we get our success message. It says, thank you for creating a new account. Please sign in. So, it looks like it worked. Let's now try signing in with Jane Doe. Our email was Jane@doe.com. And the password was mypassword. And we'll click Sign In. And it looks like we did get signed in, it says thanks for signing in. But it looks like I made a mistake up here in the user menu. It's displaying the actual method call so let's go back into Sublime and under views > layouts let's open up main.blade.php. Let's scroll down to our user menu. So since we're signed in, that means the problem is here in this nav menu. So you can see, here's the error. The link text for the link. I thought I was still inside of blade brackets, that's why I didn't open up a new pair. But apparently, I was not. So let's open up a pair of blade brackets here. That should fix the second problem. Let's save the file, we'll go back into Firefox, and let's refresh. And perfect, you can see that it now displays our user name, our first name of Jane, and we have our order history and sign out links. So let's try signing out. And perfect. We get our message saying you've been signed out, and you can see the nav menu goes back to being Sign In and Sign Up links. All right. Excellent. Everything is now working as expected, after fixing my two errors. Next up, we'll work on protecting the admin panel pages by enforcing that the user who logs in must be an admin before they can access those pages.


