

- Overview
- Transcript
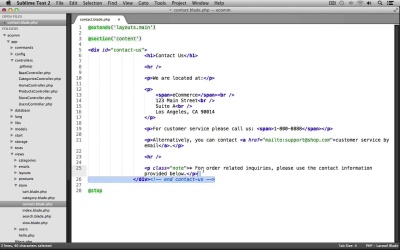
4.2 Contact Page & Conclusion
In this lesson we’re going to wrap up the course by creating the last page for the application—the contact page. Even though it’s basically just a static page, the contact page is very important, especially for a commerce application.
At the end of this lesson I’ll list out a few cool features you could create next and add to the commerce app on your own. Congratulations on completing this course, and thanks for watching.
1.Introduction
1.1Introduction00:51
2.Getting Started
2.1Creating the Categories Admin Panel29:14
2.2Creating the Product Admin Panel29:40
2.3Displaying Products16:53
2.4Displaying Products By Category10:57
2.5Searching Products06:51
3.Security
3.1User Authentication26:05
3.2Protecting the Admin Panel05:14
4.Payments & Conclusion
4.1Shopping Cart & PayPal21:54
4.2Contact Page & Conclusion03:55
4.2 Contact Page & Conclusion
In this lesson we're going wrap up the course by creating the last page for our application, our Contact Page. Even though it's basically just a static page, the Contact Us page is very important, especially for an Ecommerce Application. And at the end, I'll list out a few of the features that would be really cool if you created and added to our Ecommerce Application on your own. Let's switch into our text editor. And let's go into app > controllers, let's open up our StoreController. And let's create a new action for our Store's Contact page. So, at the bottom, let's create a new public function. We'll prefix this with the get http verb, and I'll name the action Contact. Now, we just need to return. We'll use the View classes make method, and we'll have this display a contact view file from the store folder, and that's it for the action. Let's save the file, we'll close it out. Now, let's create our contact view file, so under views > store, let's create a New File. We'll Save this as contact.blade.php. Let's have this use our main layout. So we'll use extends('layouts.main'), and we need to create our content section, and we'll stop the section here. And now, let's open up our starting-resources folder. And let's grab the contact.html file. I'll just drag and drop it into sublime. Let's scroll down to the main-contents section. And let's grab all of the code inside of here. The div with the id of contact-us, all the way down to the comment and contact-us. We'll Copy this. We can close the contact.html file. And let's Paste it into our contact view file. Now, I'm just going to fix up the indentation here a bit, and that's basically it for the Contact page. We now just need to update the main layout, so that the contact-us link links to this page. So, we can close out this view. Let's go to views > layouts. We'll open up main.blade.php. And let's scroll down to our footer. And down here in the extras, you can see we have this Contact Us link, so let's replace this. We use HTML, we'll call the link helper method. This will link to store/contact. To link text, we'll just say, Contact Us. And with that last small change, we have completed the course. Let's go and take a look at the Contact Us page though, first. We'll switch into our browser. I'll just refresh the page, and if we scroll down, here's our Contact Us link. Let's go to this page, and there we go. Here's our store's contact information. So, we are finished. Now, just because I'm done walking you through building the application doesn't mean you have to stop here. The techniques that I've shown throughout this course should give you plenty of knowledge to add a lot more functionality to the app. Some cool features that you might consider adding would be to create a discount's page, and then have the homepage here linked to it. You may also want to create full product category and user edit pages for admin users. You could create a user profile page, so users could update their personal information, or you could even create a wish list, so users could store products that they'd like to purchase in the future. Hopefully those items ideas will keep you going for a while. I'd like to thank you for watching this course. If you have any questions, feel free to ask in the comments or email me and I'd be glad to help out. Good bye.


