
 Lessons: 13Length: 1.2 hours
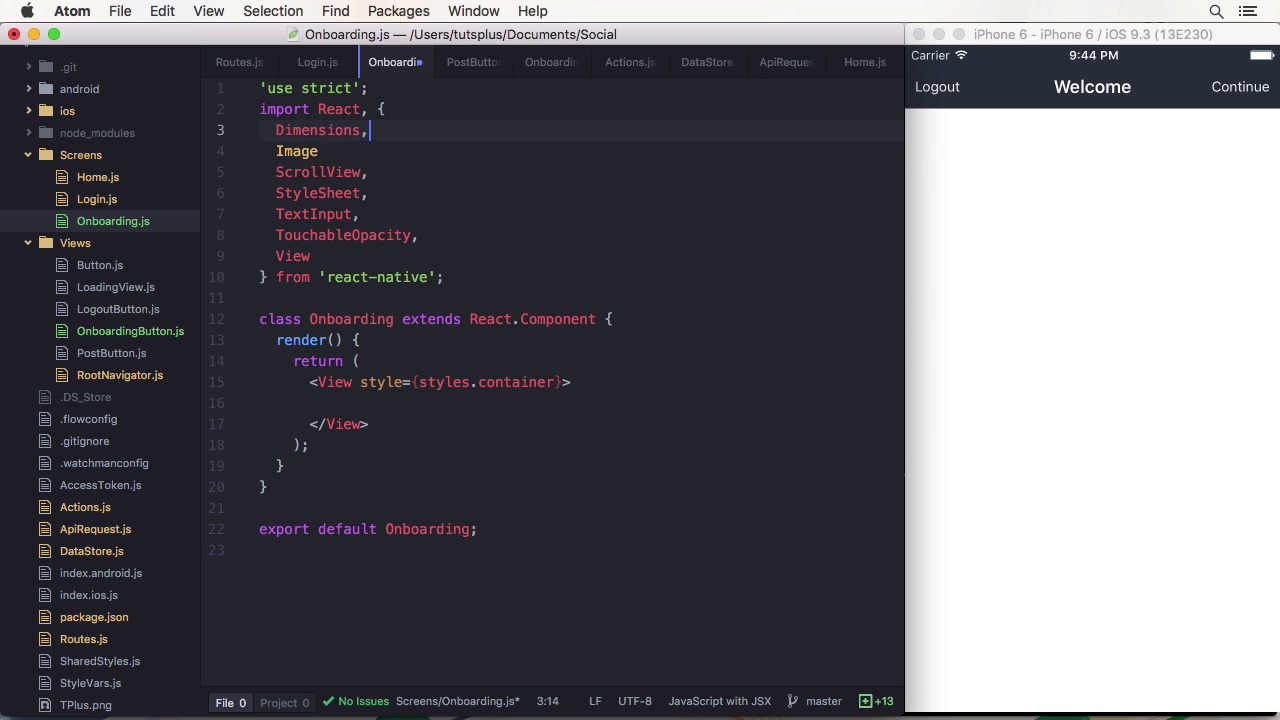
- Overview
- Transcript
3.3 Follow Contacts From Your Address Book
Accessing the user’s contacts can help them find and add their friends quickly. We’ll code that functionality in this lesson.
Related Links
1.Introduction
1.1Introduction01:03
1.2Project Overview02:01
1.3Installation and Setup06:50
2.Set Up the Project
2.1Create a Firebase Back-End06:22
2.2Design Your UI With React Native Elements06:08
2.3Create a Navigator With React Navigation07:30
3.Create the App
3.1Create the Login Screen13:42
3.2Add a Sign-Up Screen07:30
3.3Follow Contacts From Your Address Book07:37
3.4Post Images to Firebase03:32
3.5Show the Timeline04:20
3.6Add Location to Posts03:54
4.Conclusion
4.1Conclusion01:29
3.3 Follow Contacts From Your Address Book
Hi and welcome back to Build a Social App With React Native. In this lesson we are going to start following users by adding them through the address book. We're going to use a library called React Native Contacts for this. Since the contact data is sensitive information, you have to ask for permission to access it. On our list, this means you have to add an entry to the Info.plist that describes why you need the contact data. This will be shown to the user when the app requests permission. Be prepared to handle a rejection, as well. On Android, you have to add the READ_PROFILE, READ_CONTACTS and maybe the WRITE_CONTACTS permission if you want to not only read from the address book. Now, how does a contact look like? The library standardizes it as much as possible, giving it a same field names on both platforms. In our app, for instance, the email addresses array will be especially interesting. Which is an array that contains objects that have email and label keys, since a contact can have multiple emails. Let's get started by installing and linking the library. With Yarn add React Native Contacts and React Native link. Then we have to open the project in Xcode and edit the Info.plist file. To add permissions for Android, check out the documentation. In the file we have to add the privacy context usage description key and provide a meaningful description of why we need it. Apple may reject the app if the app unnecessarily requests permission. Okay, let's start in the app navigator and add an import to AddContactsScreen, as well as the route in the ProfileNavigator. I'm also adding the modes modal setting to it so the contacts appear from the bottom. With that out of the way, let's add the new screen. Besides the classic React import, I'm also going to need a button on the scroll view as well as the list and list item components from React Native elements. Then we're going to need the context component from React Native context as well as our file base imports. We also have to set up the decorators so we can access the profile. I'm going to map the auth and profile data to the props. >> So in the component itself I'm going to need a state that has the list of contacts in it. >> Then we are also going to want some navigation options. This time, I'm supplying a function to it that has the navigation parameter, and I'm going to set the title, add left header but it will say done and navigate back to the previous screen. In componentDidMount, we are going to populate our contents. I'm going to get all of them with getAll, which will return a list of contacts. I'm going to ignore the error in this example but you should handle it. We can create a temporary array for the contacts, add into it all the fetched ones. The reason I'm doing this is to filter out the ones that don't have an email. Finally, we can set the state. In the render method, I'm going to return a ScrollView so we can show all contacts that might not fit on the screen, and add a list. In this list we are going to map through all the contacts that are stored in the state and return a list item for each one. The list item will contain a roundAvatar and a key that is the index in the list. The avatar will be the thumbnail path from the contact if there is any. If there isn't an image, we are going to display an icon named account-circle. Since I don't have a default image, the title is going to be the name of the contact which is composed of the given name and the family name. The subtitle will be the email. It is also going to be a button and upon pressing it, it will add the contact with the first email address. You also want to hide the chevron on the right that normally indicates that there is a transition to another screen. The addContact function will be an async one that extracts the email from the parameters. Since we have to query for the email to retrieve our user, I'm going to get the reference from the Native JavaScript Firebase library and query the profiles of ordering by email and adding equalTo our email. Then I'll limit the result to the first one, and get the value once. Once means that there won't be any further updates. Unlike the default, their updates to the reference get pushed to the client. If we get a value back, meaning we found an email, then we can add the ID to the following property of the profile. And also updating the database by calling update with the auth to the profile by using the auth.uid and setting the new following value. To make this work, I also have to remove the profile params to populate property from the store, since it doesn't seem to work anyways, and we don't really have a use case for it here. Finally, I need to add a header button to the profile screen as well using the function style for the navigation options to be able to navigate to the Add Contracts route. I also need to add the button to the import. Let's try it out. I've added all the default contacts from the address book on iOS to the backend. I'm going to add John Appleseed and Anna Haro to my contacts. After doing that and closing the screen, I will see that I'm now following two people. To recap, if you want to access contacts on your phone, you have to ask for permission and set up the iOS and Android's project for It. When you need to access the navigation in our header, use the function-style syntax to set the navigation options. You can access the Firebase JavaScripts library directly by using special properties like ref or database under Firebase property. In the next lesson, we are going to post some images to the backend and do that by using the photo library. See you there.


