
 Lessons: 13Length: 1.2 hours
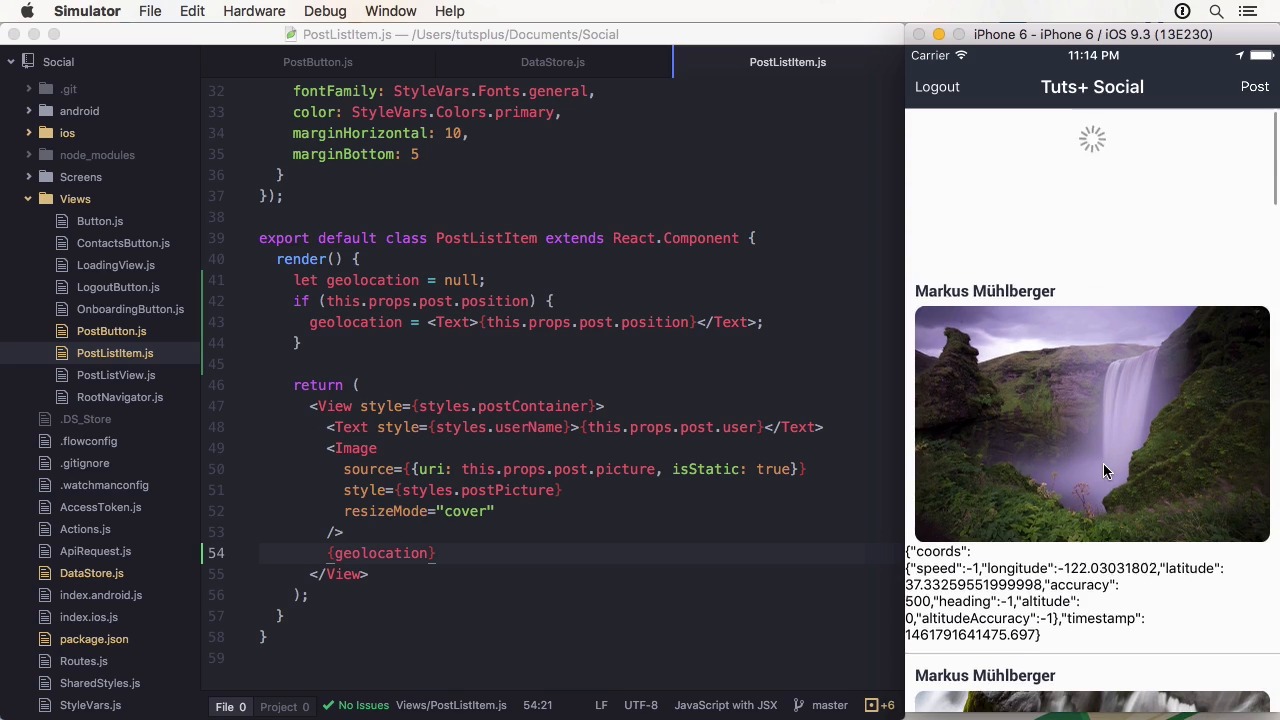
- Overview
- Transcript
3.6 Add Location to Posts
In this lesson we are going to complete the course project, by adding location information and using reverse geocoding to display the location in a human readable format.
Related Links
1.Introduction
1.1Introduction01:03
1.2Project Overview02:01
1.3Installation and Setup06:50
2.Set Up the Project
2.1Create a Firebase Back-End06:22
2.2Design Your UI With React Native Elements06:08
2.3Create a Navigator With React Navigation07:30
3.Create the App
3.1Create the Login Screen13:42
3.2Add a Sign-Up Screen07:30
3.3Follow Contacts From Your Address Book07:37
3.4Post Images to Firebase03:32
3.5Show the Timeline04:20
3.6Add Location to Posts03:54
4.Conclusion
4.1Conclusion01:29
3.6 Add Location to Posts
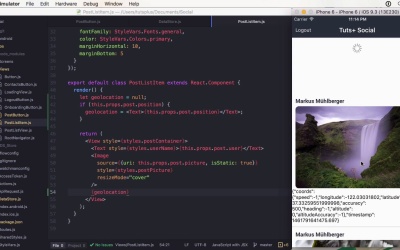
Hi, and welcome back to Build a Social App with React Native. In this lesson, we will have to look at the geolocation API and how we can use it to add location information to our posts. The API is very simple. It only has four functions, getCurrentPosition, watchPosition, clearWatch, and stopObserving. The first three functions are also part of the geolocation API you can use in your browser. To use the user's location you have to have the NSLocationWhenInUsageDescription key to the Info.plist, which is automatically done for you during React Native init. If you want to use the location in the background you have to add this to your capabilities and include the location of AlwaysUsageDescription key. Normally these keys should contain a description why the app wants your location. On Android, you need to add the user's permission to ACCESS_FINE_LOCATION to the Android menu first. To continuously watch the location for updates, you use watchPosition and add a callback to it. You can also add a timeout, enableHighAccuracy, or only receive significant updates by adding distanceFilter. If you are done watching, use clearWatch for the up server instead of stop up serving, because this will stop it app-wide. Geolocation doesn't need to be imported. It can be used through the navigator geolocation polyfill. Let's go to the course project. Before we start coding, we have to install a dependency called react-native-geocoder. It is used to do reverse geocoding. This means using a coordinate to get a name for the location it represents. You can add it by using yarn add react-native-geocoder and linking it with react-native-link. To add geolocation information to the project, we have to fetch the location at the time of posting. Here we can use navigator.geolocation.getCurrentPosition to request the location once. It will return some coordinates. I'm going to reverse geocode on the device when the image is posted since it reduces the workload for all other devices that greet them. And because reverse geocoding is normally rate limited. But you should upload the latitude and longitude and do such processing on the server so you'll always have the raw data as well. To do this I'm going to import geocoder and use geocode position with lat and long from the coordinates. It will return the geocoded result. Within the callback, I'm going to post the image and pause the locality, which is usually the city and country as a string. Taking them from the first location that was returned, since there could be multiple. And the render method, I'm going to switch to date to the location. And if there's no location because we posted the data before, we'll display somewhere on the road. Let's upload the new image and we can see it at Cupertino, United States. >> This concludes the feature set for recalls project. I will see you in the conclusion lesson.


