
 Lessons: 10Length: 1.2 hours
- Overview
- Transcript
4.3 Creating a Shortcode With Editable Parameters
In this lesson, I’ll show you how to add parameters to your shortcode for maximum flexibility.
Related Links
1.Introduction
1.1Introduction00:59
2.Plugin Best Practice
2.1Best Practice for Coding Plugins06:48
3.Creating a Hook-Activation Plugin
3.1Action and Filter Hooks06:26
3.2Coding a Plugin for Activation With a Hook11:47
4.Creating a Shortcode Plugin
4.1Creating a Simple Shortcode06:23
4.2Creating a Shortcode With Editable Content05:40
4.3Creating a Shortcode With Editable Parameters10:21
5.Code a Widget Plugin
5.1Creating the Widget12:23
5.2Save User Edits to the Widget10:30
6.Conclusion
6.1Conclusion02:52
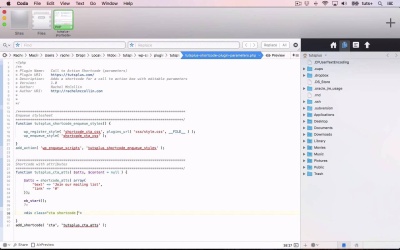
4.3 Creating a Shortcode With Editable Parameters
Hello, and welcome back to this Tuts+ course on Practical Projects to Learn to Code Plugins. So far, we've created two types of shortcode. Firstly, we created a basic shortcode, the output code already defined in the plugin. And then we output a shortcode that allowed the user to define what would be contained within it. In this part of the course, we're gonna take things a step further. We're gonna create a shortcode with attributes. And that will allow the user to define two attributes, which will then be used to populate variables in our plugin. So let's take a look at the code. So here's our plugin file. And once again, I've already enqueued the style sheet, which I showed you how to do in an earlier part of the course. And now I have to write the function for my shortcode. So let's start doing that. So I'm calling this one tutsplus_cta_atts. Now, each time I've started working on a new plugin in this course, I've deactivated any previous plugins. And that's because there's some very common code between them all. So for example, this style up here, shortcode_cta_css, is the same in all of them. Now, if I had all of my plugins open and active at the same time, WordPress would get confused because I'm using the same value twice. And that also applies for the function names. So my advice to you, if you use these techniques, is either to only use one style sheet and one plugin for all your shortcodes. Because then you can use that style sheet to start all of the different shortcodes that you're creating in your shortcode plugin. Or to make sure you're using unique names and unique values all the way through. Either that or just turn off the plugins you're not using, which is what I'm doing. So there's my empty function, and then I need to use add_shortcode to activate it. And that needs to be a comma, not full stop. So my second parameter is the name of my function, and my first parameter is what somebody would type in. So that's cta again. Now, let's populate the function. So first, we need to add atts and content, the two variables that apply to this function. Making sure I use [LAUGH] dollar sign instead of the pound sign. So before I actually code my shortcode, I'm gonna define those variables. And that uses a function provided by WordPress, called shortcode_atts. And within that, I need to provide another array of variables. So my first one is going to be text. And my second is going to be link. Now, you may be a bit puzzled as to why I've put the same things on either side of my equals here. The left-hand side is the name of my attribute, and the right-hand side is the default content. So I'm gonna change that. I'm gonna change that to, Join our mailing list. And I'm gonna change the default link to https. No, I'm just gonna make that a #. So those are my defaults. So if somebody should use this shortcode without actually using those attributes, I've got default attributes there. Now, let's code the actual shortcode itself. So we start with ob_start. We close our PHP tags, and then we start coding the HTML. Now, it's worth mentioning, I said before that if you're using more than one of these shortcodes, you need to think about your naming conventions. The same goes for your CSS classes. So I'm using class = cta for all of these. You might want to code yours differently depending on what type of shortcode they are. So you might want to add an extra CSS class so that you can target that. So for example, we could add CSS shortcode attributes. So those are three separate classes that apply to this one that you could use to target your CSS if you wanted to. I'm not gonna bother doing that because I've closed my other plugins, but it's something to bear in mind. Let's close that div. So inside our div, we need to echo out these attributes. Making sure I add a question mark before my PHP. So firstly, I'm echoing out my link. So inside my href, instead of hard-coding whatever I want the link to be, I add this link here. And I do that using my atts variable, or my atts array. So that will output the value of link in this atts array of variables. And then I'm going back into HTML, closing my link, and then I need output the text. And then I'm back in HTML, Or I'm back in my echoing, and then echoing out my closing tag for the link. And then I close my PHP tags. So what we have here is a link with its value being the value of the link item in this attributes array of variables. And then that is enclosed around the text, which is the value of this text array, or this text value in the array of variables. So I've closed my div, and then I need to do return ob_get_clean. So that's my entire function. I've defined these parameters of my function up here, the attributes, and the content, which is null. And then I've output that using this array of variables. So let's save that and use it on our site. So once again, I'm going to add a shortcode block. And this time, I'm going to add the parameters within my shortcode. So there's the link, which at the moment is just a hash, and then there's the content. And I'm not forgetting to close the shortcode. So those are my two parameters in my shortcode. And then I'll save that and take a look at it in my site. Now, we've got a warning here. We're missing argument 2 for the shortcode_atts function. That's because I've missed out some code here. So here, after my array of variables, I should have, $atts as my second parameter here, and then, cta-atts as the third. Now, let's just take a look at the codex page for this shortcode_atts function because it will help us make sense of what's going on here. So this is shortcode_atts. So the first parameter is our pairs. These pairs, so that's a pair, and that's a pair. The second is $atts, and then the third is the shortcode that it goes in. So the short code is just cta. So that's my cta here, so let's save that. And if I go back to my post, and I've already refreshed it, you can see that it's now displaying correctly. So that's using the content that I added as that parameter when I was setting up the shortcode. And it'll also go to the link, which at the moment goes nowhere. So that's how you create a shortcut with attributes. Now, this could be used for a whole variety of things. So for example, if you were outputting a custom query, the attributes could be the post type, or the number of posts to be output. If you were outputting a more complex text-based shortcode, you could have just parts of that text. So for example, you could include contact details, like a phone number and an email address. And use those to set up a link to the email address and to add text in. Or there's a whole variety of things that you could use it for. It basically means that your users can add elements of the text or elements of the content without having to add all of it. So that's how you create a more complex shortcode with some attributes, using that array of variables. In the next part of the course, we'll move on from shortcodes, and I'll show you how to create a widget plugin. See you next time, and thanks for watching.


