
 Lessons: 12Length: 1.4 hours
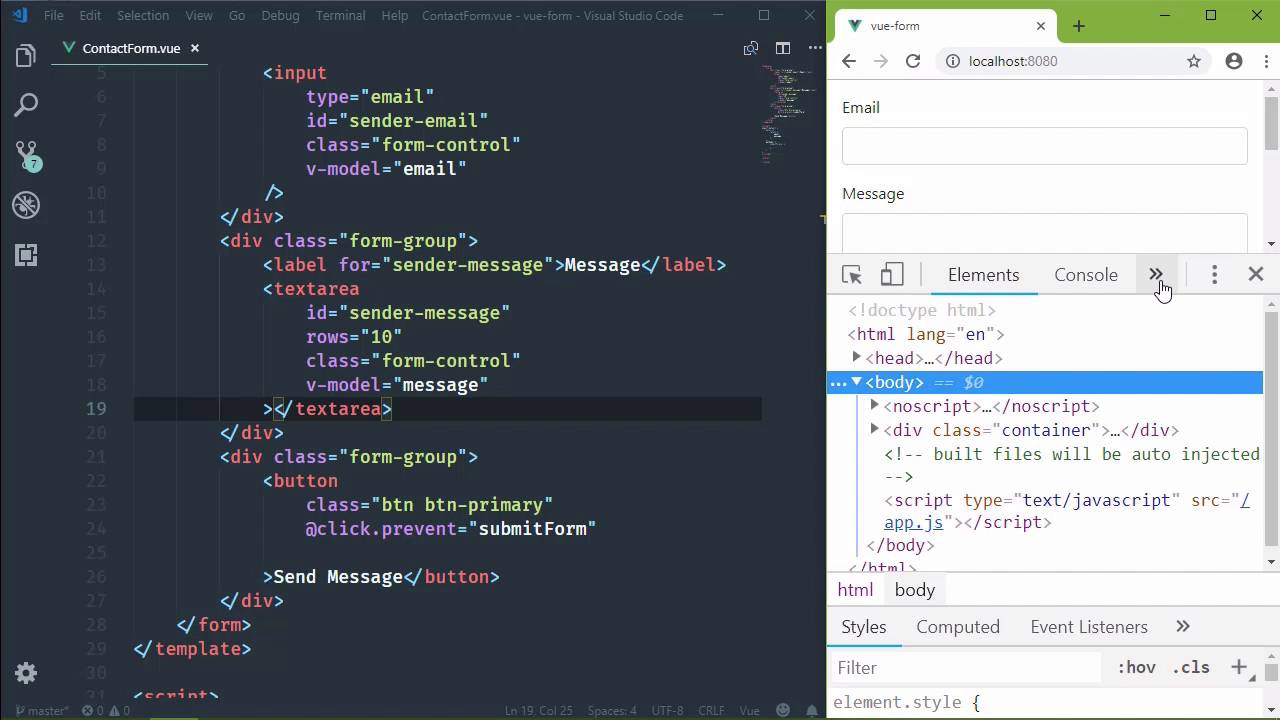
- Overview
- Transcript
4.3 Binding Form Controls to Component Data
Working with forms has always been a sore spot for web apps, but Vue makes it extremely easy: we just bind the form controls to our data props. This makes working with form data incredibly easy.
Related Links
1.Introduction
1.1Introduction01:48
2.The Obligatory "Hello World" Example
2.1Basic Structure04:55
2.2Single-File Component Structure09:51
3.The List Example
3.1Passing Props and Iterating a Collection12:41
3.2Displaying More Data08:56
3.3Using External Data11:41
4.The Contact Form Example
4.1Building the Form08:45
4.2Handling Events08:42
4.3Binding Form Controls to Component Data06:07
4.4Defining Computed Properties04:40
4.5Manipulating Style05:48
5.Conclusion
5.1Conclusion00:58
4.3 Binding Form Controls to Component Data
I've personally never liked working with forms because it's a tedious process. You have to first of all handle an event, be it the click event for the Submit button, or handle the Submit event for the form, which we didn't talk about but it follows the same concepts. @submit.prevent=, and then the code that we want to execute. So, any standard dom event follows the same guidelines. Okay, so we would either have to handle one of those events, and then we would have to find the form controls in the document, and then get the values from those form controls. It was just a tedious process and I hated it. But with Vue it is so much easier. It removes all of the tedium because we get to setup a binding between the data properties in our component with the form controls themselves. And it's a two-way binding so that any change that we make in the form is going to be automatically represented in the component data. And any change we make in the component data will automatically show up within the form itself. So the first thing we need to do then is declare our data properties. And we've done this before, we have our data factory function that returns an object. And in this case we're going to have two pieces of information. We need the email. And then we need the message, and I'm going to initialize both as an empty string. So then we just need to set up the binding between our data properties and then our controls, and we do that with a directive called v-model. This is going to set up a two-way binding between the form-control and whatever data property we specify. So this is for the email field, we'll specify email. And then we will do the same thing for the message, but of course this is going to be for the message. Now, you know what, let's first of all leave it with email, this will be interesting. So if I start typing in the email field, we are going to see that the message field is also going to mirror that because of this two-way binding. So if I start typing an email address, voila, we see that the message automatically updated as well. But if we change anything in the message, we're going to see that the email address is also modified. That's because of this two-way binding. Whatever we change in the form is going to change our component data, which is then going to change the form again since we are using the same data property here. But let's be correct and let's use the message data property for our message. And now we have our binding set up. Now one thing that you might want to be interested in is the view developer tools and I will have a link in the description of this lesson because this is a wonderful tool. If you open up your development environment or development tools rather and go to the Vue tab after you have installed it. You're going to see the structure of your application. You have the root, the app component and then the contact form. But here for the contact form we see the data of that component. And we can come in and we can actually modify that if we wanted to. And if we had props, we would see those, as well. But if we modify our email here. Now, this has to be standard JSON. So if we change this to admin@admin.com, and then we commit that change, we have changed the email data property. So therefore, we see that change in the form control as well. So now that we have easy access to this information inside of the submit form, we just have to use those data properties to refer to those values. So let's add some sudo code like validate form and then submit form, and then we can let the user know that we got your message, we will send a reply. So thanks for the message and then we will include their email address. We will reply to and then we will say this email soon. So if we test this out, we type something into the email field and then click on send message. We have what we would expect to see. We are including the email address in the alert message. But that's not the only thing that we can do. We have access to this information throughout our entire component. And that means that we can use it in our directives in the markup. So something that would be really cool to do is disable the button if we don't have a complete form. So if we don't have an email or we don't have a message, disable the button. We can use the disabled attribute, this is standard HTML and we can set that to be true if the form is not complete. Now because we are going to be using our component data for this attribute, we have to use v-bind here. So we're going to use the shorthand of the colon, but all we have to do is, if not email and not message, because if we don't have any text in these things, then they're going to be falsey. So if not email, if not message, then disable that button. So we can see automatically that our button is disabled because we don't have a message. But the minute that we type something into the message field, that becomes enabled. We can submit, and there we go. Now that's all well and great, but we need to take this a step further because we need to do some actual form validation. Now we can't just check to see if we have a value in the email field. We need to see if it's a valid email. So in the next lesson, we are going to incorporate some validation and create what's called a computed property.


