


- Overview
- Transcript
2.3 Views and Layouts
In this lesson, I’ll show you how to create views using the Blade templating language, and create a layout for all the pages on our site.
Related Links
1.Introduction
1.1Introduction01:25
1.2Setting Up Your Dev Environment06:05
2.Core Concepts
2.1Models, Migrations, and Seeds06:08
2.2Routing Overview03:16
2.3Views and Layouts04:57
3.Putting It All Together
3.1Navigation and Forms05:13
3.2Creating Records, Validation, and Session Data05:35
3.3Updating Records, Redirects, and Model Association07:01
4.Conclusion
4.1Conclusion00:48
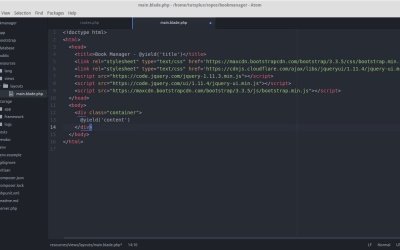
2.3 Views and Layouts
In the last lesson, we covered how to create routes in Lumen. And we made our models usable, inside the route's file. In this lesson, we'll be talking about views and layouts. And how to display data in a user friendly format. If you're not familiar with views, a view is a piece of your application that the user actually sees in your browser. In this case, it's HTML. A view can be as simple as an HTML page, with some php embedded inside of it. Lumen does allow you to do your views that way. But for this lesson, we're gonna use the Blade Templating System from Laravel for our views, since it'll save us some repetition. The documentation for Lumen isn't always clear about which components from Laravel are available, and which are not. In the case of Blade, we are able to use it in Lumen. However, Lumen doesn't come with a views folder. So, we'll have to make one. Let's create a views folder, inside the resources folder. Inside that views folder, let's create another folder called layouts. We'll start by creating the layout for our project. This will be like the skeleton of our HTML document, that we can keep reusing for each page. We just substitute in the content and the page title, for each page that we're rendering. Let's make a new file for the layout. It'll be under resources/views/layouts, and the file name is main.blade.php. This is just a standard HTML structure, with our HTML five doc type at the top. Let's pull in a bootstrap css file from the bootstrap cdn, to make our HTML elements look a little nicer. Let's also include jquery and jquery ui from the jquery cdn, as we'll be needing them later on. In the head tag of the document, we have a title section. The title of every page will be prefixed with Book Manager -, plus whatever subtitle we decide on for that particular page. Inside the body of the document, let's make a bootstrap container div to hold the content of the page. The yield statement outputs the value of the content section, which gets defined in each view. From here, every view we make will extend this layout. Each view will have its own setup for what the page title should be, and what goes under the content section. But we still get to share the document structure, the style sheets, and the JavaScript between pages, as opposed to copying and pasting it onto each page. Before we create our first view for listing authors, we need to go back into our flash authors route and have it render the author listing view, instead of echoing out the test message. The associates of array you pass in for the second argument, defines what data is going to be available inside the view. The key is what the variable name will be inside the view, and the value is the data itself. So once we're inside the view, dollar sign authors will be an array of author objects that we can iterate over. We'll need to create an authors folder inside the views folder, to hold all views related to authors. Let's go ahead and create the view. This view will take the authors from our database and render them onto the page dynamically as HTML. Let's call it index.blade.php and create it under resources/views/author. At the top of the view, we first have to extend layouts.main. Which is to say, the main layout inside the layouts folder. We'll set the title of the page to authors. Then, we define the content section. Let's put a simple, large header at the top of the page. Then we'll need a table to hold our database rows. We can use the table bootstrap class to make it look nice. You'll also wanna put @stop at the bottom of the view. We can use Blades for each functionality like this, and then just use double curly braces for echoing out the values. Let's see what our view ended up looking like. And here you have it, all of our authors in a clean, tabular format. In the next lesson we'll be adding a site-wide navigation to the app, and creating our first form.


