

- Overview
- Transcript
3.1 Navigation and Forms
In this lesson, we’ll add a top-level navigation to our site’s layout so users can get around the site more easily. Then we’ll create our first form, which will eventually create a new Author record when submitted.
Related Links
1.Introduction
1.1Introduction01:25
1.2Setting Up Your Dev Environment06:05
2.Core Concepts
2.1Models, Migrations, and Seeds06:08
2.2Routing Overview03:16
2.3Views and Layouts04:57
3.Putting It All Together
3.1Navigation and Forms05:13
3.2Creating Records, Validation, and Session Data05:35
3.3Updating Records, Redirects, and Model Association07:01
4.Conclusion
4.1Conclusion00:48
3.1 Navigation and Forms
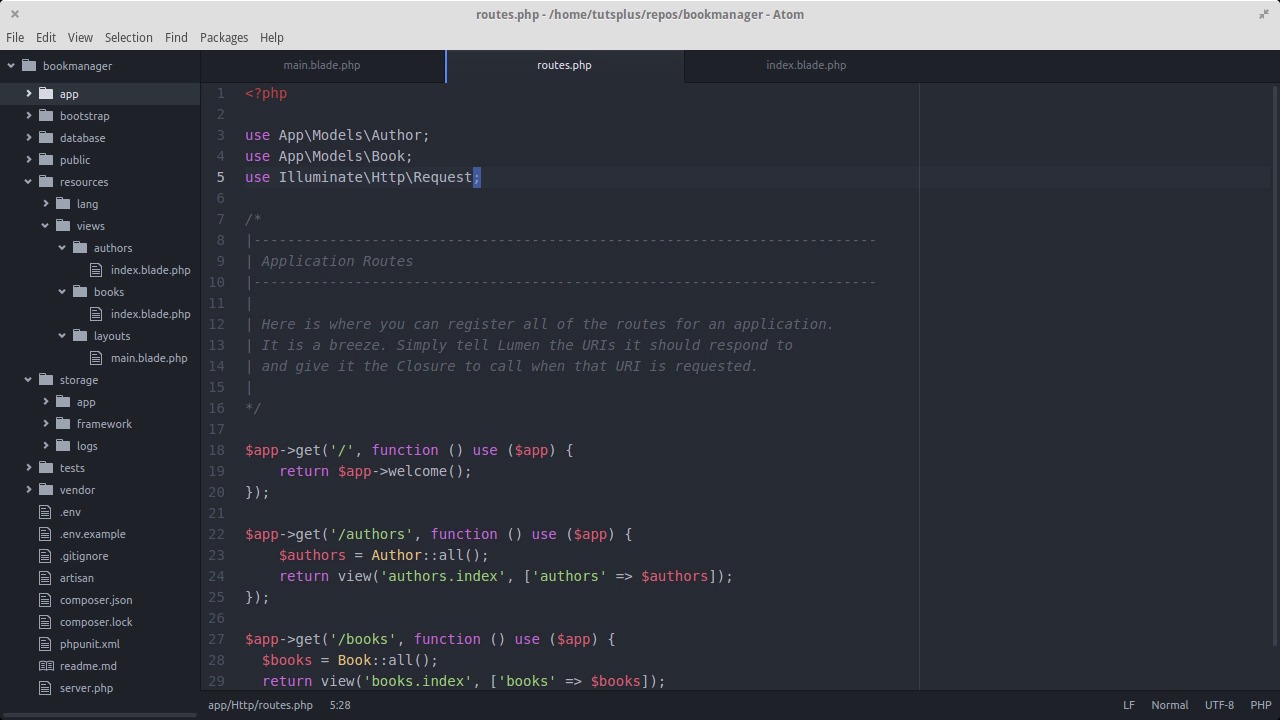
In the last lesson, we set up our layout and our first view using the Blade templating system. Then we retrieved all the authors from the database and presented them back to the user in a readable table structure. In this lesson, we'll add site-wide navigation to the app, the ability to list books, and a form for adding a new author to the system. Now that we've got a route, a view, and a couple of models, we have enough that we can start really building out the features of the app. Let's start by adding a top navigation to our layout file. We gonna have a few different pages in this app and the navigation will give us some glue between so we can just click between pages instead of typing out the paths in the address bar. Since we're using bootstrap, we don't have to think too hard to make this happen. The basic structure looks like this with a main link to go to the home page, and then a UL where the list items are the entries for each page in the navigation. Let's add one called authors that links to /authors. Then we'll have another called new author that links to authors/new. Then we just do the same for Books and New Book, following the same restful patterns. Let's see what that looks like. Not bad, considering we didn't have to write any CSS. Next, let's add the ability to list books, just like we can with authors. First, we'll create an index route to list books, similar to what we have for authors. We'll follow the same pattern, loading up the books into a variable, then passing it into a view under resources/view/books called index. Let's create the books folder under resources/views. And then we create the view file. Here's what the view looks like. Pretty much the same idea. We're good on listing records for now, let's add the ability to create authors now. As we get into working with web forms and session data, we're gonna want access to our request object inside the actions of our routes. At the top of the routes file, let's include use Illuminate\Http\Request, now we can make a new get route for /authors/new with an argument to the anonymous function as our request object. That way we can easily retrieve form and session data when we need it. It may not be obvious yet why we need sessions for this, but we'll get to that shortly. We'll be rendering a new view under resources/authors, called new. This will be a form that allows us to fill out the data for a new author. We'll pass a variable into the view called request, which gives us the overall request object so we can grab our form data as well as session data. Before we get into the new author view, let's enable sessions for the entire app. Open bootstrap/app.php, and you'll see block about $app middleware. Uncomment that whole thing, and sessions will be enabled. Now, let's create our new author view. The title and main heading for the page will say New Author. Then we need a form whose method is going to be post and the path will be to /authors. That's a new route that we'll be making in the next lesson. Next, we fill in the form fields with labels and some bootstrap classes to make them look nice. Along with our input fields we'll need a hidden field for a CSRF token. CSRF or cross site request forgery, is a security concern for web applications. If you haven't heard of it, it's good topic to read up on. Basically, our luman app generates a unique string of characters that we place into the hidden field so that it get sent back to the server when the user submits it. Then, the app check for that token in the form data. If it's there, our app knows it is a valid request coming from our site and not any other site. We'll need a submit button, and then a little bit of jQuery to put a date picker on the date of birth input field. Notice how the form input for date of birth has the class datepicker on it. With the JavaScript snippet at the bottom, any input with a class of datepicker will show the datepicker when the user clicks into it. Let's have a look at the form. And our form is looking pretty good now. In the next lesson, we'll start actually saving records into the database and running validation on our models to make sure the data we're getting from the user makes sense.


