
 Lessons: 10Length: 51 minutes
- Overview
- Transcript
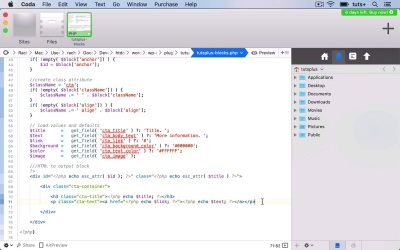
4.2 Writing the HTML
In this lesson, we'll write some HTML to output the block to our WordPress site.
1.Introduction
1.1Introduction00:48
1.2Why Create Blocks Without JavaScript?03:25
2.Registering a Block
2.1Setting Up the ACF Plugin04:43
2.2Registering a Gutenberg Block With the ACF API06:17
3.Adding Fields to the Block
3.1Creating a Field Group and Adding Fields04:16
3.2Adding Block Settings03:49
4.Outputting the Block
4.1Setting Up the Block Class and Values08:17
4.2Writing the HTML06:14
4.3Adding the Block to a Post or Page10:49
5.Conclusion
5.1Conclusion02:16
4.2 Writing the HTML
Hello, and welcome back to this Tuts+ course on creating Gutenberg blocks in WordPress without JavaScript. In this part of the course, we're going to continue with our callback function. We'll add the HTML to output the block on a page or a post. So I'm working in my plugin file again in my callback function. And I will work below the code I've already added inside my function. And here I'll add the HTML, first adding a comment so that when I come back to this in the future, I know what's going on. So I close php, not forgetting to open it again at the end of the function, and then I'll add some HTML. And fix any typos. So I've got a div with an ID that is the ID of this block that I've already created in my function and a class which is the title. Make sure I close that div further down. I always like to close my elements before I write other elements inside them. And then within that, I'm going to add another div, which will contain all of the text elements. And then close that div. And then inside that, we'll have all of the individual text elements. So I'm gonna start with an h3 for the title. So I'm echoing this variable here, title, which I've already done for my class as well. I'll close that h3 and then I'll add a span. In fact, no, I'm gonna add a paragraph, a p, not a span. And then within that, I want to include the link which I'll wrap around the text. So I've got a paragraph with a link inside that and then the text inside that, which is in my call to action box. Now, the next thing I need to add is the image. And that will go outside that cta container, which gives me the opportunity to style it separately. So that's my div and then my image, which I'll give a class. And that's not actually the correct way to do the image because that will just echo out my image variable. I need to actually use a function to fetch that image. So I'll use wp_get_attachment_image. The first parameter for that is the image and the second is the size. I'm gonna use full. In fact, no, no, I'll use medium in case somebody uploads a huge image, I don't want to be pulling that in. CSS will style it so it doesn't look full size. But I don't wanna slow down people's browsers with a massive gray image. Now, you might want to actually create a new setting, a new image. And you can register an image size if you want to. And you could use that for your call to action block or for any block that you create that includes an image. But I'm not gonna do this, I'm gonna stick with medium. So I've got my div, I've got my heading, I've got my paragraph with the link and the text, and then I've got the image. So I'll save that. And that's the code to output the content of my block. So when I go back to my site, there is clearly a problem. So let's take a look at the code and see if we can work out what that is. It's saying the problem is on line 80, where the file ends. Let's just try tidying things up a bit there. See if that works, refreshing the screen. All it was was that line underneath my closing php tag. Don't you just hate PHP sometimes? It's a very unforgiving language. Now, there is probably a case for learning JavaScript because you don't get this sort of problem. Because all I did was miss out a space and I added a carriage return, and my whole site went blank as a result. So I like PHP because it's a familiar language to me, and you're probably watching this because you do too. But sometimes it can be a bit of a pain. But anyway, let's move on to the next part of the course. See you next time, and thanks for watching.


