
 Lessons: 10Length: 51 minutes
- Overview
- Transcript
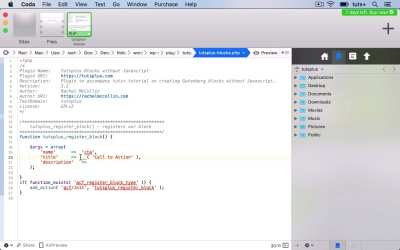
2.2 Registering a Gutenberg Block With the ACF API
In this lesson, I'll show you how to write the code for your plugin to register a block using the ACF acf_register_block_type() function.
Related Links
1.Introduction
1.1Introduction00:48
1.2Why Create Blocks Without JavaScript?03:25
2.Registering a Block
2.1Setting Up the ACF Plugin04:43
2.2Registering a Gutenberg Block With the ACF API06:17
3.Adding Fields to the Block
3.1Creating a Field Group and Adding Fields04:16
3.2Adding Block Settings03:49
4.Outputting the Block
4.1Setting Up the Block Class and Values08:17
4.2Writing the HTML06:14
4.3Adding the Block to a Post or Page10:49
5.Conclusion
5.1Conclusion02:16
2.2 Registering a Gutenberg Block With the ACF API
Hello, and welcome back to this Tuts+ course on creating Gutenberg blocks in WordPress without JavaScript. In this part of the course, we're gonna register our block in our plugin. So we've already installed the ACF plugin, and we've set up our Tuts+ blocks without JavaScript plugin as well. And now we're going to register our block in that plugin. Now you'll be able to find documentation on that on the ACF website. But I'm gonna walk you through the process. So in our plugin, which I've renamed to version 3.2 up here, because we're in part 3.2 of the course. I'm gonna add the code to register the block. So I'm going to create a function called tutsplus_register_block. So we hook that function to a hook called acf/init, which comes with the advanced custom fields plugin. Making sure I type it correctly. However, we don't want to automatically add the action. Let me just correct that there. We don't want to add that if the ACF plugin isn't already installed on the site. So we'll add a check for that. And what we need to do is check that a specific function exists that comes with ACF. And that function is acf_register_block_type. So I'll move that add action into my conditional statement. And then this function will fire on the ACF and it hook if that function exists. So now let's populate our function. So first, I'm gonna create my args. So I have an array of arguments, Will register the block. And I'm gonna create a call to action block. So I'm gonna give it a name of cta. So this will be a kind of button or box where I can customize the colors, and the text, and the content, that kind of thing. So I'll give it a title of Call to Action, which I'm making translatable. And then I add a description, which will also appear in the admin screens. So when somebody's adding this block to a post or a page. Just tightening up a layout here. So my description again is translatable. And this is some text to describe this particular block. Just tidying up my typos. I then use a render_template argument, which will point to a theme template file, which will output the block itself on the page. I'll add a category argument which is the category of custom field. Which is a advanced custom fields thing, an icon which is the icon that will show up for it in the admin screens. Keywords that somebody can use to search for it and to find it in advanced custom fields. And this is an array of keywords. And those are my arguments. Now, I'm gonna make a slight change to that name. Give it a prefix so that it's unique, and we can be sure that there won't be another block or another group of blocks that might be called cta in advanced custom fields. One change to this argument here, I'm gonna replace render_template with render_callback. And I'll use a callback version within this plugin. Because that keeps it all in one place and means we know exactly where our code is. And you've got it all in this version of the plugin. So that is my name of the callback function. And I'll add that later on in this plugin in a later part of the course. So we have all the arguments now. And then we need to add the function that actually registers the block. So that will register my block with those arguments. I'm gonna save that and then I'll go to my site. If I refresh the Plugins page, it's not showing anything except for the new version number. And if I go to Custom Fields, there are no field groups yet. I'll need to add one. But I'll be able to select this type of field group in this screen here that Advanced Custom Fields provides us with. And that's what we'll do in the next part of the course. See you next time, and thanks for watching.


