
 Lessons: 10Length: 51 minutes
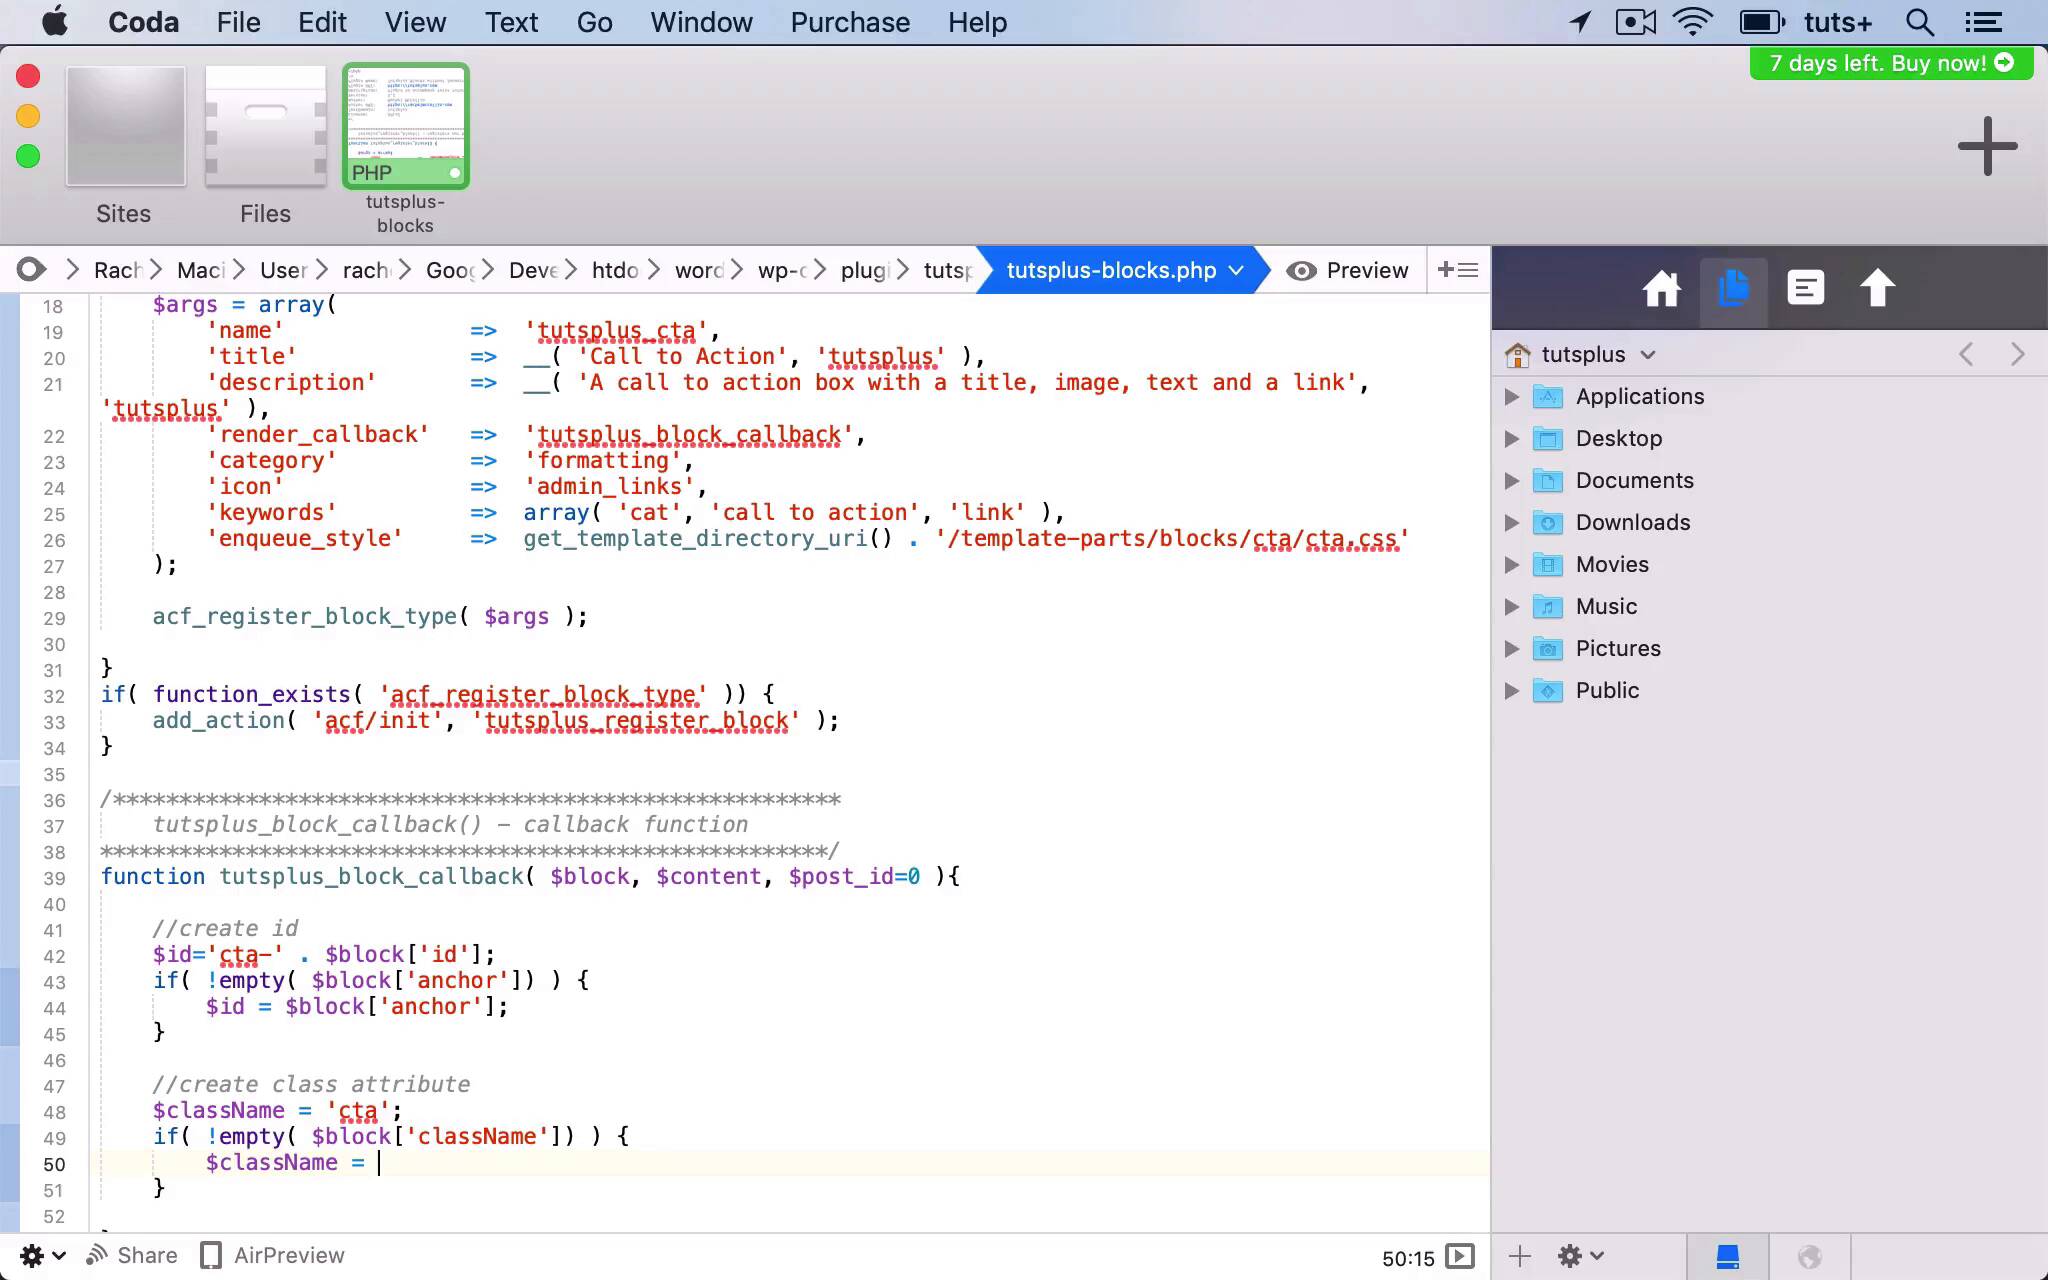
- Overview
- Transcript
4.1 Setting Up the Block Class and Values
In this lesson, we'll create a callback function for the block and define values for outputting it based on its fields.
1.Introduction
1.1Introduction00:48
1.2Why Create Blocks Without JavaScript?03:25
2.Registering a Block
2.1Setting Up the ACF Plugin04:43
2.2Registering a Gutenberg Block With the ACF API06:17
3.Adding Fields to the Block
3.1Creating a Field Group and Adding Fields04:16
3.2Adding Block Settings03:49
4.Outputting the Block
4.1Setting Up the Block Class and Values08:17
4.2Writing the HTML06:14
4.3Adding the Block to a Post or Page10:49
5.Conclusion
5.1Conclusion02:16
4.1 Setting Up the Block Class and Values
Hello, and welcome back to this Tuts+ course on creating Gutenberg blocks in WordPress without JavaScript. In this part of the course, we're going to create our callback function that will actually output the block on a post or a page. And we'll start by setting up a function for it and pulling in our fields. Now, before I do that, I'm going to edit these because I don't like this Book CTA. I'd rather call it CTA Title. So I'm gonna edit that, because that's what it is. It doesn't have to be a CCA for buying a book, it could be for anything. And I'll be using these names when I pull them into my callback function, because this is how WordPress and how the Advanced Custom Fields plugin will identify them. So I'm gonna make a note of all those names so that when I'm writing that function, I've got them to refer to. I'm gonna edit the background and call it CTA Background Color. And then I'm gonna update that field group to save those changes. So I'll use all those names in my code. So now let's go back to our plugin file and create our callback function. So let's copy this and paste it down here and edit it. So my callback function is called tutsplus_block_callback. And then I'll change the description here. And I like to use comments like this throughout my plugins, so I can see exactly what's going on. And if I ever need to come back to the code in future, I don't have to spend ages going through it. So I'll start by creating my function. I don't need to hook it to anything because it's a callback function. And I need to add some parameters to it. The first one being block, content, and post_id. So now let's add some content to this function. The first thing we need to do is create a unique ID for this specific instance of the block. And we do that using the CTA or using the IDs that we've already created for the field group. And it'll use variables that are provided by the Gutenberg interface and the Gutenberg API. So it has a unique ID, this particular instance of the block, because that means we can then use that later on to style it. Because we just want to style this instance of the block, not every time this block appears on our site. So the ID is cta- and then the ID of the actual block. An anchor is part of the array of variables stored against the block by Gutenberg. If that's empty, we will create an ID, Which we've already defined using this ID variable. We then need to create a class attribute for it. And this is all using aspects of the Gutenberg API to create our block correctly. So this creates the ID and the class attribute, pulling in values from an array of variables stored against the block. And if you want to find out more about that, you can see it in the documentation for Advanced Custom Fields here. So now let's load the values that have been set using those fields in the field group. Now what I used here was not cat_title, it was cta_title. So I need to make sure I'm using exactly the same IDs for my fields as I used when setting up my groups. So these names that I used here. So I'm gonna copy these and paste them and edit them as I go along. So I need to make sure I'm editing the right one. And they are placeholder values that will be overwritten by the user. And for my link, I'll just put a hash as the default. Making sure I'm using cta and not cat. Now you don't have to include a default. I could have taken all these defaults out if I wanted to. And I'm not gonna include a default for the image. So those are the values and the defaults. So the next stage is to write the HTML that will actually output the block. And that's what we'll do in the next part of the course. See you next time, and thanks for watching.


