
 Lessons: 16Length: 1.6 hours
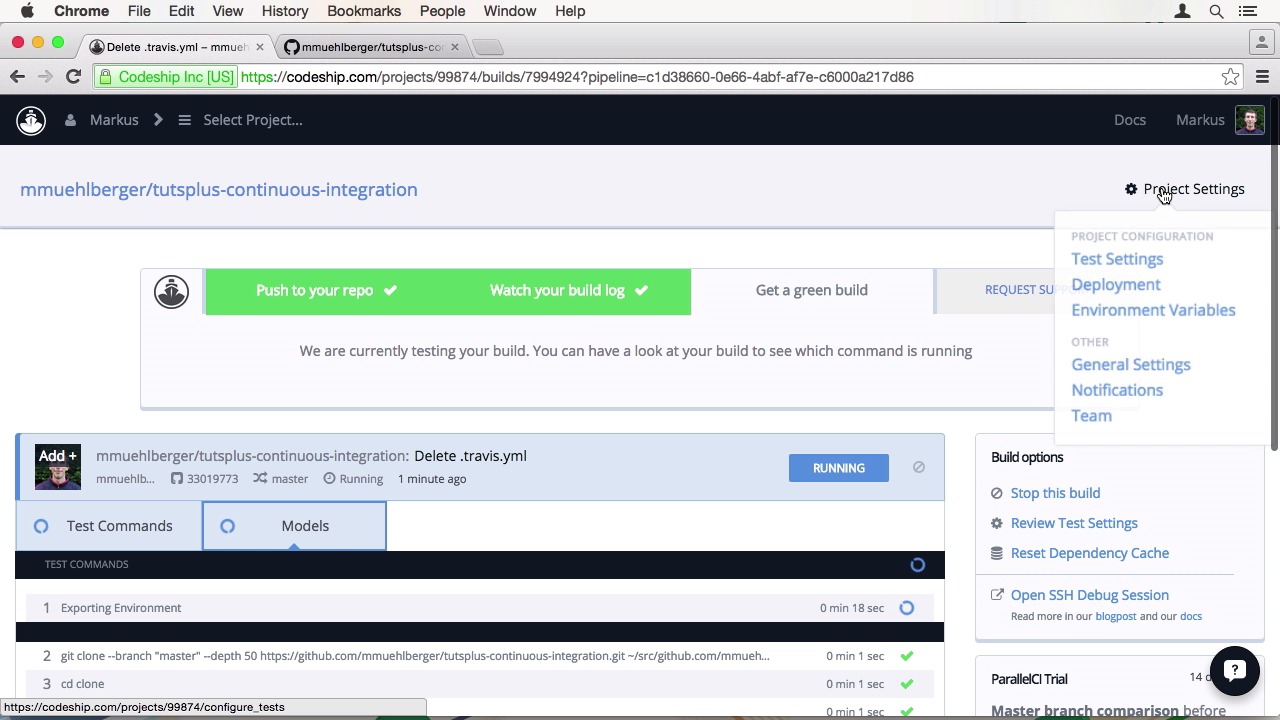
- Overview
- Transcript
3.1 Codeship Overview
In this lesson, I’ll show you how to set up our project on Codeship. We’ll also take a look around the Codeship interface.
Related Links
1.Introduction
1.1Introduction01:07
1.2What Is Continuous Integration?04:54
1.3Development Approaches: Git Flow and GitHub Flow04:38
1.4Project Overview01:42
2.Git Flow, Travis CI and Engine Yard
2.1Travis CI Overview09:01
2.2Test a New Feature07:43
2.3Release and Hotfix08:04
2.4Engine Yard Deployment08:27
3.GitHub Flow, Codeship and Heroku
3.1Codeship Overview09:24
3.2Develop a New Feature09:49
3.3Heroku Deployment05:38
4.Bonus: Custom Jenkins Server and Capistrano
4.1Installing Jenkins on a VPS02:31
4.2Jenkins Overview10:08
4.3Test a Ruby Project06:02
4.4Capistrano Deployment08:04
5.Conclusion
5.1Conclusion01:02
3.1 Codeship Overview
Welcome back to continuous integration workflow. Now that you know how to develop, test ,and deploy a feature with Travis CI and Engine Yard, we are going to use Codeship and Hiroko to do the same thing using the GitHub flow development approach. In this lesson I'll be giving you an overview of Codeship and set up our project there. When you sign into Codeship for the first time you will be presented with this get started page. So let's create our project. You first have to choose which SCM provider you want to use. Right now, Codeship supports GitHub and Bitbucket. After selecting a service, it will load all your repositories there Unlike Travis CI, it will also show your private ones. Let's choose our continuous integration repository. Now we have to configure our project. Codeship divides its build process into multiple sections. First, there are the setup commands. This is where you prepare your environment for your build meaning choosing the correct droopy version and preparing the database. Then there are test pipelines, which will run your test. Finally, there is the deployment step which we get to in a bit. Codeship also provides presets, that have common settings for popular frameworks and languages. We're going to choose Ruby on Rails to start off. We want to use the latest Ruby 2.2 version, so let's change our setup commands. Everything else is fine. To speed up our build we're going to use multiple test pipelines. This is a recently introduced feature by Codeship. They call it parallel CI meaning your tests run in parallel to each other saving, you a huge a lot amount of time instead of running them sequentially. I know we don't have a huge number of tests, but let's pretend we do. I want to split the model and control aspects into separate pipelines. First I'm specifying the rake task under the fault pipeline. And then I'm going to add a new one and call it models. We're also going to run rake there, but limit its student model specs. Now we can save our project, and the site will redirect us to the dashboard. The trigger I first built, we need to push something to the repository. But before I do that, I want to prepare the project on GitHub for using GitHub Flow. Now I want to set the default branch back to master. Then, I can go to the branch list, and delete the develop branch. To make, and push a change to our repository, why don't we just delete the Travis CML file. We can do that directly on the GitHub site. When we switch back to Codeship, you can already see the build running. By clicking on it you will get more details. For instance, the two test pipelines. Each pipeline is an independent environment. So they have to run the set up steps on every pipeline. Internally, Codeship uses version machines for that. You can also see the different commands in the log. So, each command, Codeship groups the output for you to total it, so it's easier to see what is going on. While that those is running, let us explore the project settings. The test settings are exactly what you've seen when creating the project. Nothing new here. In the deployment sections, you can specify specific branches of wild cards to deploy it to a server or service. I will show you this section in detail in a later lesson. As with Travis, you can also add environment variables to your build. There are also different notification options. You can choose to get an email about your builds or be notified in one of the chat services like Hip Chat or Slack, distributed teams, nowadays, like to use to communicate. If you have a custom service that needs build data, you can also add a web hook. They probably don't want to look at your builds alone, so you can add team members to the project. Codeship will automatically suggest people who committed to the repository for you to add. You can also write people with the email addresses. The Repository tab just lets you relink your repository to another one. In the General section you can change the connected hit hub account that is going to be used. See the projects unique identifier on Codeship and also the public key, Codeship will use for this project when interacting with external services like GitHub or Hiroku. Now let's go back to our build to see how it's doing. It seems we are right in time to see the tests. The first run always takes a bit longer since Codeship has to build up its caches. It looks like the build failed, I mistyped test commands. They should have been in plural, but that's no problem. Codeship automatically suggests we review our test settings. So we're going to change the commands to use models and controllers. After saving we can choose to restart the build. We don't have to make another commit. Codeship will already use in new Test Commands for to build. Since the project isn't run for the first time, the build now runs much faster. Our build just took 22 seconds. And in this time it passed. Codeship is now suggesting further steps to take. They try to help the users wherever they can. Giving suggestions what to do next. Before I finish I want to show you another neat feature. It might help you debug a problem when testing. That only occurs when building on Codeship. You have the option to open an SSH session to your build VM to dig into the problem right where it occurred. Creating the bridge just takes a few moments. And when it's ready we will get an SSH command, ready to be copied into a shell. When your SSH entered the machine, we will get a helpful info text showing you the available commands. Codeship wants to make it easy for you to get to your code and they replicate the commands they used to run your build. It also has a choke command. Not necessarily useful, but I thought you should know about it. A Roman walks into a bar and such. When you are done debugging, you should end your session with CS exit. This will kill the SSH bridge and free it up for other uses. Codeship will do this after some time anyways, but it's better to clean up after yourself. In our next lesson we're going to develop a new feature using the GitHub workflow development approach. See you there.


