
 Lessons: 9Length: 1.1 hours
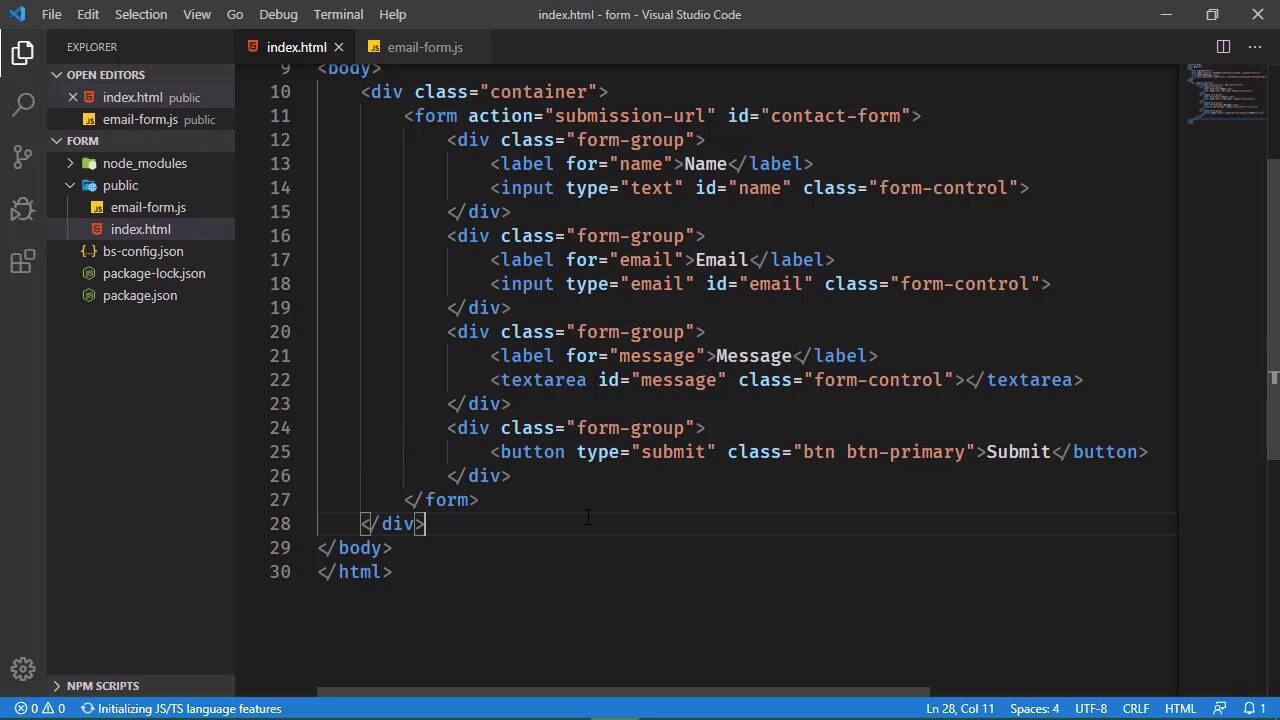
- Overview
- Transcript
2.1 Writing the Markup
We need a form to work with. In this lesson, we'll write the form markup and a tiny bit of JavaScript.
1.Introduction
1.1Introduction02:30
1.2Getting Started06:29
2.Building the Form
2.1Writing the Markup08:45
2.2Setting Up Unobtrusive Event Listeners08:44
2.3Organizing Functionality With Objects07:32
2.4Validating Form Fields10:40
2.5Displaying Validation Messages09:42
2.6Submitting the Form11:03
3.Conclusion
3.1Conclusion02:34
2.1 Writing the Markup
Now that we have a project, we need a form. So in this lesson, we're going to build that form. And we're going to start by grabbing the CDN for Bootstrap because we want our form to look nice. And Bootstrap will arguably make that nice. It's a lot nicer than the default style sheet that comes with a browser. So there's that as well. So I'm just gonna paste that in. We're not going to use any of the components like models, or anything like that. So we don't need the JavaScript library or jQuery or anything like that, we just need the CSS. Then from there, we just need to start writing our markup. So we'll start with a div that's going to serve as the container for our form. And as I'm going through the markup, I'm also thinking what I need to work with inside of JavaScript. And when it comes to the form, we need to do something whenever we submit the form. Because we need to validate the form, we need to make sure everything's okay with that data, so that we can then send that to wherever it needs to go. And we're doing that all through JavaScript. So we need to be able to easily access this form. And the easiest way to do that is to just give it an ID. So we will have an ID of contact-form. And as far as the action, I mean, technically we don't need to have an action here. But I like doing this, I don't do it all the time. But I like specifying the action so that we can actually use that in the JavaScript. And I'll show you how we do that when we get there. So now that we have our form, we just need our fields. And really we only need two fields. We need the email address and then the message. But when it comes to a contact form, I'd like to have a name as well. That way, I can greet the person whenever I'm responding. So let's start with a field for the name. And the text for that label is going to be name. Then we will have our input element with a class of form-control. It does need to be a type text and we do need that ID of name. So there we go. We can use this for our other field for the email. So let's just copy and paste. The for the label is going to be email. The text is going to be email. And then the ID is going to be email as well. And I guess we could change the type too since we're being forward thinking and we can use the email type. And then we need a field for the message. So once again, let's just copy and paste. As far as the label is concerned, we need to make the necessary changes to the for attribute and for the text. But now, we don't have an input element, we have a text area. And we do need a closing tag for the text area. So let's go ahead and add that. We do need to change the ID to message and we need to get rid of the type. And then finally, we need the submit button. So, one last copy and paste. And we don't need a label here, we just need a button. So as far as the button is concerned, let's have the button class for the btn-primary. And then we'll have Submit. Now when it comes to forms, we have two ways that we can actually submit the form. We can handle the submit event for the form itself. Or we can handle the click event on the button and then submit the form through that way. Either way, we get a form submission. I'm going to opt to handle the submit event for the form. So I guess we do need to add a type to the button so that we can have that set to submit. So let's take a look at this in the browser. Everything looks fine there. And so let's add in our JavaScript file. This is going to go inside of Public as well. So let's call this email-form.js, and we do need to add a reference to this file. So I'd like to put my JavaScript files at the bottom of the page right before the closing body tag. And we will simply have a script element where the source attribute points to emai- form. And there we go. And if we wanted to make sure that that absolutely works, we can alert some kind of message, it really doesn't matter what it is. We're just testing to make sure it works. And in the browser, we can see that that does indeed work. So when it comes to writing JavaScript, really the first lesson that we need to talk about is protecting our code. So let's say that we have a variable called form. Because we want to retrieve that form object. And we will use getElementById. We will pass in contact form so that we can get that element. And then we would have a function called submit. And then we would do something with that form object there. Now, technically, there's nothing wrong with this code. But let's also think of this in terms of the late 1990s and early 2000s. In that we have just defined a variable and the global scope. And if it's global, then that means it is globally accessible. If it's globally accessible, that means that it can also be overwritten. So let's say that's okay. We found this really great library that adds a lot of extra functionality that we want to use. And it's written by a guy named Jim. And we want to include that. So we're going to add Jim's library to our HTML file. But the problem there is that library has a form variable as well. And so by just including this library, we have essentially broken our code. Because instead of referencing our form object, the form variable is actually referencing whatever was used inside of Jim's library. So we have broken our page. And this was a very real problem. So the solution then was to place our code inside of another level of scope. And if you have taken the functions course, you know that functions have their own level of scope. So we can actually put all of our code inside of what's called an immediately invoked function. This is a function that, well, it looks a little weird to begin with. We start with a pair of parentheses, and then inside of the parentheses, we have the function keyword, followed by the parentheses for that function, then the curly braces. And then we want to call that function. So first of all, let's get rid of these parentheses. What we have is an anonymous function. This is a function expression. It's kinda like if we were going to assign it to a variable. But we're not doing that. Instead but we're doing is creating this function and then immediately calling it so that the code inside is going to execute. And while it does look a little weird, this does protect our code. Because now, this form variable and this submit function is inside of the scope of this anonymous function that we just created. And so therefore, it is protected. It cannot be accessed from outside. And thus, it cannot be manipulated from outside. Now it looks a little funny because we have these parentheses surrounding the function definition. Those are kind of important because it's a syntax error. If we just write a function and then try to execute it. So one of the ways we can get around that is just by surrounding the function definition with parentheses, and then calling that function. And so now any other library that we would choose to add to our file Is going to be just fine. It's not going to affect our code in any way because we have protected it using an immediately invoked function. And so now that we have that in place, we are ready to handle the submit event for that form. And we will do that in the next lesson.


