
 Lessons: 9Length: 1.1 hours
- Overview
- Transcript
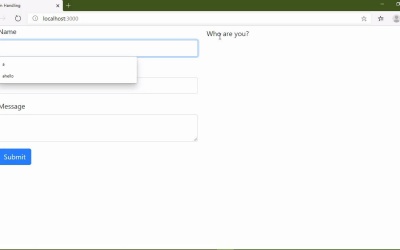
2.4 Validating Form Fields
To provide a meaningful experience, we need to validate our form before submitting it to the server. In this lesson, we'll write the code for validating all of our form fields.
1.Introduction
1.1Introduction02:30
1.2Getting Started06:29
2.Building the Form
2.1Writing the Markup08:45
2.2Setting Up Unobtrusive Event Listeners08:44
2.3Organizing Functionality With Objects07:32
2.4Validating Form Fields10:40
2.5Displaying Validation Messages09:42
2.6Submitting the Form11:03
3.Conclusion
3.1Conclusion02:34
2.4 Validating Form Fields
Now that we have a mechanism for writing messages to the page, we need to turn our focus to validating the form because we want to display validation errors, we first of all need to perform the validation. So, in this lesson we're going to focus more on that. However, we're not going to go in depth into the constraint validation API. If you're not familiar with what that is, it's just basically HTML5 form validation. For example, we have three fields to input elements in a text area. And if somebody is going to send us a message, we really need all three pieces of information. So we can come in and mark these fields as required using the required attribute. And then behind the scenes, the browser is going to do all of the hard work for us. It's going to know that these are required and if the user tries to submit the form, then it's not going to allow it until the validation passes. And you can see Chrome is saying please fill out this field. So the HTML5 form validation does all of this work for us. So we no longer have to actually write the code that's going to validate unless if it's some very specific and specialized information that we need to validate. For just normal everyday stuff, we can rely upon the browser to do the hard work for us, so now we just need to display the error messages when they occur. So now the first thing that we need to do is tell the browser not to do this to pop up its own error messages because we want to provide our own messages to have our own experience. And we can do that very easily by just adding an attribute to the opening form tag. It's called novalidate. And that is kind of misleading because there's still validation going on, it's just not going to use the browser's default experience. So, by clicking on Submit, we can see that the tooltips go away. However, if you'll remember I want to be as unobtrusive as possible, and this is kind of getting into the realm of being obtrusive. Because if a user doesn't have JavaScript enabled, well, they gonna have a form that works but it's not going to give them any feedback. So we want them to have at least the default browser experience. So we don't want to set no validate directly inside of our HTML. Instead we want to do that inside of our JavaScript so we can do that very same thing with the set attribute method, and we will set no validate to true. And that's going to give us the same thing. So if we go back, click on Submit, we don't get those tool tips. The next thing I want to do is create an array that is going to contain the properties that we are going to be looking for as far as validation is concerned. The first is called valueMissing, this is used for any field that is required. So whenever we check on the property called valueMissing, if it's true, then that means that it is a required field and validation failed for that field. The second type of error we want to look for is typeMismatch. And this is for our email field because our email field is not only required, but it also needs to be an email address. So if the value inside of this field does not conform to it An email address then that is a validation error that we want to catch. And we want to display a message for that. And this is great because once again, the browser is going to do that hard work for us. So we don't have to have any regular expressions or anything like that. Now this array is going to come into play in a few minutes. The first thing I want to do now is write a function called validate. That's going to validate an individual element. And this element is going to be either the email the name or the message fields. And really I don't think we need these variables. I think I wrote that code well before I had actually thought about what we were going to do so I'm going to leave them there but we might end up getting rid of them. So for this validate function, the first thing we want to do is get whether or not validation passed for this field. And we can do that with the validity property. This is the gateway to the whole constraint validation API. This validity property we'll have the valueMissing. It'll have the typeMismatch properties and all of that great however, the one that we are currently concerned with is just called valid. If it's valid, then everything is fine. If it's not valid then you know something went wrong as far as validation is concerned. So if it is valid then really we want to not display anything at all as far as a validation message is concerned. So we can just pass in an empty string. Now, I know we haven't written this yet, we will do that in the next lesson. For right now I'm just stubbing this out. But really this isn't good enough, because we aren't just displaying an informational message. We are displaying a message for a distinct field. So we're going to have to keep track of which error message goes with which field. So whenever we write a validation message we also need to know the elements and we can do that with it's given id. So if it's valid we just clear out whatever was written for that field and then we will return true. But if validation fails, then we definitely want to write a message to our message pane. So we will specify the element, but then we need to know what type of error occurred. And we also need something that's friendly enough for the user to read so that they can understand what they need to fix. So we can write a function called getErrorMessage and we can pass in the element that we are currently validating and that will give us the message to send to our message pane. And then finally we will return false. So how do we get our error message? Well, we can do that inside of our HTML. Now, you could make the argument that this is being a little obtrusive here, but I don't think, so because this isn't going to break anything as far as how the form works using just the default browser functionality. And in my mind, that is what is or isn't obtrusive. So we are going to have just some special custom attributes that will have the validation error messages for the different types of errors. So in this case we have the valueMissing. Because this is a required field, if there is no value, then the value is missing. And we want to tell the user to please enter their name. So that can be our error message and each one of these fields is required. So we can go ahead and copy and paste that into this other elements. And then we just need to change the content here. So we can have, please enter your email. And then, please enter your message. So, in the case that any one of these do not have a value, that is the error message that we will display. Now for the email, if you'll remember, I said that there's multiple things that could go on, it is required, but it's also an email address. And we need to make sure that it is a valid email address. Now, we can't really check to see if it's an email address that exists because we can't do that unless if we actually send an email. So all that we can really be concerned with is that this is a valid email, it conforms to an email address. And the error message here will be please enter a valid email address and I guess we need to have address here just so that we are specific as to what we are getting. And with these messages, we can retrieve these inside of that getErrorMessage function. So let's go ahead and write that as well. I'm gonna put this before validate. And this is going to accept the element that we were working with. And the first thing that we're going to do is iterate over these validation props. And we're going to do that with a for loop. We'll have our counter, I call my counters ii instead of just plain i and the reason is if you ever did a search for i, look how many places i is used. But if you do a search for ii, well, that's a lot easier to find where you have used that as a counter for a loop. That's just what I do. So, we want to iterate for as long as the counter is less than the length of our validation props. And then of course we want to increment this and then we will get the prop at this index and we will use this property to determine whether or not this is the validation error that occurred. So once again, we're going to use that validity property and it would be just like we are using valueMissing or typeMismatch. But we're going to use our square bracket syntax to specify our prop. And then we are going to return the value of one of those attributes that we just created. So that was data-valerror-, and then it was the name of our prop. So there we go, that will give us the error message for whatever type of validation failed. However, just in case something goes wrong, let's just have unknown error. So just in case, if we iterate through our loop here, we don't find an error for valueMissing or typeMismatch, then we can specify unknown error. And then finally we need to kick this off when the user inputs information into those fields. So here we will call validate, and we will pass in the target of the input event. Now of course, none of this is gonna work because we haven't implemented anything as far as our message pane is concerned. But we will do that in the next lesson.


