
 Lessons: 9Length: 40 minutes
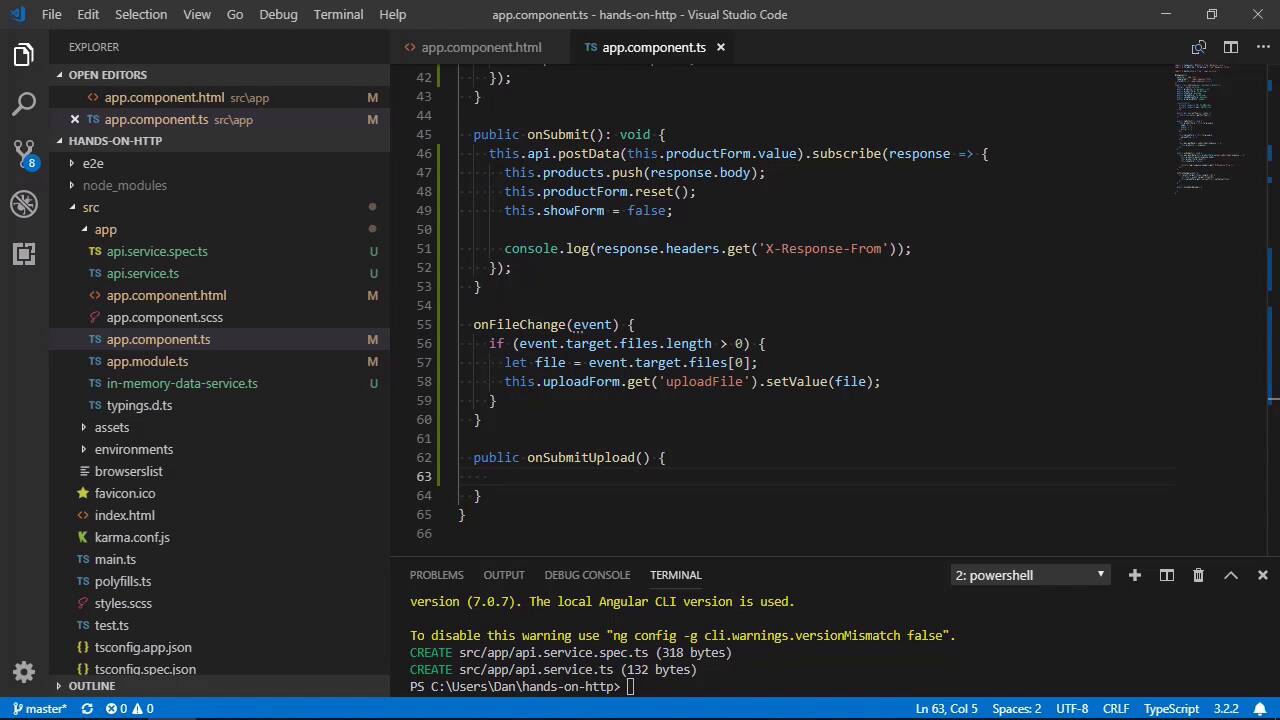
- Overview
- Transcript
3.1 Using Progress Events: Part 1
In this lesson, you'll learn how to override HTTP methods in the Angular in-memory database by adding named methods.
1.Introduction
1.1Introduction00:46
1.2Setup04:05
1.3Angular's in-Memory API03:39
2.Making Basic HTTP Requests
2.1Sending a GET Request06:18
2.2Sending a POST Request04:44
2.3Working With Headers06:14
3.Advanced HttpClient Usage
3.1Using Progress Events: Part 107:01
3.2Using Progress Events: Part 206:44
4.Conclusion
4.1Conclusion00:54
3.1 Using Progress Events: Part 1
Hi, folks. In this lesson we're going to start looking at how we can use progress events with Angular's HttpClient. A progress event is used to see how much of a process has already completed and it's very often used with file uploads to signal how much of the file has uploaded and how much remains to be uploaded. Let's add a simple file upload form to our example app and we can then hook up progress events to track a file upload. First of all, let's update the app component template. We can add a link in the header to show the upload form, just like there is a link in the header to show the product form. The pipe containing span is just a visual separator for the links. The app already has some styles for that in the app component style sheet, so now let's add the new form itself. This can go after the existing form. We will only show the upload form if show upload form is true, and clicking on the link will set that to true and show the form. It's a reactive form, so the form elements has the form group directive and the input has the form control name directive. The input also has a change handler added called on file change. At the end of the template we can add a div with the class progress containing a span. We'll use this to show a progress bar for the request. On the inner span we use the NG style directive to set the width of the element using a property called progress width. We'll also need to update the class for the app component to contain the new items required by the form. First of all, we'll need to add some new properties. Next, we can initialize the new form in the ngOnInit method and add a single field called upload file. And let's just put that after where we initialize the product form just to keep things nice, and consistent, and tidy. So now let's add the change handler for the file input. This method will be past an event object which in turn will contain the selected file. So we just read the actual file back to the form control for the input so that we can easily access it later. Last of all, we need to add a new method called onSubmitUpload. Inside this method, we will need to get the file chosen by the user and send it to the back end. It's common to use a PUT request to do this, although a post can also be used. We haven't seen a PUT request in action yet, so let's use that. We'll come back and fill this method out in the next lesson. Next, we need to add some logic to our in-memory data service to handle this PUT request. The in-memory database doesn't handle file uploads natively unfortunately, so we'll have to come up with our own implementation for this. We'll need to import some new things from Angular to achieve this, And we can also import the observable class from rxjs. We can override any HTTP method inside our in-memory data service simply by providing a method with a name matching the request type that we want to override. Let's add this after the response interceptor down at the bottom of this file. So we're gonna override the PUT HTTP method and it will return an observable containing any type. So now whenever a PUT request is issued to the in-memory database, it will call this method instead of its own internal method. We just have to make sure the method returns an observable, otherwise it won't work. Inside the method then, we'll need to create a new observable. The observable constructor is passed an arrow function, and the argument passed to this function will be the success handler passed when this observable is subscribed to. Inside the arrow function, we need to create a new progress event. The progress event constant contains a regular object literal typed as an HTTP progress event. Progress events have three main properties, type, total, and loaded. The type needs to be set to the HTTP event type or upload progress. The total can just be set to 100 and the loaded value can be set to 0. The total really should be the total size of the file that we're uploading, but as I'm not providing this file to be uploaded for this example, there's no real way that I can know this beforehand. So let's just set it to 100 and imagine it say percentage rather than the actual file size. Next, we need to increment the loaded property of the progressEvent until it reaches 100. We can use a set interval for that to make the example more realistic. In each interval, we check that the progress hasn't reached 100 yet, and if not, we increment the loaded property by 1 and then invoke the next method of the success handler, passing it the progress event. Once the loaded property is equal to 100, we can then complete the observable string to end it, perfect. So that's about all we have time for in this lesson, but don't worry, we'll come right back to this in the next lesson and finish wiring things up. So in this lesson, we first updated our app template to include a new upload form. We then focused on the in-memory data service to see how to override an HTTP method using the in-memory database. We did this in order to manually create an observable to use with fake progress events for the PUT request in order to better test file uploading. Thanks for watching.


