
 Lessons: 9Length: 36 minutes
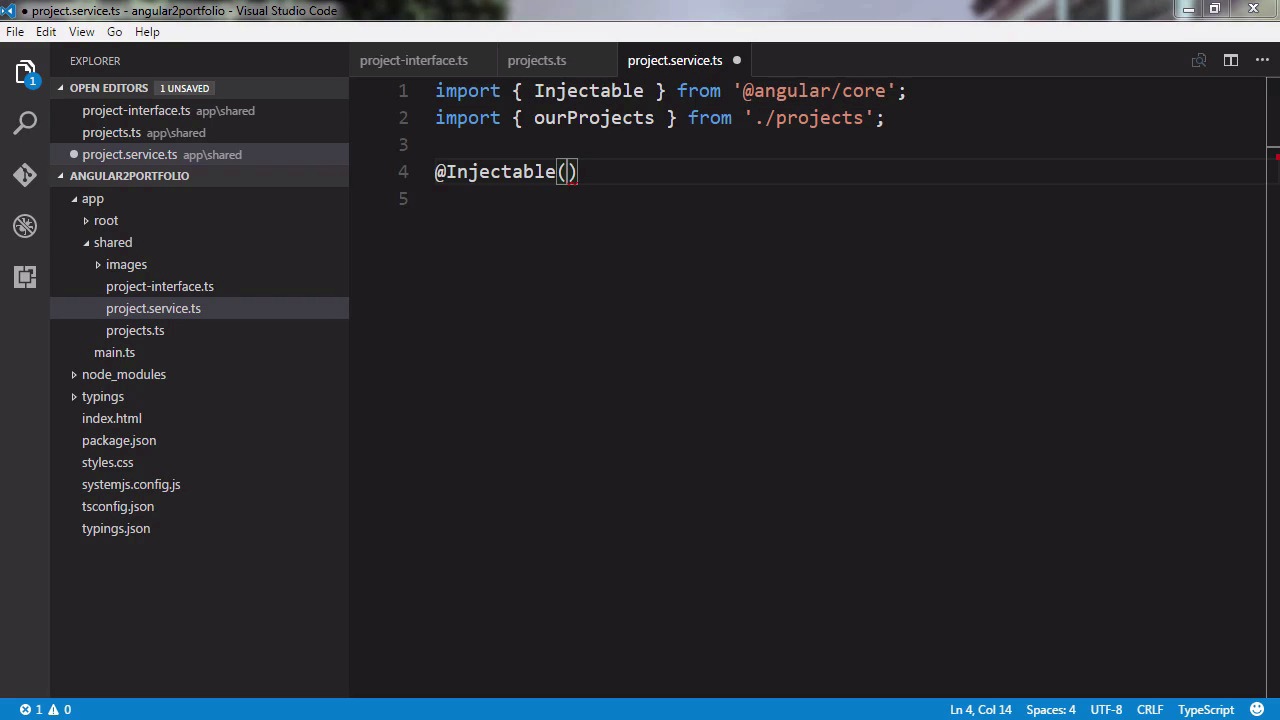
- Overview
- Transcript
2.3 Create Utility Files
In this lesson, we’ll build a service for retrieving information about projects, and a pipe for truncating project descriptions.
Related Links
1.Introduction
1.1Introduction00:35
2.Getting Started
2.1Set Up the Project06:47
2.2Create the Routes and Root Component07:02
2.3Create Utility Files04:25
3.Building the Ui Components
3.1Create the Home Component04:57
3.2Create the Detail Component03:09
3.3Create the Projects Component02:56
3.4Finishing Up05:09
4.Conclusion
4.1Conclusion00:49
2.3 Create Utility Files
Hello everyone, I am Reginald Dawson. Welcome to the build up portfolio site with Angular 2 course for Tuts Plus. In this video, we will create the utility files that we will use across multiple components. First we need to create a folder called shared in the app folder. After that we can create our first file called project-interface.ts. Typescript gets its name because it uses static typing, which allows editors to recognize an expected value. An interface lets us create an expected shape of our values. In this case, we will create an interface for our projects that we will use anytime we are manipulating projects in our components. Here we create an interface that we are going to export, then we have an id, name, info and image. Notice that we are supplying types for these properties as well. It will make more sense on why we are doing this when we make use of the interface. Next, we will create a file to hold our projects called project.ts. Now in the real world we could start a project using some sort of service such as Firebase, but for a few projects that may be overkill. At any rate, we we'll be able to add more projects simply by adding to the array. First, we will import our interface. Like I said, you'll always see this as we work with our projects. Then we will create an array to hold the projects. Here we are using the project-interface as the shape of the data in the individual objects that will make up our array, then we will add the data As you can see the object follow the expected shape of the data. The id is a number while name, info and image are strings. Now I just went ahead and added some dummy text and information for five projects. As for the images, we will add a folder in shared called images. Then we will copy the images that we will use for our project into that folder. Once we're done with that, next we create a file called project.service.ts. Now this small service will deliver the project data to whatever component needs it. Since this service is included with the routed Bootstrap, all components will have access to the service. First we import the injectable decorator in our list of projects. Then we add the injectable decorator that tells Angular 2 that this is a service that can be injected into other components. After that, we will add our class. First we will add our promise. Here the promise is immediately resolved, which means the promise will return whatever has been resolved. In this case it will return the array of projects. Then we will add the getProjects method that will return the resolved promise. This method will return all of our projects from our service. After that, we have our getOneProject method that returns just one project from the list. Here, we return the project promise but after that, we chain in then to handle the returned data. The data is returned as the project array. And we use the find method to match the id to the project that we clicked on. For more on how this works, make sure to check out the routing course when I built a similar app but explained how this works much more in-depth, after that our service is finished. Now we need to add one more file called trunk.pipe.ts. Now this file is an Angular 2 pipe which we can use to transform data. For example, by making some text all upper case or lower case. In this instance, I wanna truncate the length that the info displayed when showing a project listing, so I will use a pipe. First we import Pipe and PipeTransform. Pipe is the decorator we use while PipeTransform lets us transform the data the pipe receives. Then we add our pipe decorator with the name of our pipe, truncate. This is how you will reference the pipe. Then we add the class with the implements keyword, you'll see this keyword again in this course and it just lets Angular 2 know this class implements a special method, in this case, the PipeTransform. Then we add the transform, first we add the value which is a string and arguments which we won't do anything within this pipe. The any represents the type for the data returned from this method. Then we use the substring method to extract the first 180 characters from the data and then add an ellipsis. After that, the last thing we will do is return the truncated text. You'll see how we use this pipe in the next video. Go ahead and save your project. In the next video, we will set up the home component and pull in our data from our service.


