
 Lessons: 9Length: 36 minutes
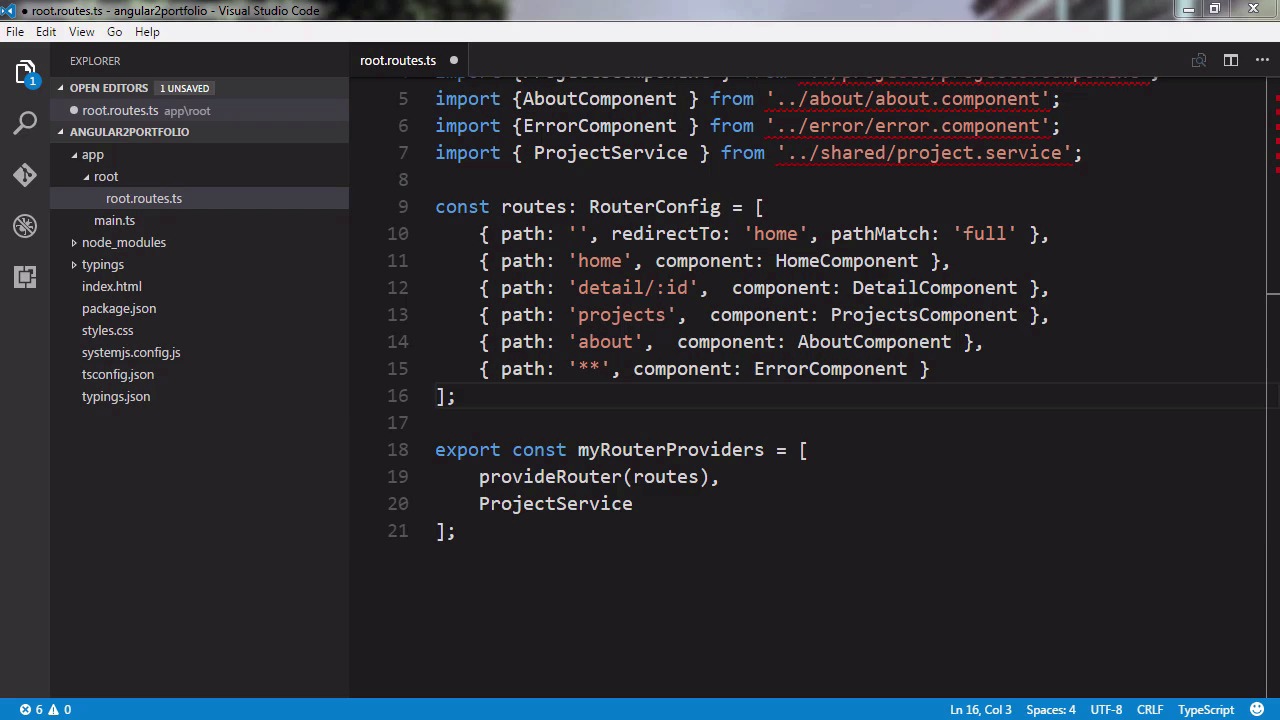
- Overview
- Transcript
2.2 Create the Routes and Root Component
In this lesson, we’ll create the root component of our app and routes for our app. The routes will map browser URLs to view components, which will then be hosted by the root component.
Related Links
1.Introduction
1.1Introduction00:35
2.Getting Started
2.1Set Up the Project06:47
2.2Create the Routes and Root Component07:02
2.3Create Utility Files04:25
3.Building the Ui Components
3.1Create the Home Component04:57
3.2Create the Detail Component03:09
3.3Create the Projects Component02:56
3.4Finishing Up05:09
4.Conclusion
4.1Conclusion00:49
2.2 Create the Routes and Root Component
Hello everyone. I am Reggie Dawson. Welcome to the build a portfolio site with Angular 2 course for Tut's+. In this video, we will set up the route component that will host the other components of our app, to go along with this we will also set up routing. Now we could have gotten away with not using routing and making this a one page add, but using routing will allow us to plan for future expansion of our site with little effort. Routing will allow us to map a component to a path in our URL. In this way we can control what the end users will see when they navigate to a particular path in their browser. First, let's create a folder called Root in the app folder. The first file we add in this folder will be called root.routes.ts, this file will hold our route definitions for us. Now if you have worked with Angular 2 previously, then you may have encountered the original router, the new component router is configured differently and has other requirements. This is why we are adding the routes in their own file. This also makes it easier to add more routes in the future as we can create routes for each section of our app if we like, for more in routing, make sure to check out my Angular 2 routing course. Now normally I would add the routes that we need one-by-one as we build the app, but here I will add all of the routes that we need now. As a result, we will not be able to test our app as we will get errors if we try to launch the app with routes that don't have components configured. First, we will add our imports of course. First, we add provide router and Router Config. Provide router is a service that makes the routes available to the app. Remember my router providers from the bootstrap function? Provide router is part of that. We will see how in a moment. Route Config is where we actually configure the routes. Then we will import the home component. This is how we will import all of our components, notice we have the two dots which lets us traverse up one level in our folder structure, then we are looking for the home component. Again, we haven't created this file yet so your editor may be giving you an error, then we will add our imports for the rest of our components. We have the detail projects about an air components. Each of them follows the same naming structure and the paths are similar for each one. The last import we will have is for our service. Here, we will import the project service to initialize it and make it available to the rest of the components in our app. Then we can create our route config. Inside, we will place our first route, the redirect route. This will redirect our app when it starts up to the home route, when our app starts, it won't have a route and will be this empty route. We could have just made this path the home route but the suggested method from the Angular team is to use a redirect, then we have our home route. Home is the path that will be displayed in the browser as well as the way we can navigate to this page if we desire. The component that will be launched from this route is the home component. Next, we have our detail route, we also have idea pinned into the end of the path, this represents a route parameter that will correspond to the ID of a particular set of data loaded. For our projects, we will load them through a small service. When we load an individual project, we are grabbing it by its ID. We will display this ID in the path for that particular project. Then we will add routes for the project and about components. Then the last route will be an error route that will represent any route that is not specified. If a user types in a non-existent route, he will be navigated to this error page. Then, after that, we need to export our routes and service. Here, we add provide router with our routes and project service to my router providers. We know that we supplied this to our bootstrap when our app starts up, this makes these routes in our service available to all the components in our app. After that, we can create a file called root.component.ts. As Usual, we start this file with our imports. The first one is component, which is what we will use with every component we create. This provides the component decorator that we will need. The router directives are necessary to host our routes, and we will see them come into play in a moment. Then we add the component decorator. Decorators are recognizable, because they are preceded by the at symbol. Decorators allow us to provide metadata to a class. First, we will add a selector, remember my-app in the index.html page? Well, this is telling Angular 2 to replace that my-app with the contents of the root component. The root component will be present all the time in our app. It is the root component cuz it will host all of the other components that will be loaded through routing. Next, we add the templateurl which is an external template that this component will display. We have the option of using inline templates as well and I normally do use them for the root component. This time, the template is a little bit more complex so I added it in its own file. Either method is acceptable. Then finally, we add the router directives. You will see why we do this in a moment. Then, finally we add our class. The backbone of Angular 2 is classes and everything is built using them. This makes developing Angular 2 apps easier than the original in my opinion. Also note that we export our class. This makes this class available as a module to other components in our app. After that, our root component is finished. Next, let's create our template and call it root.html. First, we will add four divs to wrap our nav bar. Here, we have a nav bar wrapper div, then a container div, then we have our nav bar in another container. This is just some standard code for bootstrap nav bar. Then we will add the code for a collapse nav bar. This will show when the display strings to a certain threshold such as being viewed on a mobile device. It makes sense to make our project responsive so that mobile visitors will be able to enjoy the app as well. Then we have a link for the navbar brand. This represents a text logo that we will have in our navbar. Also notice we have a router link there as opposed to an HTML link. Router link is a router directive that allows us to navigate around our app though routes. In this case, will navigate home when we click on the nav bar brand. Then we add the regular bootstrap navbar, inside, we have a router link for our projects in about components. The router link active will apply a class any time the route that matches the router link is active. This will in turn highlight the link using a built-in bootstrap class, the last thing we will add to this file is the router outlet. This is where we added the router directive and also where the components that we load through routing will be displayed. After that, the last thing we need to do is go over to the styles.css file. Here, we will apply some styles that will apply to our entire add. First, we will set the background in the white in the text to black, then we'll add some styles that we have taken from a bootstrap template. This will ensure that our nav bar style correctly and displays properly on all view ports. Then we will add a media query which applies styles based on the width of the display. In this case, we're pushing the nav bar down from the top of the screen with our margin and applying some padding. Then we add some rounded corners to nav bar so it looks cleaner since it isn't flush with the top of our page. After that, our route component is finished. Go ahead and save your project. In the next video, we create the services that will drive our app and the other utility files that will be shared across our components.


