
 Lessons: 16Length: 3 hours
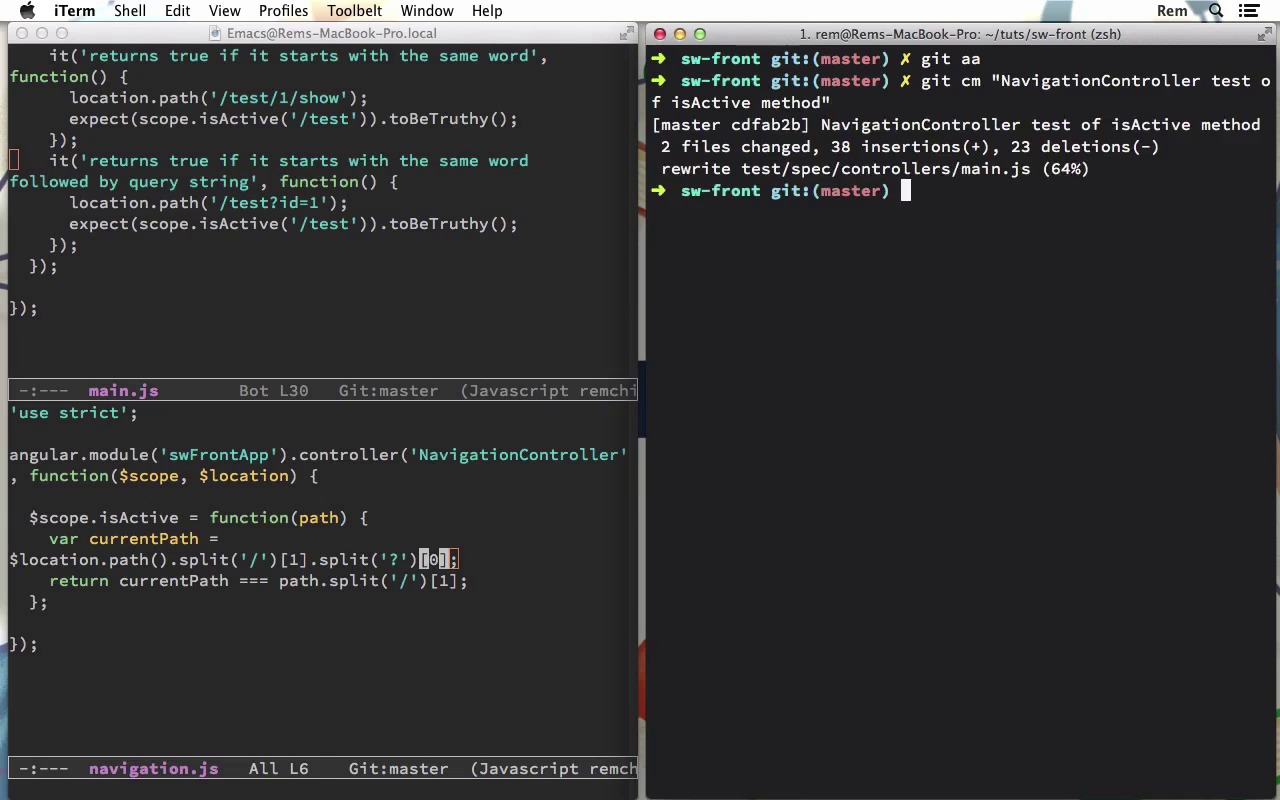

- Overview
- Transcript
3.2 Unit Tests and E2E Tests With Protractor
In this lesson, we'll see how we can test Angular controllers and get a glimpse into how to use Protractor for end-to-end testing.
1.Introduction
1.1Introduction01:12
2.Application Setup
2.1Front-End Application Setup10:37
2.2Backend Application Setup06:48
3.Public Area
3.1Routes, Navigation and Directives12:06
3.2Unit Tests and E2E Tests With Protractor15:24
3.3Testing With Capybara04:39
3.4Display Edges on the Page16:46
3.5Filter Edges22:35
3.6Testing Boundaries of Two Applications14:39
3.7Acceptance Tests With Capybara and Factory Girl11:47
4.User Section
4.1Front-End Login Form and Validation12:54
4.2Token Authentication27:56
4.3Create New Edge10:32
4.4Refactor09:36
4.5Delete Edges03:14
5.Conclusion
5.1Conclusion00:31
3.2 Unit Tests and E2E Tests With Protractor
Hi, in this episode, we'll see how we can test Angular controllers. And have a glimpse on how to use Protractor for end to end testing. So we developed a custom directive for the nav bar. And this directive uses special controller, which has a logic for defining active link. We need to test this logic. So let's go to editor. And let's open main.js controller test. So we go to test, spec, controllers, main.js. And for now, I'm going to remove everything in this describe log, so we can start from the end to understand better, how all these parts work together. So here, let's describe isActive method. So there's gonna be a function, and inside of it let's define our example. So it returns true when paths are the same. And there's going to be a function. Okay. So, first of all what we expect, we expect that when we call isActive method on this scope, with the parameter test, it should be truthy. So it should return true value if the current path is also test. So to set current paths, we will use location service of Angularm and we make the path to test, like this. So now we need to inject location, we need to inject scope, we need to inject controller. So let's do this. So here we define before each block, and we inject into this function. So this inject function is provided by Angular, and it allows us to inject services right into this function. So we need the controller helper that will help us to initialize controller instance. We need to have root scope, which we use to instantiate new scope for our controller. We need to have location, so we can set our current path. Okay. So now let's set location to location. And scope to rootScope.new, like this. And after that we need the instantiate controller, and we do it with the controller helper. And we provide the name of the controller, which is NavigationController. And the second parameter is just an object where we define scope as newly created scope. Okay. So, now, let's define these variables. So we need location, we need scope. Good. So let's go to terminal, let's save this file. Let's go to terminal, and run karma start. And it fails with a lot of things, but the most important thing, the argument NavigationController is not function. So it's undefined. And that happens because we need to inject the application itself, the module where this controller is. So for that, we use beforeEach special method module provided by Angular, and then the name of our application, FrontApp. Now when we save it, we are green. Great. So this is the basic structure of a controller test. So first, we fetch module, or the whole application, or the specific module where controller resides. Then we inject needed dependencies, and here we define some, we mark some, or we instantiate some like such. And then we make in the examples. Okay, let's create another example for our function. Of course, this should be the bad path. So it returns false when paths are different. So there's a function, and I'm gonna just copy this to a line and paste them here. But here we will have the different path. Let's save it and, of course, here I expect it to be falsy. Let's save it again, and we're green. Excellent. So let's add another one, and I'm gonna take this example. I'm gonna copy it and paste here. And this particular one returns true if it starts with the same word. So, what I mean by this, if the current path is something like test 1 show, then it still should be truthy. So this way our navigation will highlight to the user in which category of the side it is now, so when we save it, of course we fail. So, to fix this let's open split here at the bottom, and let's open our navigation controller. And here instead of returning the path, we'll create a current path, so there's gonna be a current path. And let's define this current path. There's gonna be a location path, and we going to split this location path. So location path returns to us the current path. So for example, like here, slash test, slash 1, et cetera. So we're going to take this path, and we're going to split it by slash and take the second parameter. So the first one, the zero, will be the empty string and then the test that we need. And then when we have in here the path, we also need to split it because the path is also has this slash here. So we're going to split it as well by slash, and take the second element. Let's save it, and we're back to green. Great. This solution will fail for query streams though, so let's have a look by creating a new example. So I'm going back to a test, I copy this thing here, and we're going to make it like it returns true if it starts with the same word followed by query string. And what I mean by this is we have the current paths like this test and then for example, id 1. Okay, so you just save it of course we fail, so we go to implementation and the solution a little bit ugly, but it will work. So what we do here, we add another split by question mark, and we take the first parameter. So we're splitting this test thing by question mark and taking only this test. And when we save it, we're back to green, so and our application should work fine. I'm going to quit this and run grunt serve. And you can see that application still works fine. So we haven't broke anything, and our tests even make it a little bit better. Excellent. So, let's commit our change. [BLANK_AUDIO] So NavigationController test of isActive method. So now let's use Protractor to make and to end test to make sure that links in menu really get this active class. First we need to install Protractor. So let's open package json. And let's add here protractor. And also we're gonna use latest version. Let's save it and go to terminal and run npm install. Okay. That's good. Now we need to install standalone Selenium server. So to install it, we just need to go to node_modules folder. Inside of it, we have the protractor folder, and there in bin, we have web manager. Let's make update, and that will update or install Selenium for us. Good, now we need to configure Protractor. And for that let's just copy configuration file from the node_modules protractor example chromeOnlyConf. And we go on to copy to protractor_conf.js file. Okay. So let's have a look at this protractor_conf js. So, there are two ways to run Selenium. So one is by using Chrome like we have here. So we start Selenium with the help of Chrome. And the second one is firing Selenium independently, so let's have a look at both of these variants. So here we have a chromeOnly true, and then the chromeDriver, but this chromeDriver here is not for us. So we need to specify node_modules and then protractor and then selenium chromedriver. Also we need to specify the base URL where we want Selenium to go. And the base URL is http 0 0 1 port 9000. Also right here in specs, let's change it to include all end to end specs and test, end to end folder, and everything in it, like this. Okay. And that's all that we need to do to set up Protractor. So let's save this file, and now we are ready to write our first end to end test. So let's create in test, we're gonna create end to end folder, and inside of it let's create navigation_spec.js file. And we need to create this folder. So as usual we use strict and we describe to describe Navigation Menu. Inside of it, we will have our example, so we want to make sure that it changes active link depending on route. So now we will use Protractor browser object to get to root URL. Now we want to get this active element. So let's create our new variable activeListItem, we call it activeListItem. And we use another method element, and we want to find by css with a class of active. So this is the active list item on the page, and after that, we want to get the text of it. So we will have text, this activeListItem. And we want to find element by tagName. That's the link. And from this element, we want to getText. So this way, we have text from the active menu. And now, we expect that this text toEqual Home because on the root page we want home to be active. Let's save it. Now to run it first we need to run Grunt server. So let's do this, grunt serve. And in additional tab, we're going to run protractor and use protractor_conf.js as the configuration file. Let's run it, and we're green, excellent. So you saw how the Chrome browser was used to navigate through the page and to make the assertions. So let's add another thing here. So first of all let's, now let's click on the edges link. So we'll have edges link, and we want to find element by linkText Edges, and now we want to do the absolutely the same two lines here, except that I'm going to remove this vars. So we again looking for activeListItem which should be changed when we clicked on this link. So first again, of course we need to click on it, and then we expect that, the active element has changed and the text also changed. So we expect that text in this case toEqual Edges. Let's save it, go to terminal, and let's run protractor again. Excellent, so we're totally green. So now let's see how to configure it to use Selenium's server. So first, of course, I need to run Selenium's server. And for that I, again, go to node_modules protractor bin web driver manager start. And that will start Selenium. And you can see here that it listens and expects requests to 0000444 port. So to make it work, let's go back to protractor configuration file, and were going to comment out this chrome. And instead of them, we'll use seleniumAddress, and we'll specify that it is http://0.0.0.0.4444/wd/hub. Now let's save it. So now let's go back here. I'm gonna open another tab and run protractor, protractor. And now, it's using Selenium, which runs right here. And you can see how it has been used. And we're still green. So these are the basics of Protractor testing. So if you go back to our Protractor test, you can see that we used browser to visit some pages. And we used element to find elements by some method, for example by css. Or we used findElement method and again, by tagName, for example. And also we can take any element and make a click on it. And you of course can read about protractor API on its official website. So let's commit the change. Unit and end to end tests. Okay, and now we have tested the behavior we introduced in previous episode. We saw how to create controller tests as well as end-to-end Protractor tests. In the next episode we'll see the alternative way to make end-to-end tests with Capybara. So thank you very much for your time, and see you in the next episode.


