
 Lessons: 7Length: 44 minutes
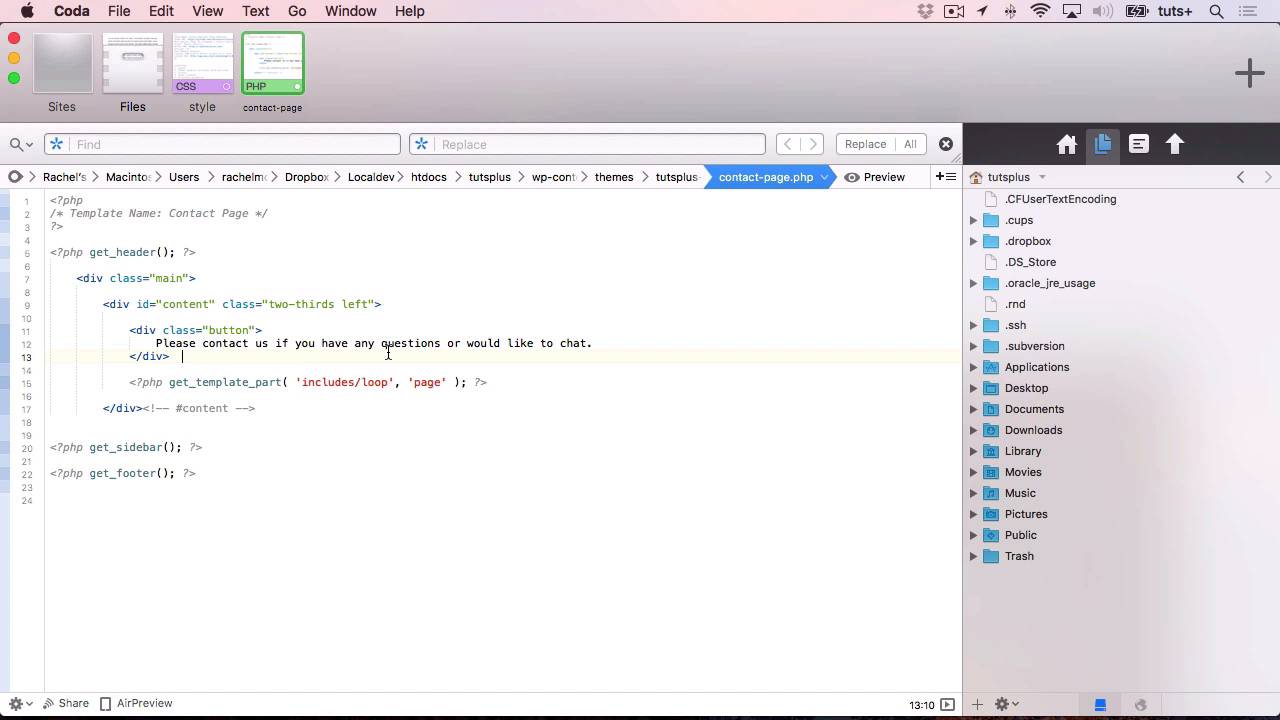
- Overview
- Transcript
3.1 Custom Page Templates
1.Introduction
1.1Introduction00:37
2.Making Use of Include Files
2.1Review of Standard Include Files05:22
2.2Creating Multiple Loop Files11:36
3.Creating Custom Template Files
3.1Custom Page Templates05:23
3.2Templates for Custom Content11:02
4.Conditional Tags
4.1Using Conditional Tags to Output Content06:37
5.Conclusion
5.1Conclusion02:58
3.1 Custom Page Templates
Hello, and welcome back to this Tuts Plus course on coding advanced theme templates. In this part of the course, we're gonna look at custom page templates. And specifically, I'm gonna show you how to create a custom page template for our Contact page, which will have some extra HTML added to it. So let's start by creating the template file. Here we are in Coda looking our theme. Now, the way you create a custom page template in WordPress is to create a new template file in your theme, and then put some commenting out text at the top to tell WordPress that this is a custom page template. So what I'm gonna do is duplicate the page dot php file. Now, you shouldn't begin the name of your file with page. And the reason for that is because if you then create a page with a slug that's the same as the second half, so let me demonstrate. So if I created a file called page dash contact, it would automatically apply that to any page with a slug of contact. Now, that could work, but who's to know that somebody using my theme might not get the contact page a different slug? So instead, I'm gonna turn it around and call it contact page dot php. Now let's open it. Now, this bit here is what we need to change. And instead of having some commented out text describing what it does, we use some very specific text, and that is that we say template name. So by putting template name, that tells WordPress that this is a custom page template, and then we can call it whatever we want. So I'm gonna call it contact page. I'll save that. Now, at the moment, it's identical to our standard page. I'm gonna add something else to make it unique, and that's some HTML that I'm gonna add right here. And that's a div with the class of button. And that is gonna have some text in it and a link. So that button will contain the text please contact us if you have any questions or would like to chat. Now, let's add link here. And we'll just add the HTML in first. Hang on. So that's a link, and the link will be mail to. And obviously, you'd put the correct text in there. So here, we have this HTML that we added here, and that's in a div with the class of button. Now, I've already added some styling for that to my theme. So you can see here, that the button class effectively creates a button, or rather a large area on my site. And that's got padding and margin, it's got centered text, a background color. I've edited the color of the text itself, and also the color and the text decoration over the link within that. Both in its normal state, and whether it's hover-over or active. Save both those files, and then I'll go back, and I'll have to set up my page to specifically use that template file. So here I am, back at my page, and I'm gonna edit the page. And over here in page attributes, I can select the template. Now, that wasn't there before because I didn't have any custom page templates. But once you create at least one custom page template, this drop-down menu will appear. And if you create more than one, they'll all be added to this list. So I've selected contact page. I click on Update, and then I'll view my page. And you can see, here is my button up here with the styling. So if I hover over that, it goes aqua. Not the nicest of colors, but you can see, just looking back at my styling here, all I did was use aqua as a HTML color. So obviously, you could do that with a little bit more finesse for your theme. So that's how you create a custom page template in WordPress. And you can create as many as you want with different layouts. So for example, you might want to create a full page, a full width page, so that there's no sidebar in that. And it just shows the content at full width and then the footer. Or you might want to create pages that you use in different parts of your site, that have different styling or colors, or maybe even branding. In the next part of this course, I'm gonna create a single page template for a new custom post type. And I'm also gonna create an archive page template for a new custom taxonomy. See you next time, and thanks for watching.


