
 Lessons: 12Length: 40 minutes
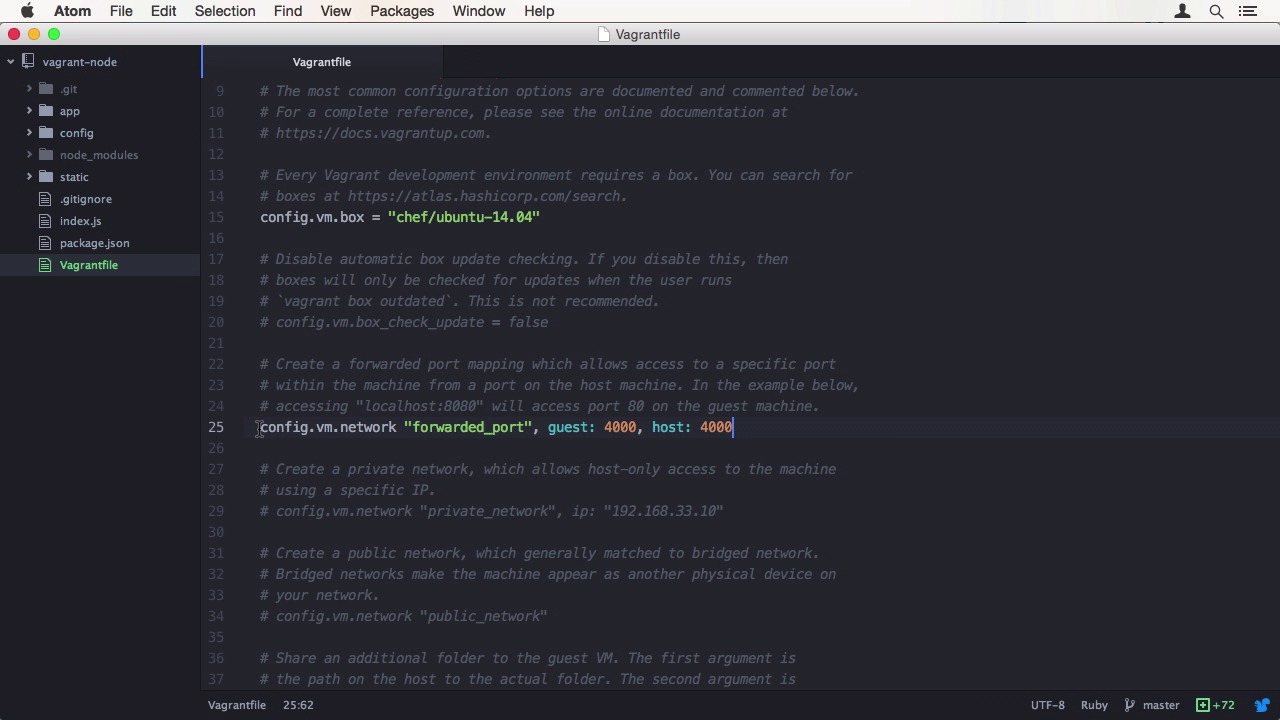
- Overview
- Transcript
2.2 The Vagrantfile
When you start using Vagrant, there are some configuration options that need to be set. In this lesson, I'll show you all the important settings and explain what they're for.
Note
In this lesson, chef/ubuntu-14.04 is recommended as a base box. That box is no longer available. The course project has been updated to use bento/ubuntu-14.04 instead.
1.Introduction
1.1Introduction01:16
1.2Installing VirtualBox and Vagrant02:05
1.3Advanced Setup: Vagrant and VMware02:42
2.Setting Up Your Node.js Stack
2.1Project Overview05:05
2.2The Vagrantfile05:02
2.3Installing Node.js Using NVM02:50
2.4Installing MongoDB and Redis05:43
2.5Node.js Development Workflow02:42
2.6Autostart the Node.js Application02:35
3.Exporting and Sharing
3.1Exporting and Sharing Your Vagrant Box07:28
3.2Sharing Your Local Vagrant Instance01:48
4.Conclusion
4.1Final Review00:54
2.2 The Vagrantfile
Hi, and welcome back to easy now development environment with Vagrant. In this lesson we're going to initialize our Vagrant box and explore the available configuration options. Let's get started. First you will need to hop into the console and use Vagrant init to initialize the project for using Vagrant. This will generate a Vagrant file that will be the center point of all configuration. Let us take a look what's inside. As you can see, the developers did a great job documenting the configuration file. If you're ever unsure what a setting does, you can almost every time find a comment explaining it's purpose right next to it. The first and most important setting is VM.box. It is the virtual machine you are going to use as starting point when booting up for the first time. To find out which one to use, Ashecorp, the company maintaining Vagrant, created a platform called Atlas. Which provides a variety of Vagrant base boxes to choose from. Many pick open source projects, or companies provide preconfigured boxes here. We are going to use the chef Ubuntu 1404 base box. It's a minimal installation of Ubuntu trusted without any extras. There is also an official box from Ubuntu itself, but I'm going to use the one from Chef because it's available for both VirtualBox and VMWare. And you can use whatever provider you like and still follow along. Next in line there is box check update. Vagrant boxes are versioned. Meaning, whenever there is an update to the box, Vagrant will notify you upon the start of your instance. By default, it is on, and we're going to leave it that way. The second really important setting, is the port for. It allows you to access the instance, as if it was your own machine. You can follow the port from Vagrant here it's port 80 to a different one on your computer. Making the port accessible via local host. We're going to use port 400 for our application forwarding it to the same one on our machine. If you want you can also create a network bridge simulating another machine on your network. This makes Vagrant instance accessible on it's own network IP address. If your project gets more complex you might want to use data from different locations on the disk. By default Vagrant forwards your project folder to slash vagrant on the instance. But if you need other data or various specific folder structure you can set up additional shares with VM dot synced folder. You can also make changes to the options of a specific provider. For example, if you have a lot of services running, you might want to consider increasing the amount of CPUs or memory the virtual machine has access to. There are also some settings for sharing and permissioning, but we're going to deal with them later in this course. Now with all the important settings explained, it's time to fire up our first Vagrant instance. Let me save the configuration file and jump back into the console. Every time you want to start a Vagrant box, you use Vagrant up. It might be necessary to enter your administrative credentials under a first run. If you're using a base box for the first time on a computer, Vagrant needs to download it. This may take a while, depending on the box and your internet connection. Vagrant then clones the base box into the project directory, so it is isolated from other instances that are using the same base box. After the cloning is complete, Vagrant boots up the virtual machine. It happens meaning you won't get a graphical interface like you might be used to when dealing with virtualization. As soon as the instance is running, you can access it using Vagrant SSH. This will open up an SSH session with the Vagrant box. If you're on Windows you need to make sure you have an SSH client as Windows doesn't come with one by default. Installing Git or GitHub for Windows should provide you with one. We have now successfully set up our first Vagrant instance. Let's get out of the instance and shut it down with Vagrant halt to save system resources. If you forget to shutdown your instances, your computer will use some of its memory and CPU time to run the virtual machine, even when you have closed the shell. In the next lesson, we're going to install using the version manager. See you there.


