- Overview
- Transcript
1.2 What You Need
In this lesson, we'll cover what you need to follow along in this course. We'll briefly discuss the application's requirements and set up our MongoDB cluster.
Related Links
1.Introduction2 lessons, 06:25
1.1Introduction01:18
1.2What You Need05:07
2.User Registration and Authentication7 lessons, 1:05:20
2.1Initializing the Client Project08:44
2.2Maintaining State With Vuex05:28
2.3Registering Users: Creating a Vuex Action09:31
2.4Setting Up the Server11:17
2.5Registering Users: Creating the API Endpoint12:43
2.6Authenticating User Credentials11:02
2.7Guarding Vue Routes06:35
3.Wireframing the UI3 lessons, 27:30
3.1Implementing the Feeds Panel06:45
3.2Showing the Articles08:44
3.3Creating the Settings View12:01
4.Handling Requests5 lessons, 39:24
4.1Writing Authentication Middleware06:33
4.2Fetching Feeds10:29
4.3Adding Feeds07:04
4.4Deleting Feeds07:28
4.5Fetching Individual Feeds07:50
5.Conclusion1 lesson, 01:04
5.1Conclusion01:04
1.2 What You Need
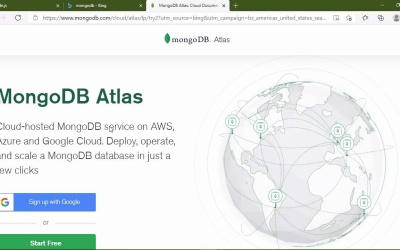
Naturally before we dive in and start developing our application we need to go over what you need to follow along in this course. And it is a very short list because the first item is going to cover the majority of the stuff that we need because in some way shape or form we are going to be using node. Either our application is going to be running on node or we need NPM to get the other stuff that we need. So if you don't have it already installed or if you need to update go to nodejs.org and download and install. Now I typically go for the LTS version a sense for long term support because that's what you would typically use inside of a production environment. Now, of course this is not a production environment, but when it comes to development I tend to want my environment to be as close to production as possible. So I recommend the LTS version so just download and install it. It's very simple straightforward, just take the defaults and you're good to go. Now after that is installed, you will want to go to the command line and we'll go ahead and we will install the next thing with NPM. And that is going to be the view CLI now we want to install this globally so that we can use the CLI. So the command is NPM install -G and then@viewCOI just press enter and then that's going to go through the process of installing that Now that could take a few moments. So while that is running, we will talk about the next thing that we need and that is a database. Now technically, we can use any type of database it could be a sequel oriented database or we can use something called a no SQL database, which if you're not familiar with that term, it's basically a database that doesn't use SQL. And there are many different types of no SQL databases, but what we are going to use is what is more commonly referred to as a document database. So instead of storing data in columns and rows we essentially store all of the data for a particular entity as a document. Now we can still have relationships and things like that but it's a more logical or summarized approach as opposed to a relational approach. Now there are many different types of document databases but for node oriented applications we would typically use MongoDB. Now you can download and install the MongoDB engine however there is a MongoDB cloud service called Atlas and for the sake of simplicity that is what I'm going to use in this course there is a free tier of Atlas and that is what I'm using. There's nothing that requires us to buy anything in this course. So if you go to MongoDB.com/cloud then just click on the Start free button. You will need to create an account and it's very straightforward. And after you log in, the first thing you will do is create a project. Now the name of the project doesn't matter but it kind of should be related to whatever application is going to be using. The databases inside of this project so I'm gonna call this Express view reader then click on next. And if you wanted to add other users, you could Chances are you're the only user and really that's all that we need. So then you will click Create Project after that we will have to create a cluster that is going to have our databases in it. So we will click on the build a cluster button now there are several different tiers we want the free tier, so create a free cluster. And then you get to choose where you want to store that cluster. I'm going to choose Azure and be sure to pick whatever region is closest to your location Virginia East two is actually closer for me. There are other things that you can configure here but that's enough for me. I'm gonna Click on the Create cluster and that is going to start the provisioning process. Now we can do other things while this is going on. And we need to grant ourselves access to this cluster because by default, it's pretty much locked down. We have to essentially whitelist our IP address, so click on network access and then add IP address. Now you don't have to know your IP because there's a button that says add current IP address that is going to be your public IP. So click on that add a comment if you want and then click on Confirm. So once that is done, then all you have to do is wait for the cluster to finish provisioning and then we'll be good to go so we can actually leave this. Let's take a look at the command line and it looks like that view see allies installed. So in the next lesson we will start with our client application.


