
 Lessons: 18Length: 2.3 hours
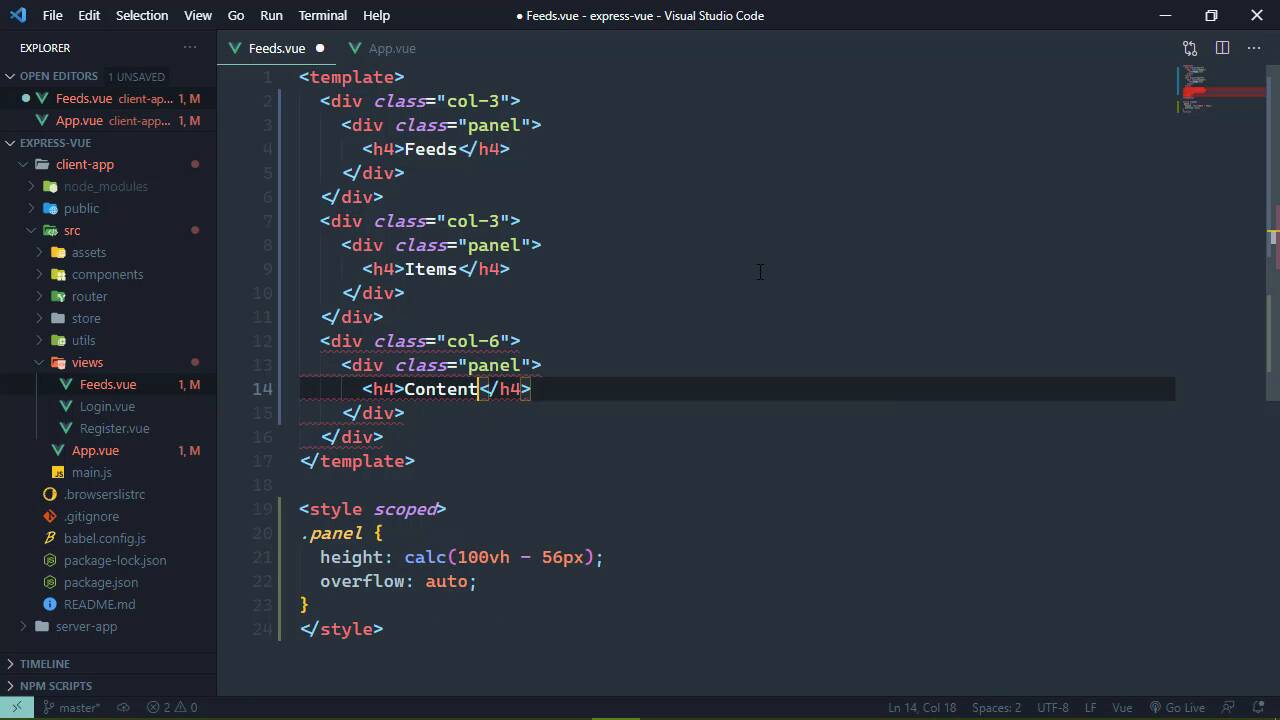
- Overview
- Transcript
3.1 Implementing the Feeds Panel
In this lesson, we'll wireframe the basic functionality of the Feeds panel and hook it up to our Vuex store.
1.Introduction
1.1Introduction01:18
1.2What You Need05:07
2.User Registration and Authentication
2.1Initializing the Client Project08:44
2.2Maintaining State With Vuex05:28
2.3Registering Users: Creating a Vuex Action09:31
2.4Setting Up the Server11:17
2.5Registering Users: Creating the API Endpoint12:43
2.6Authenticating User Credentials11:02
2.7Guarding Vue Routes06:35
3.Wireframing the UI
3.1Implementing the Feeds Panel06:45
3.2Showing the Articles08:44
3.3Creating the Settings View12:01
4.Handling Requests
4.1Writing Authentication Middleware06:33
4.2Fetching Feeds10:29
4.3Adding Feeds07:04
4.4Deleting Feeds07:28
4.5Fetching Individual Feeds07:50
5.Conclusion
5.1Conclusion01:04
3.1 Implementing the Feeds Panel
Now that we have most of the authentication stuff out of the way, we can start focusing on the actual functionality of our application. And we're going to start with just the UI, we'll get the UI up and running, we'll get most of the things kind of plumbed up so that, whenever we implement things on the server, everything should just start working. That's the plan, we'll see if that actually happens. So in this lesson we are going to implement the view for our feeds which we already have the file there but, there's nothing. And we're going to have three panes, I believe I had mentioned this in the previous lesson where on the left hand side, we will have the list of feeds. And then in the middle we will have the items of that feed so that we can click on the item. And then over on the right hand side we will be able to read the content of that item. So let's just dive in, first thing I want to do though is go to our Appview, and we're going to change the CSS class here. Instead of container, we're going to use container-fluid, that way the container is not going to have as much padding and margin on the sides. It's going to essentially stretch across the entire width, and we also want to hide any overflow. So we're going to use the overflow-hidden class here, and the reason is because we want all three panes to be independently scrollable. Now let's first of all define a class that we are going to use inside of our feeds view. This is going to be just for the individual panels that we have, it's okay that this is going to be scoped because we shouldn't be needing this anywhere else. And we are going to set the height, and this is gonna be a calculation. So that's we're going to take 100% of the vertical height available, and we are going to minus 56 pixels. Now 56 is coming from the menu or the navbar itself, that's around 56 pixels. So we're going to take the height of the viewable space minus 56, and then that is essentially going to be the height of our panels. And then we are going to use overflow:auto so that it will automatically scroll if it needs to scroll vertically, or even horizontally but we shouldn't have any issues with horizontal scrolling. And we're going to use columns in this view, so that every panel is essentially going to be inside of a column. Now since this is view three, we can define all of our columns directly inside of the template here, they do not have to be inside of a containing element. So the first two columns are going to be the size of three, and then the third column is going to be six. And then inside of each of these columns we will have our panel, and then each panel is going to have some kind of title and we will use an H4 with that. So, on the left hand side we will have our feeds, let's copy that, let's paste that in, and then we will have items. And then for the content, the title that we will have is actually going to be the title of the item that we would be reading, but for now, we will just leave that as content. And if we look at the browser, we can see that we have those three columns, which is great. Now for our feeds panel, what we're going to use is a bootstrap list group, and there are many different list groups. But, for our purposes, this is going to be a list group that is going to contain just a bunch of a elements. So for right now we're going to set the href to just be a pound or a hash, and then we need some classes here the first will be list-groupitem, and we will also need list group item action. And then the text will be the text of the item, so if we were going to put this inside of our store which we will do we'll have a feeds items. So let's actually go ahead and go to our store, let's open that up, let's add feeds here. This will simply just be an array, and this is essentially going to map directly to the feeds from our MongoDB schema. Although I believe we only specified a URL item, we might need a title or a name. So we'll have a name and this will be First Feed, and for right now the URL doesn't matter, so we'll just have an empty string. And let's copy that, paste it, so that we can have at least two items here, and the second one will be Second Feed. So this gives us some information that we can work with directly inside of our feeds panel here. So we're gonna modify this, so that we'll have a elements, we'll use v4, and we want for each feed in our store.state.feeds, but really, I think what we want is a getter here. So let's actually add a getter that's going to be feeds, which will essentially just return the feeds that we have from our state. So let's do that, instead, we'll change that to getters, and we will output the name of the feed. So if we go and view this in the browser, there we have our items for our feeds there. Now each feed that we click on, is actually going to make a request to the server to pull that information in, and we would then need to fill out the items. So that essentially means that we need to have an action inside of our store, to do that. So let's go ahead and let's define an action, it doesn't have to actually work right now, but it does give us something that we can go ahead and use, and we'll just call this getFeed. Once again we will have the context as well as the feed url, and then of course this would eventually post JSON and all of that stuff, but we don't have that in place. So starting in the next lesson, we will implement the code that's going fill out the items in our store because we are going to store our items there as well and display those within the UI. So that when we do have the code ready to make our requests, then we just need to add that and everything should work.


