

Chinese (Simplified) (中文(简体)) translation by Fuhuan (you can also view the original English article)
关于本周的视频教程,我们将教你如何使用PHP和MySQL的构建自己的购物车功能。 你会发现,它并不像你想象的那么困难。
截屏预览
步骤1
我们先看看文件结构:

结构体
- reset.css - 你可以从这个链接重置
- style.css - 我们自己的css文件,我们将用它来设计我们的HTML标记
- connection.php - 将使我们的数据库连接的文件
- connection.php - 将使我们的数据库连接的文件
- cart.php - 可以从购物车功能中更改产品的文件(添加,删除)
- products.php - 产品列表页面
第2步
我们将首先编写html标记,然后对其进行设计。 所以打开index.php并复制/粘贴下面的代码:
1 |
|
2 |
<!DOCTYPE html PUBLIC "-//W3C//DTD XHTML 1.0 Strict//EN"
|
3 |
"http://www.w3.org/TR/xhtml1/DTD/xhtml1-strict.dtd">
|
4 |
|
5 |
<html xmlns="http://www.w3.org/1999/xhtml"> |
6 |
<head>
|
7 |
|
8 |
<meta http-equiv="Content-Type" content="text/html; charset=utf-8" /> |
9 |
<link rel="stylesheet" href="css/reset.css" /> |
10 |
<link rel="stylesheet" href="css/style.css" /> |
11 |
|
12 |
<title>Shopping cart</title> |
13 |
|
14 |
</head>
|
15 |
|
16 |
<body>
|
17 |
|
18 |
<div id="container"> |
19 |
|
20 |
<div id="main"> |
21 |
|
22 |
</div><!--end main--> |
23 |
|
24 |
<div id="sidebar"> |
25 |
|
26 |
</div><!--end sidebar--> |
27 |
|
28 |
</div><!--end container--> |
29 |
|
30 |
</body>
|
31 |
</html>
|
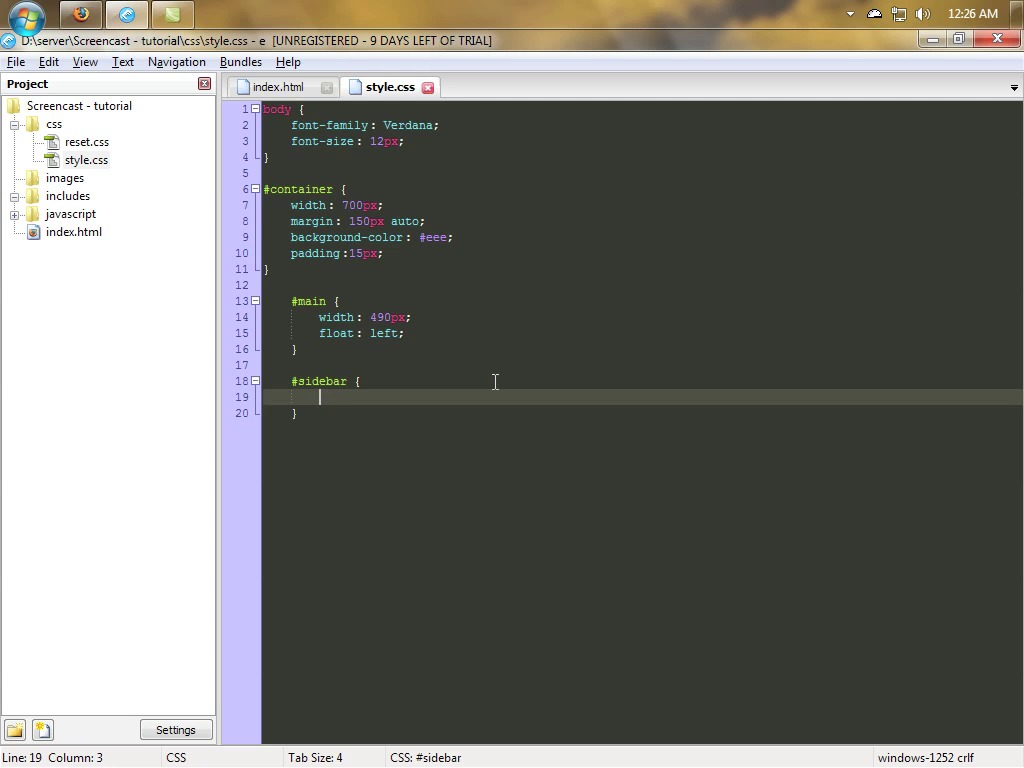
正如你所看到的,我们的页面有两列:主列和侧栏。 正如你所看到的,我们的页面有两列:主列和侧栏。 打开文件style.css并输入下面的代码:
1 |
|
2 |
|
3 |
body { |
4 |
font-family: Verdana; |
5 |
font-size: 12px; |
6 |
color: #444; |
7 |
}
|
8 |
|
9 |
|
10 |
#container { |
11 |
width: 700px; |
12 |
margin: 150px auto; |
13 |
background-color: #eee; |
14 |
overflow: hidden; /* Set overflow: hidden to clear the floats on #main and #sidebar */ |
15 |
padding: 15px; |
16 |
}
|
17 |
|
18 |
#main { |
19 |
width: 490px; |
20 |
float: left; |
21 |
}
|
22 |
|
23 |
#sidebar { |
24 |
width: 200px; |
25 |
float: left; |
26 |
}
|
打开文件style.css并输入下面的代码:

全屏显示
全屏显示
在我们转到PHP / MySQL之前,我们需要创建数据库。 所以打开phpMyadmin并按照下列步骤操作:
- 转到权限选项卡,单击添加新用户按钮,然后使用以下设置:用户名:教程; 主机:localhost; 密码:supersecretpassword ;. 现在确保已设置全局权限; 然后继续下一步。
- supersecretpassword ;. 现在确保已设置全局权限; 然后继续下一步。
- 创建一个名为products的新表,并将字段数设置为4.现在填充这些字段,以便你具有:id_integer - 确保将其设置为INT并将其标记为PRIMARY(也将其设置为auto_increment); 名称 - 使其长度为100的VARCHAR; 描述 - 长度为250的VARCHAR; 价格 - 确保它设置为DECIMAL(2,6)
- 用一些示例产品填充表格
为了节省一些时间,我导出了我的产品表,以便你可以简单地运行以下查询:
1 |
|
2 |
CREATE TABLE IF NOT EXISTS `products` ( |
3 |
`id_product` int(11) NOT NULL AUTO_INCREMENT, |
4 |
`name` varchar(100) NOT NULL, |
5 |
`description` varchar(250) NOT NULL, |
6 |
`price` decimal(6,2) NOT NULL, |
7 |
PRIMARY KEY (`id_product`) |
8 |
) ENGINE=MyISAM DEFAULT CHARSET=latin1 AUTO_INCREMENT=7 ; |
9 |
|
10 |
INSERT INTO `products` (`id_product`, `name`, `description`, `price`) VALUES |
11 |
(1, 'Product 1', 'Some random description', '15.00'), |
12 |
(2, 'Product 2', 'Some random description', '20.00'), |
13 |
(3, 'Product 3', 'Some random description', '50.00'), |
14 |
(4, 'Product 4', 'Some random description', '55.00'), |
15 |
(5, 'Product 5', 'Some random description', '54.00'), |
16 |
(6, 'Product 6', 'Some random description', '34.00'); |


步骤4
在我们开始从数据库提取数据之前,我会将我的index.php作为产品列表和购物车功能的模板。 因此,将以下代码添加到index.php页面的顶部:
1 |
|
2 |
<?php
|
3 |
session_start(); |
4 |
require("includes/connection.php"); |
5 |
if(isset($_GET['page'])){ |
6 |
|
7 |
$pages=array("products", "cart"); |
8 |
|
9 |
if(in_array($_GET['page'], $pages)) { |
10 |
|
11 |
$_page=$_GET['page']; |
12 |
|
13 |
}else{ |
14 |
|
15 |
$_page="products"; |
16 |
|
17 |
}
|
18 |
|
19 |
}else{ |
20 |
|
21 |
$_page="products"; |
22 |
|
23 |
}
|
24 |
?>
|
- session_start() - 这是供以后使用; 它将允许我们实际使用会话(在将任何其他数据发送到浏览器之前写入session_start至关重要)。
- 在第二行中,我们包含connection.php,它将建立与数据库的连接(我们将在一秒钟内处理这个问题)。 还有一件事:include和require的区别在于,如果使用require并且找不到文件,那么脚本执行将会结束。 如果你使用“包含”,该脚本将继续工作。
- 除了将整个html代码(链接指向css,指向js)复制到网站中的每个文件之外,你都可以将它们全部相对于单个文件。 首先,我检查是否有一个名为“页面集”的GET变量。 如果不是,我将创建一个名为_pages的新变量。 如果首先设置名为页面的GET变量,那么我想确保我要包含的文件是有效的页面。
为了使这项工作,我们需要包括该文件; 将此行添加到ID为“main”的div之间的index.php中:
1 |
|
2 |
<?php require($_page.".php"); ?> |
现在这里是我们现在完整的index.php:
1 |
|
2 |
<?php
|
3 |
session_start(); |
4 |
require("includes/connection.php"); |
5 |
if(isset($_GET['page'])){ |
6 |
|
7 |
$pages=array("products", "cart"); |
8 |
|
9 |
if(in_array($_GET['page'], $pages)) { |
10 |
|
11 |
$_page=$_GET['page']; |
12 |
|
13 |
}else{ |
14 |
|
15 |
$_page="products"; |
16 |
|
17 |
}
|
18 |
|
19 |
}else{ |
20 |
|
21 |
$_page="products"; |
22 |
|
23 |
}
|
24 |
|
25 |
?>
|
26 |
<!DOCTYPE html PUBLIC "-//W3C//DTD XHTML 1.0 Transitional//EN" "http://www.w3.org/TR/xhtml1/DTD/xhtml1-transitional.dtd">
|
27 |
<html xmlns="http://www.w3.org/1999/xhtml"> |
28 |
<head>
|
29 |
|
30 |
<meta http-equiv="Content-Type" content="text/html; charset=utf-8" /> |
31 |
<link rel="stylesheet" href="css/reset.css" /> |
32 |
<link rel="stylesheet" href="css/style.css" /> |
33 |
|
34 |
|
35 |
<title>Shopping Cart</title> |
36 |
|
37 |
|
38 |
</head>
|
39 |
|
40 |
<body>
|
41 |
|
42 |
<div id="container"> |
43 |
|
44 |
<div id="main"> |
45 |
|
46 |
<?php require($_page.".php"); ?> |
47 |
|
48 |
</div><!--end of main--> |
49 |
|
50 |
<div id="sidebar"> |
51 |
|
52 |
</div><!--end of sidebar--> |
53 |
|
54 |
</div><!--end container--> |
55 |
|
56 |
</body>
|
57 |
</html>
|

我们创建与MySQL的连接。 打开connections.php并键入以下内容:
1 |
|
2 |
<?php
|
3 |
|
4 |
$server="localhost"; |
5 |
$user="tutorial"; |
6 |
$pass="supersecretpassword"; |
7 |
$db="tutorials"; |
8 |
|
9 |
// connect to mysql
|
10 |
|
11 |
mysql_connect($server, $user, $pass) or die("Sorry, can't connect to the mysql."); |
12 |
|
13 |
// select the db
|
14 |
|
15 |
mysql_select_db($db) or die("Sorry, can't select the database."); |
16 |
|
17 |
?>
|
第5步
现在是编写产品页面标记的时候了。 所以继续打开它并键入以下内容:
1 |
|
2 |
<h1>Product List</h1> |
3 |
<table>
|
4 |
<tr>
|
5 |
<th>Name</th> |
6 |
<th>Description</th> |
7 |
<th>Price</th> |
8 |
<th>Action</th> |
9 |
</tr>
|
10 |
<tr>
|
11 |
<td>Product 1</td> |
12 |
<td>Some random description</td> |
13 |
<td>15 $</th> |
14 |
<td><a href="#">Add to cart</a></td> |
15 |
</tr>
|
16 |
<tr>
|
17 |
<td>Product 2</td> |
18 |
<td>Some random description</td> |
19 |
<td>25 $</th> |
20 |
<td><a href="#">Add to cart</a></td> |
21 |
</tr>
|
22 |
</table>
|
我们来看看这个页面:

正如你所看到的,这很丑陋。 所以让我们通过添加这个额外的CSS来设计它。
1 |
|
2 |
a {color: #48577D; text-decoration: none;} |
3 |
|
4 |
a:hover {text-decoration: underline;} |
5 |
|
6 |
h1, h2 {margin-bottom: 15px} |
7 |
|
8 |
h1 {font-size: 18px;} |
9 |
h2 {font-size: 16px} |
10 |
#main table { |
11 |
width: 480px; |
12 |
}
|
13 |
|
14 |
#main table th { |
15 |
padding: 10px; |
16 |
background-color: #48577D; |
17 |
color: #fff; |
18 |
text-align: left; |
19 |
}
|
20 |
|
21 |
#main table td { |
22 |
padding: 5px; |
23 |
}
|
24 |
#main table tr { |
25 |
background-color: #d3dcf2; |
26 |
}
|
所以让我们通过添加这个额外的CSS来设计它。

看起来好多了,你不觉得吗? 下面你有完整的style.css代码:
1 |
|
2 |
body { |
3 |
font-family: Verdana; |
4 |
font-size: 12px; |
5 |
color: #444; |
6 |
}
|
7 |
|
8 |
a {color: #48577D; text-decoration: none;} |
9 |
|
10 |
a:hover {text-decoration: underline;} |
11 |
|
12 |
h1, h2 {margin-bottom: 15px} |
13 |
|
14 |
h1 {font-size: 18px;} |
15 |
h2 {font-size: 16px} |
16 |
|
17 |
#container { |
18 |
width: 700px; |
19 |
margin: 150px auto; |
20 |
background-color: #eee; |
21 |
padding:15px; |
22 |
overflow: hidden; |
23 |
}
|
24 |
|
25 |
#main { |
26 |
width: 490px; |
27 |
float: left; |
28 |
}
|
29 |
|
30 |
#main table { |
31 |
width: 480px; |
32 |
}
|
33 |
|
34 |
#main table th { |
35 |
padding: 10px; |
36 |
background-color: #48577D; |
37 |
color: #fff; |
38 |
text-align: left; |
39 |
}
|
40 |
|
41 |
#main table td { |
42 |
padding: 5px; |
43 |
}
|
44 |
|
45 |
#main table tr { |
46 |
background-color: #d3dcf2; |
47 |
}
|
48 |
|
49 |
#sidebar { |
50 |
width: 200px; |
51 |
float: left; |
52 |
}
|
第6步
在我们从数据库中提取产品之前,让我们从表格中删除最后2个表格行(我们只用它来查看我们的表格的样子)。 删除这个:
1 |
|
2 |
<tr>
|
3 |
<td>Product 1</td> |
4 |
<td>Some random description</td> |
5 |
<td>15 $</th> |
6 |
<td><a href="#">Add to cart</a></td> |
7 |
</tr>
|
8 |
<tr>
|
9 |
<td>Product 2</td> |
10 |
<td>Some random description</td> |
11 |
<td>25 $</th> |
12 |
<td><a href="#">Add to cart</a></td> |
13 |
</tr>
|
又完成了一大步! 现在在表格行所在的位置输入以下PHP代码:
1 |
|
2 |
<?php
|
3 |
|
4 |
$sql="SELECT * FROM products ORDER BY name ASC"; |
5 |
$query=mysql_query($sql); |
6 |
|
7 |
while ($row=mysql_fetch_array($query)) { |
8 |
|
9 |
?>
|
10 |
<tr>
|
11 |
<td><?php echo $row['name'] ?></td> |
12 |
<td><?php echo $row['description'] ?></td> |
13 |
<td><?php echo $row['price'] ?>$</td> |
14 |
<td><a href="index.php?page=products&action=add&id=<?php echo $row['id_product'] ?>">Add to cart</a></td> |
15 |
</tr>
|
16 |
<?php
|
17 |
|
18 |
}
|
19 |
|
20 |
?>
|
- 因此,首先我们使用SELECT来检索产品,然后我们从数据库中循环每一行,并将其回显到表格行中的页面。
- 你可以看到锚点链接到同一页面(当用户单击将其添加到购物车功能/会话中的产品的锚点时)。 我们只是传递一些额外的变量,如产品的ID。
如果你将某个添加到购物车功能链接悬停,则可以在页面底部看到产品的ID已通过。

第7步
让我们通过在页面顶部添加以下代码来实现锚点的工作:
1 |
|
2 |
<?php
|
3 |
|
4 |
if(isset($_GET['action']) && $_GET['action']=="add"){ |
5 |
|
6 |
$id=intval($_GET['id']); |
7 |
|
8 |
if(isset($_SESSION['cart'][$id])){ |
9 |
|
10 |
$_SESSION['cart'][$id]['quantity']++; |
11 |
|
12 |
}else{ |
13 |
|
14 |
$sql_s="SELECT * FROM products |
15 |
WHERE id_product={$id}"; |
16 |
$query_s=mysql_query($sql_s); |
17 |
if(mysql_num_rows($query_s)!=0){ |
18 |
$row_s=mysql_fetch_array($query_s); |
19 |
|
20 |
$_SESSION['cart'][$row_s['id_product']]=array( |
21 |
"quantity" => 1, |
22 |
"price" => $row_s['price'] |
23 |
);
|
24 |
|
25 |
|
26 |
}else{ |
27 |
|
28 |
$message="This product id it's invalid!"; |
29 |
|
30 |
}
|
31 |
|
32 |
}
|
33 |
|
34 |
}
|
35 |
|
36 |
?>
|
- 如果设置了名为action的GET变量并且它的值是ADD,那么我们执行代码。
- 我们确保通过GET变量的id是一个整数
- 如果产品的ID在购物车功能SESSION中,我们只需将其数量增加1
- 如果id不在会话中,我们需要确保通过GET变量的id存在于数据库中。 如果是这样,我们抓住价格并创建会话。 如果没有,我们设置一个名为message的变量来保存我们的错误。
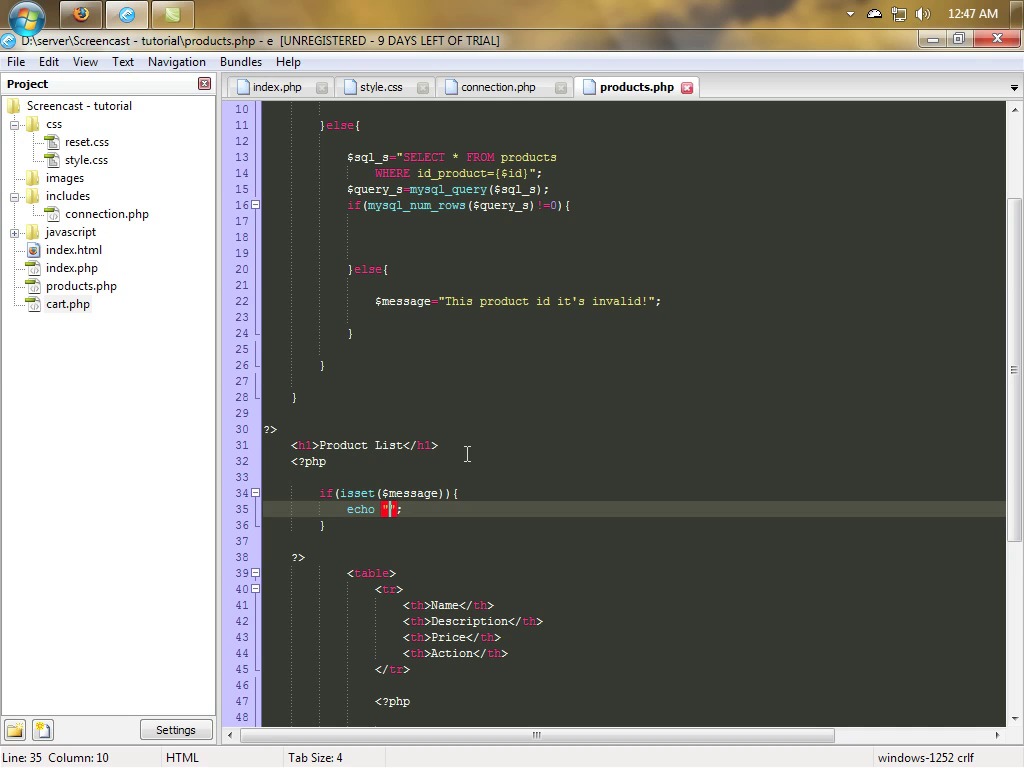
让我们来检查一下这个消息变量是否已经设置并且将它回显给页面(在H1页面标题下键入这个代码):
1 |
|
2 |
<?php
|
3 |
if(isset($message)){ |
4 |
echo "<h2>$message</h2>"; |
5 |
}
|
6 |
?>
|
在这里你可以看到完整的products.php页面。
1 |
|
2 |
<?php
|
3 |
|
4 |
if(isset($_GET['action']) && $_GET['action']=="add"){ |
5 |
|
6 |
$id=intval($_GET['id']); |
7 |
|
8 |
if(isset($_SESSION['cart'][$id])){ |
9 |
|
10 |
$_SESSION['cart'][$id]['quantity']++; |
11 |
|
12 |
}else{ |
13 |
|
14 |
$sql_s="SELECT * FROM products |
15 |
WHERE id_product={$id}"; |
16 |
$query_s=mysql_query($sql_s); |
17 |
if(mysql_num_rows($query_s)!=0){ |
18 |
$row_s=mysql_fetch_array($query_s); |
19 |
|
20 |
$_SESSION['cart'][$row_s['id_product']]=array( |
21 |
"quantity" => 1, |
22 |
"price" => $row_s['price'] |
23 |
);
|
24 |
|
25 |
|
26 |
}else{ |
27 |
|
28 |
$message="This product id it's invalid!"; |
29 |
|
30 |
}
|
31 |
|
32 |
}
|
33 |
|
34 |
}
|
35 |
|
36 |
?>
|
37 |
<h1>Product List</h1> |
38 |
<?php
|
39 |
if(isset($message)){ |
40 |
echo "<h2>$message</h2>"; |
41 |
}
|
42 |
?>
|
43 |
<table>
|
44 |
<tr>
|
45 |
<th>Name</th> |
46 |
<th>Description</th> |
47 |
<th>Price</th> |
48 |
<th>Action</th> |
49 |
</tr>
|
50 |
|
51 |
<?php
|
52 |
|
53 |
$sql="SELECT * FROM products ORDER BY name ASC"; |
54 |
$query=mysql_query($sql); |
55 |
|
56 |
while ($row=mysql_fetch_array($query)) { |
57 |
|
58 |
?>
|
59 |
<tr>
|
60 |
<td><?php echo $row['name'] ?></td> |
61 |
<td><?php echo $row['description'] ?></td> |
62 |
<td><?php echo $row['price'] ?>$</td> |
63 |
<td><a href="index.php?page=products&action=add&id=<?php echo $row['id_product'] ?>">Add to cart</a></td> |
64 |
</tr>
|
65 |
<?php
|
66 |
|
67 |
}
|
68 |
|
69 |
?>
|
70 |
|
71 |
</table>
|
如果产品的ID无效,则会显示错误消息

第8步
让我们回到index.php并构建边栏。 添加下面的代码:
1 |
|
2 |
<h1>Cart</h1> |
3 |
<?php
|
4 |
|
5 |
if(isset($_SESSION['cart'])){ |
6 |
|
7 |
$sql="SELECT * FROM products WHERE id_product IN ("; |
8 |
|
9 |
foreach($_SESSION['cart'] as $id => $value) { |
10 |
$sql.=$id.","; |
11 |
}
|
12 |
|
13 |
$sql=substr($sql, 0, -1).") ORDER BY name ASC"; |
14 |
$query=mysql_query($sql); |
15 |
while($row=mysql_fetch_array($query)){ |
16 |
|
17 |
?>
|
18 |
<p><?php echo $row['name'] ?> x <?php echo $_SESSION['cart'][$row['id_product']]['quantity'] ?></p> |
19 |
<?php
|
20 |
|
21 |
}
|
22 |
?>
|
23 |
<hr /> |
24 |
<a href="index.php?page=cart">Go to cart</a> |
25 |
<?php
|
26 |
|
27 |
}else{ |
28 |
|
29 |
echo "<p>Your Cart is empty. Please add some products.</p>"; |
30 |
|
31 |
}
|
32 |
|
33 |
?>
|
- 首先我们检查购物车是否已设置。 如果不是,我们会显示该消息,提醒用户该购物车是空的。
- 接下来我们创建一个mysql SELECT,但我们只选择会话中存在的产品。 为了做到这一点,我们使用foreach函数。 因此,我们正在循环会话并将产品ID添加到SELECT。 接下来,我们使用substr函数从SELECT中删除最后一个逗号。
- 最后,我们将数据输出到浏览器。
看看下面的图片:


由于index.php是所有文件的模板,因此边栏也将在cart.php中可见。 这不是很酷吗?!
第9步
最后,打开cart.php并键入以下代码:
1 |
|
2 |
<h1>View cart</h1> |
3 |
<a href="index.php?page=products">Go back to products page</a> |
4 |
<form method="post" action="index.php?page=cart"> |
5 |
|
6 |
<table>
|
7 |
|
8 |
<tr>
|
9 |
<th>Name</th> |
10 |
<th>Quantity</th> |
11 |
<th>Price</th> |
12 |
<th>Items Price</th> |
13 |
</tr>
|
14 |
|
15 |
<?php
|
16 |
|
17 |
$sql="SELECT * FROM products WHERE id_product IN ("; |
18 |
|
19 |
foreach($_SESSION['cart'] as $id => $value) { |
20 |
$sql.=$id.","; |
21 |
}
|
22 |
|
23 |
$sql=substr($sql, 0, -1).") ORDER BY name ASC"; |
24 |
$query=mysql_query($sql); |
25 |
$totalprice=0; |
26 |
while($row=mysql_fetch_array($query)){ |
27 |
$subtotal=$_SESSION['cart'][$row['id_product']]['quantity']*$row['price']; |
28 |
$totalprice+=$subtotal; |
29 |
?>
|
30 |
<tr>
|
31 |
<td><?php echo $row['name'] ?></td> |
32 |
<td><input type="text" name="quantity[<?php echo $row['id_product'] ?>]" size="5" value="<?php echo $_SESSION['cart'][$row['id_product']]['quantity'] ?>" /></td> |
33 |
<td><?php echo $row['price'] ?>$</td> |
34 |
<td><?php echo $_SESSION['cart'][$row['id_product']]['quantity']*$row['price'] ?>$</td> |
35 |
</tr>
|
36 |
<?php
|
37 |
|
38 |
}
|
39 |
?>
|
40 |
<tr>
|
41 |
<td colspan="4">Total Price: <?php echo $totalprice ?></td> |
42 |
</tr>
|
43 |
|
44 |
</table>
|
45 |
<br /> |
46 |
<button type="submit" name="submit">Update Cart</button> |
47 |
</form>
|
48 |
<br /> |
49 |
<p>To remove an item, set it's quantity to 0. </p> |
最后,打开cart.php并键入以下代码: 你应该注意到,不是在表单中显示数量,现在它显示在输入框中(以便我们可以更改数量)。 此外,该表格还被封装在一个表单标签中。要获取这些项目的总价格,我们会将特定产品(来自会话)ID的数量与其价格相乘。 这是在每个循环中完成的。
注意:输入是一个数组,键是产品的ID,数量是数量值。

第10步
我们需要做的最后一步是使表单工作。 因此,将此代码添加到cart.php页面的顶部。
1 |
|
2 |
if(isset($_POST['submit'])){ |
3 |
|
4 |
foreach($_POST['quantity'] as $key => $val) { |
5 |
if($val==0) { |
6 |
unset($_SESSION['cart'][$key]); |
7 |
}else{ |
8 |
$_SESSION['cart'][$key]['quantity']=$val; |
9 |
}
|
10 |
}
|
11 |
|
12 |
}
|
- 首先我们检查表单是否被提交。 如果已提交并且输入值为零,则我们取消设置该会话。
- 如果该值是任何其他值,我们将该数量设置为该值。
这里是完整的cart.php
1 |
|
2 |
<?php
|
3 |
|
4 |
if(isset($_POST['submit'])){ |
5 |
|
6 |
foreach($_POST['quantity'] as $key => $val) { |
7 |
if($val==0) { |
8 |
unset($_SESSION['cart'][$key]); |
9 |
}else{ |
10 |
$_SESSION['cart'][$key]['quantity']=$val; |
11 |
}
|
12 |
}
|
13 |
|
14 |
}
|
15 |
|
16 |
?>
|
17 |
|
18 |
<h1>View cart</h1> |
19 |
<a href="index.php?page=products">Go back to the products page.</a> |
20 |
<form method="post" action="index.php?page=cart"> |
21 |
|
22 |
<table>
|
23 |
|
24 |
<tr>
|
25 |
<th>Name</th> |
26 |
<th>Quantity</th> |
27 |
<th>Price</th> |
28 |
<th>Items Price</th> |
29 |
</tr>
|
30 |
|
31 |
<?php
|
32 |
|
33 |
$sql="SELECT * FROM products WHERE id_product IN ("; |
34 |
|
35 |
foreach($_SESSION['cart'] as $id => $value) { |
36 |
$sql.=$id.","; |
37 |
}
|
38 |
|
39 |
$sql=substr($sql, 0, -1).") ORDER BY name ASC"; |
40 |
$query=mysql_query($sql); |
41 |
$totalprice=0; |
42 |
while($row=mysql_fetch_array($query)){ |
43 |
$subtotal=$_SESSION['cart'][$row['id_product']]['quantity']*$row['price']; |
44 |
$totalprice+=$subtotal; |
45 |
?>
|
46 |
<tr>
|
47 |
<td><?php echo $row['name'] ?></td> |
48 |
<td><input type="text" name="quantity[<?php echo $row['id_product'] ?>]" size="5" value="<?php echo $_SESSION['cart'][$row['id_product']]['quantity'] ?>" /></td> |
49 |
<td><?php echo $row['price'] ?>$</td> |
50 |
<td><?php echo $_SESSION['cart'][$row['id_product']]['quantity']*$row['price'] ?>$</td> |
51 |
</tr>
|
52 |
<?php
|
53 |
|
54 |
}
|
55 |
?>
|
56 |
<tr>
|
57 |
<td colspan="4">Total Price: <?php echo $totalprice ?></td> |
58 |
</tr>
|
59 |
|
60 |
</table>
|
61 |
<br /> |
62 |
<button type="submit" name="submit">Update Cart</button> |
63 |
</form>
|
64 |
<br /> |
65 |
<p>To remove an item set its quantity to 0. </p> |

我希望你喜欢这个教程。 如果你有任何问题,可以观看更深入的视频教程!或在下方提出!
 By
By


